
Vegan Recipes
Vegan Honey Buns (Soft, Sweet & Totally Irresistible)
May
You know that feeling when something warm and sweet comes out of the oven and the whole kitchen just smells like a hug?
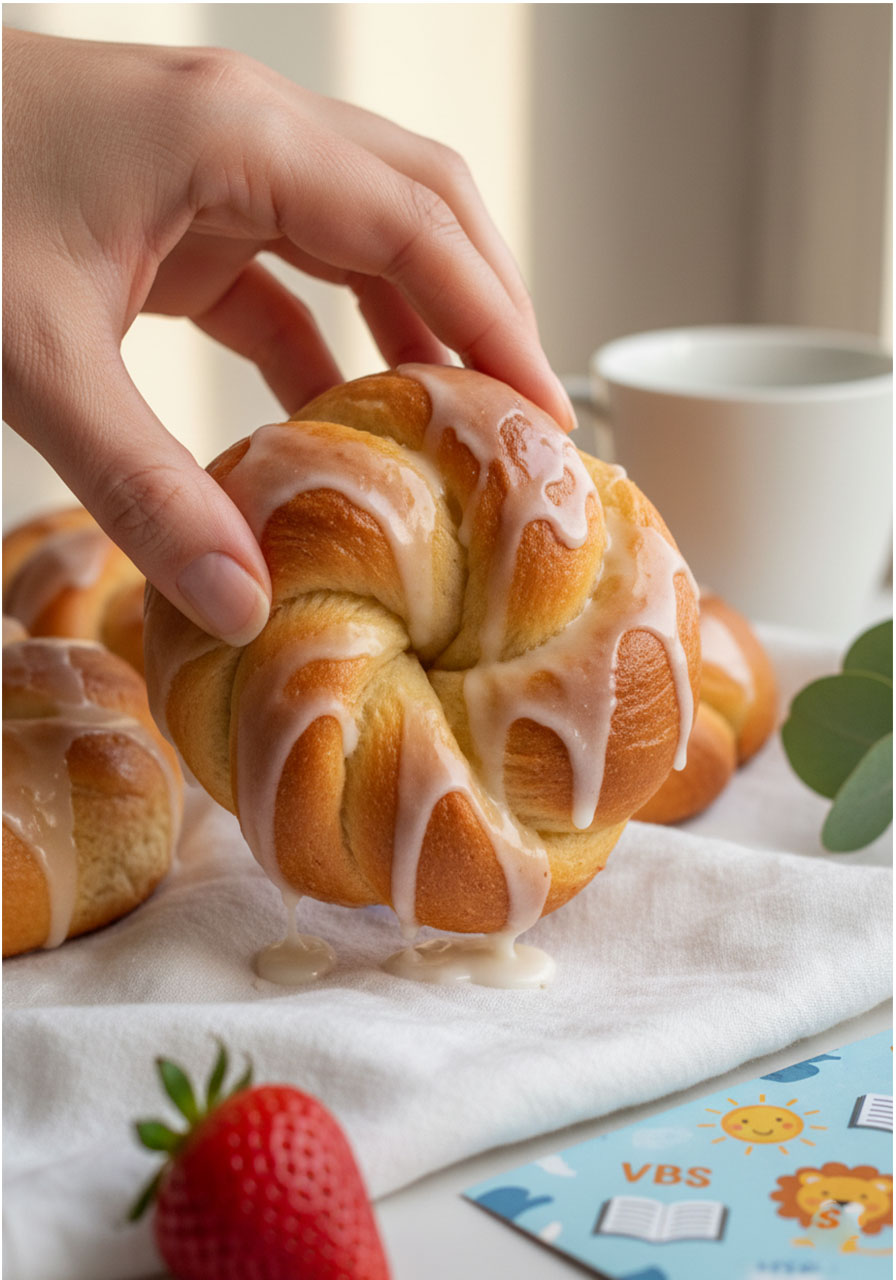
That’s exactly what these Vegan Honey Buns feel like.
Soft on the inside. Slightly golden on the outside. Swirled with a buttery cinnamon filling. Topped with a crackly, sweet glaze that sets just right.
And the best part? They’re completely egg-free and dairy-free.
Whether you’re plant-based, lactose-intolerant, or simply want a wholesome treat to share at Sunday brunch – this recipe was made for you.
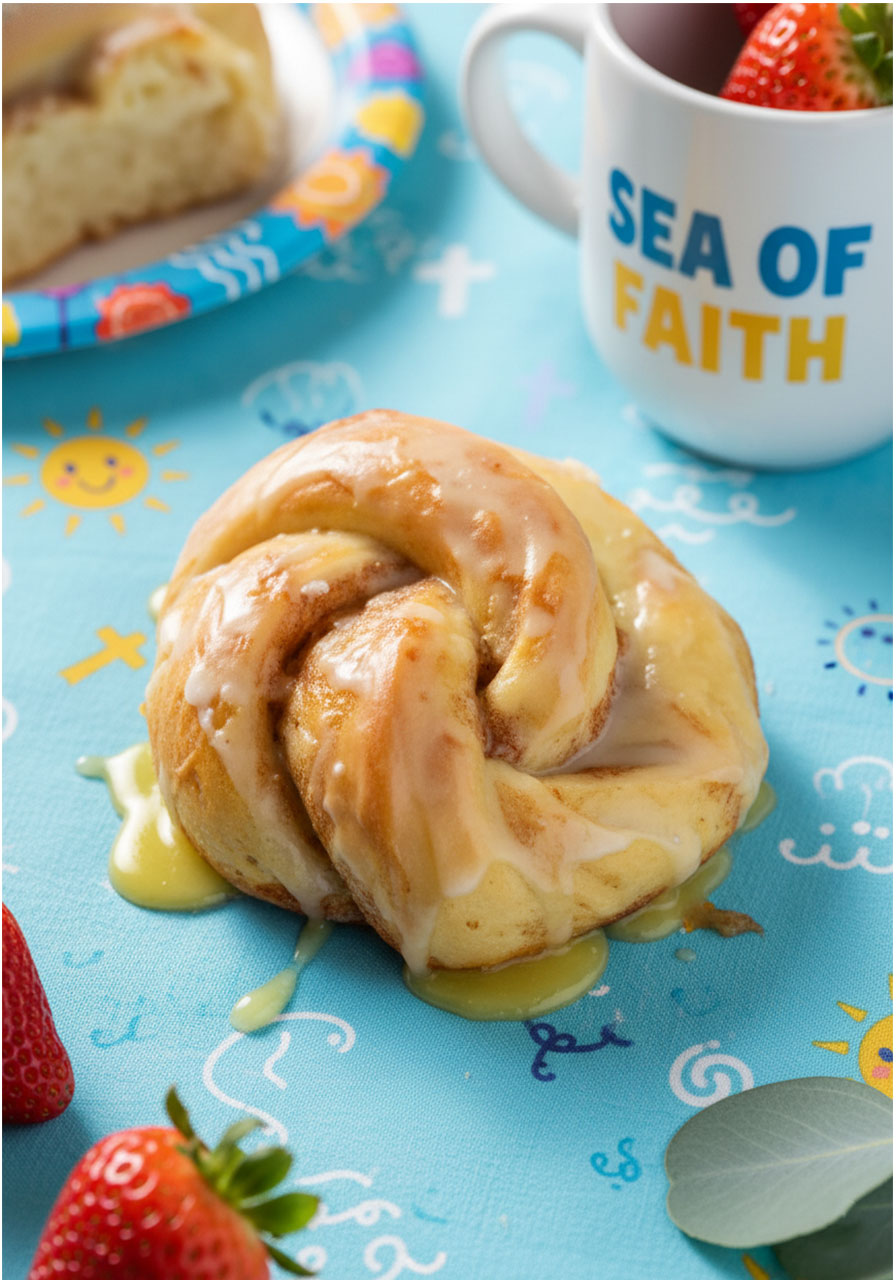
There’s something beautiful about gathering around a table and breaking bread – or in this case, pulling apart a warm, glazed honey bun – with the people you love. It’s a small act, but it’s full of meaning.
“She brings her food from afar.” – Proverbs 31:14
So put on your apron and let’s bake something wonderful.
In This Post You’ll Learn:
- What ingredients make these honey buns soft and fluffy without eggs or dairy
- Step-by-step instructions for making the dough, filling, and glaze
- How to shape the buns (it’s easier than it looks!)
- Storage tips so they stay fresh
- Easy substitutions and variations
- FAQs answered
What Are Honey Buns, Exactly?
If you grew up in the US, honey buns might bring back a very specific memory – that sweet, glazed pastry wrapped in plastic at the gas station or school cafeteria.
The classic honey bun is soft, sweet, slightly spiral-shaped, and covered in a sugary glaze.
This homemade version takes everything you love about the original and makes it from scratch – with clean, plant-based ingredients you can feel good about.
No preservatives. No mystery ingredients. Just real food made with care.
Why You’ll Love This Recipe
- 100% vegan – no eggs, no dairy, no compromise on flavor
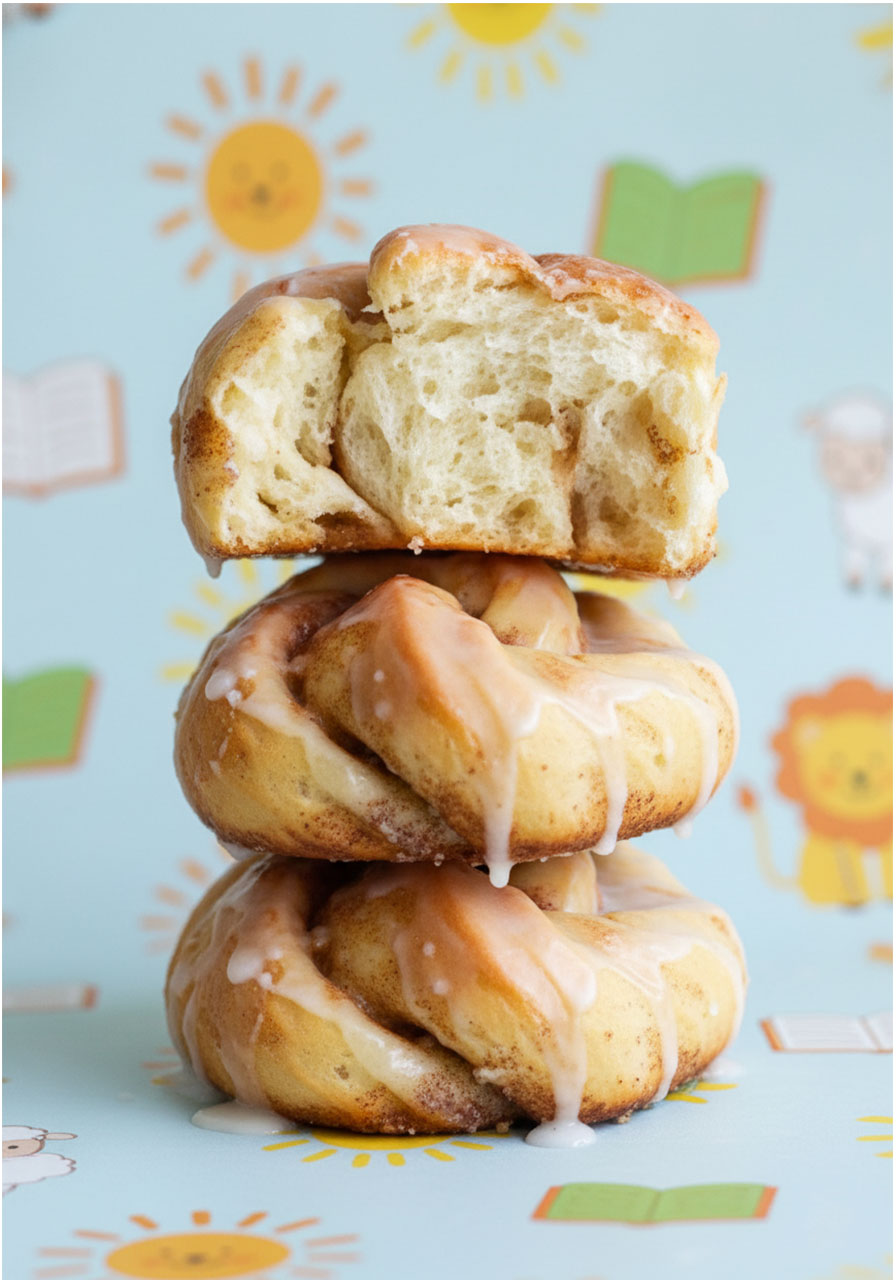
- Incredibly soft and fluffy – the texture is light, pillowy, and pull-apart perfect
- Sweet cinnamon filling – swirled through every layer
- Simple glaze – just two ingredients, sets into a beautiful crackly finish
- Great for brunch, gifting, or a Sunday treat
- Freezer-friendly – make a batch and save some for later
Ingredients You’ll Need
The ingredients list for these honey buns is wonderfully simple. Let’s break it down section by section.
For the Sweet Dough
- Non-dairy milk – Oat milk works beautifully here, but any plain, unsweetened non-dairy milk will do. Almond, soy, or cashew all work well.
- Agave nectar (or vegan honey) – This sweetens the dough and helps activate the yeast. Light agave is ideal, but if you can find store-bought vegan honey, use it for extra flavor.
- Instant yeast – This is what makes the buns rise and get that airy, fluffy texture. Make sure your yeast is fresh!
- Non-dairy butter – Adds richness and that buttery softness to the dough. Country Crock Plant Butter Sticks work great.
- All-purpose flour – Regular AP flour is all you need. King Arthur is a reliable brand if you want consistent results.
- Kosher salt – Salt strengthens the gluten and balances the sweetness. Don’t skip it.
For the Cinnamon Filling
- Non-dairy butter (softened) – Spread easily across the dough for that signature swirl.
- Granulated sugar – Adds sweetness to the filling layer.
- Agave nectar – Creates a sticky, honeyed filling that caramelizes slightly as it bakes.
- Ground cinnamon – The warm spice that makes every bite taste like comfort.
For the Glaze
- Powdered sugar (sifted) – The base of the glaze. Sift it first for a smooth, lump-free finish.
- Non-dairy milk – Just a splash to bring it together. Simple and perfect.
How to Make Vegan Honey Buns: Step by Step
Yes, this recipe has a few steps. But each one is simple and straightforward. Let’s walk through it together.
Step 1: Make the Sweet Dough
Start by warming your non-dairy milk slightly – you want it around room temperature, not hot. Hot liquid can kill the yeast.
Add the agave and instant yeast to the warm milk and stir gently. Let it sit for about 10 minutes. You’ll see it get foamy and bubbly – that means your yeast is alive and active.
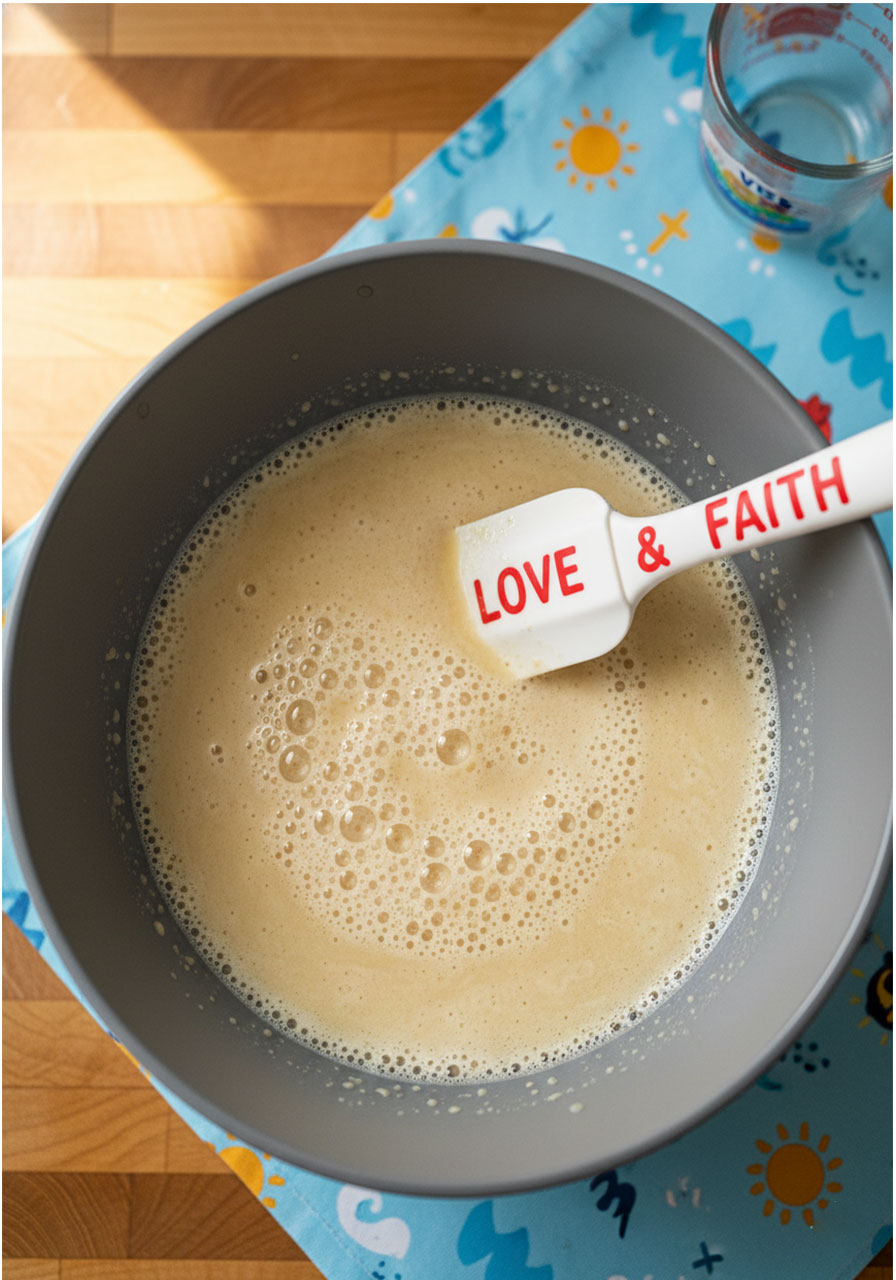
Add the melted non-dairy butter and stir it in.
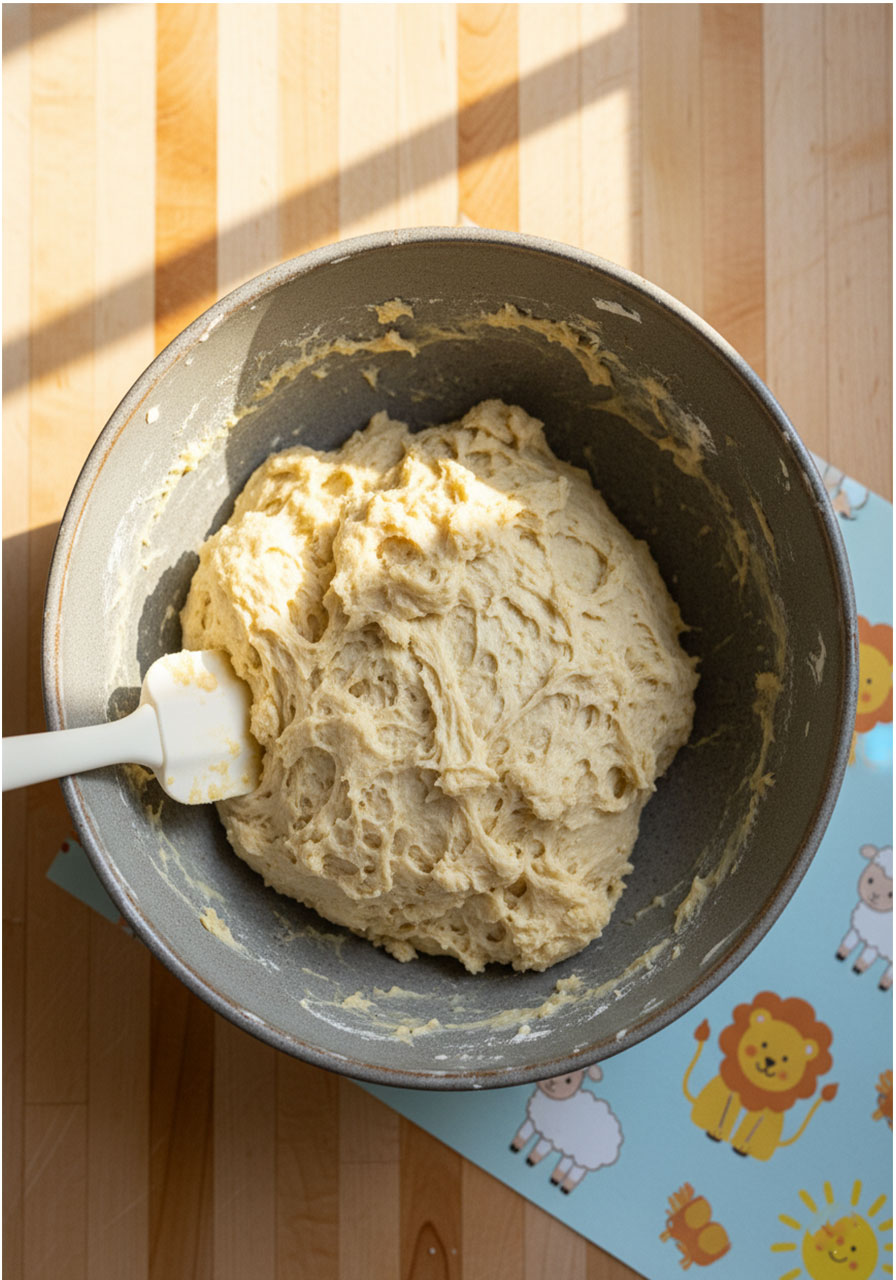
Then add 3½ cups of flour and the salt. Stir with a spatula until a shaggy, sticky dough forms.
Here’s a key tip: let the dough rest for 10 full minutes before kneading. This gives the flour time to absorb the liquid and makes the dough much easier to work with.
Step 2: Knead and Rise
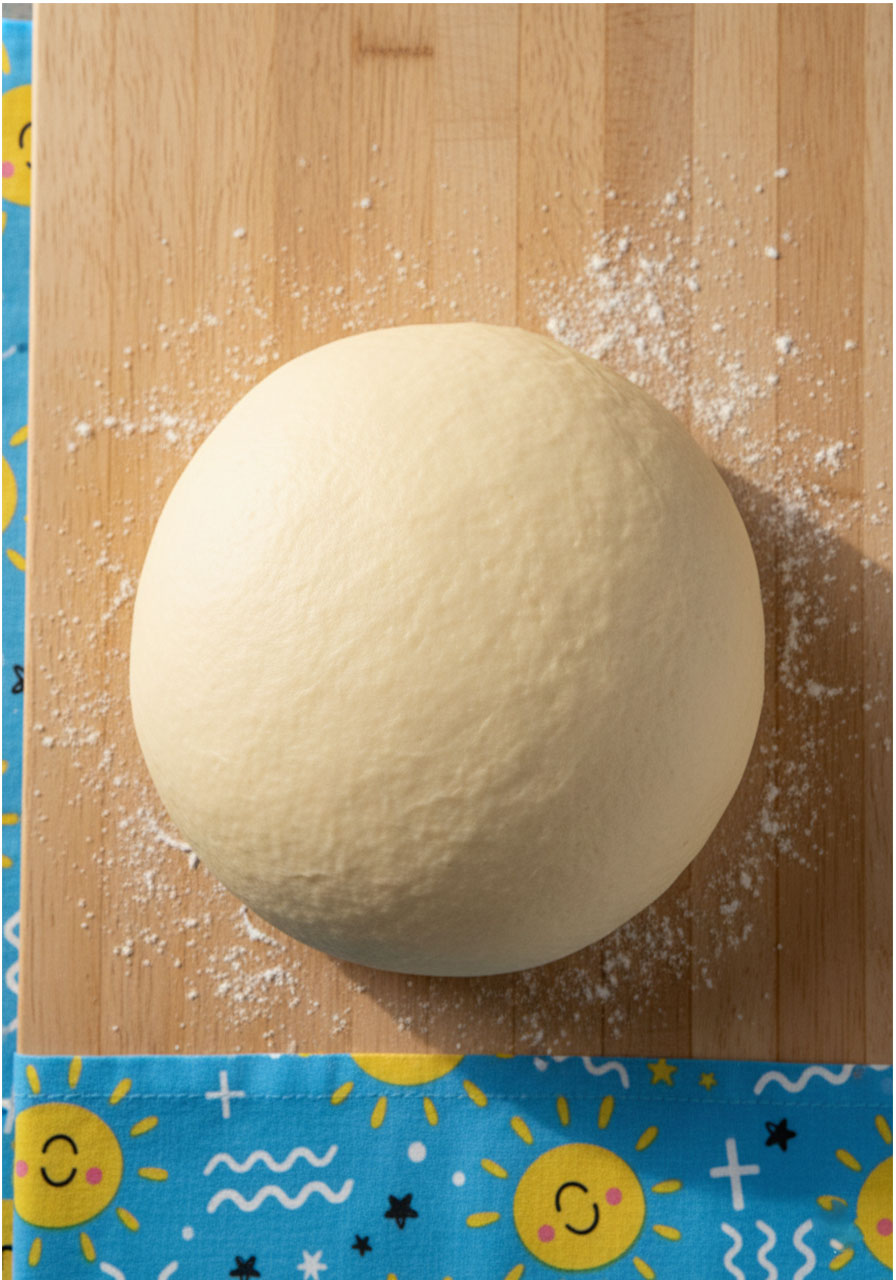
Turn the dough out onto a floured surface and knead for about 5 minutes. Add up to ½ cup more flour as needed – the dough should feel smooth and slightly tacky, not sticky.
Place the dough into a lightly oiled bowl and cover it with a clean kitchen towel. Set it somewhere warm and let it rise for 1½ to 2 hours, or until it has doubled in size.
This is a great time to make yourself a cup of tea, do a little journaling, or just rest. The dough will do its thing while you take care of yourself.
Step 3: Make the Cinnamon Filling
In a medium bowl, mix together the softened non-dairy butter, granulated sugar, and ground cinnamon until well combined.
Then stir in the agave nectar until everything is smooth and spreadable. Set aside.
Step 4: Shape the Buns
This is the fun part – and once you do it once, it’ll feel totally natural.
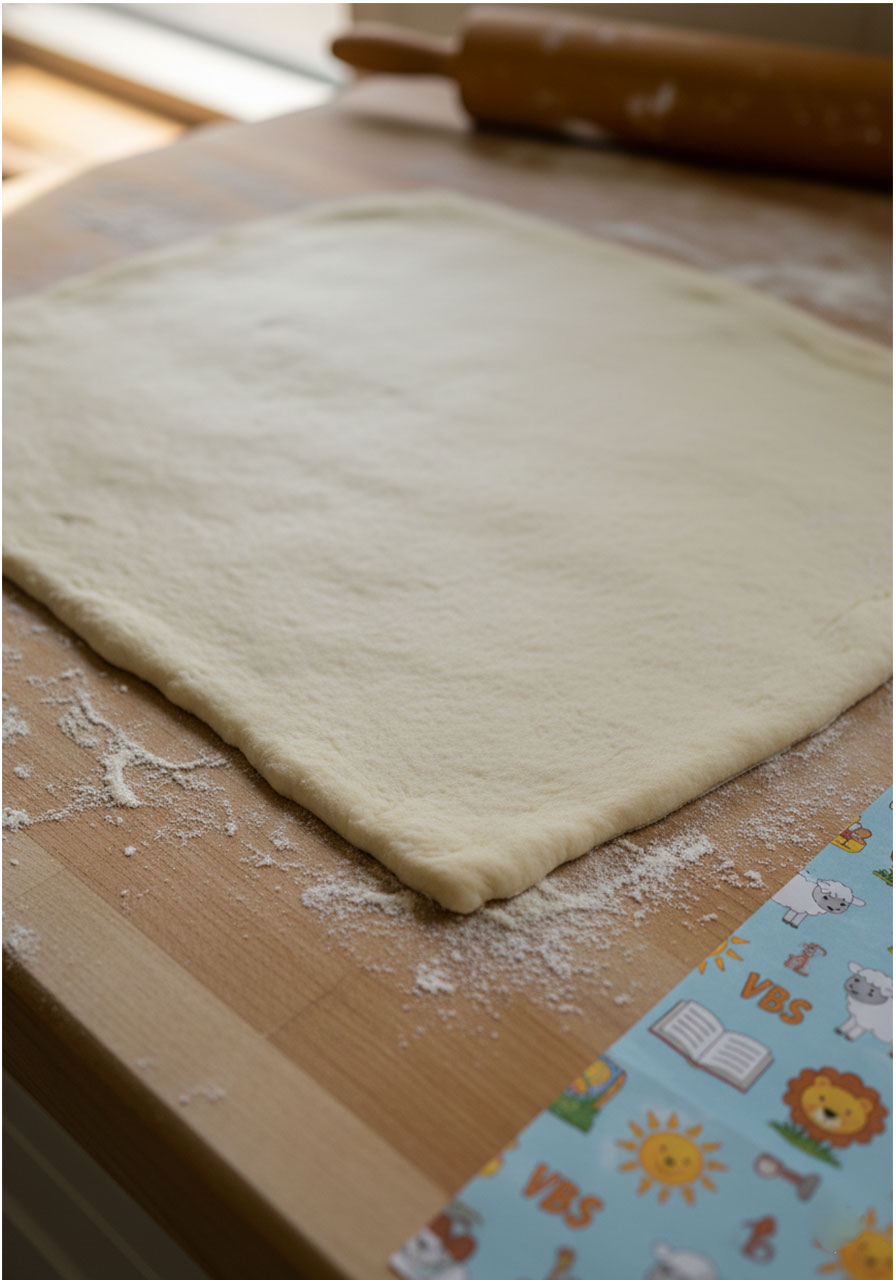
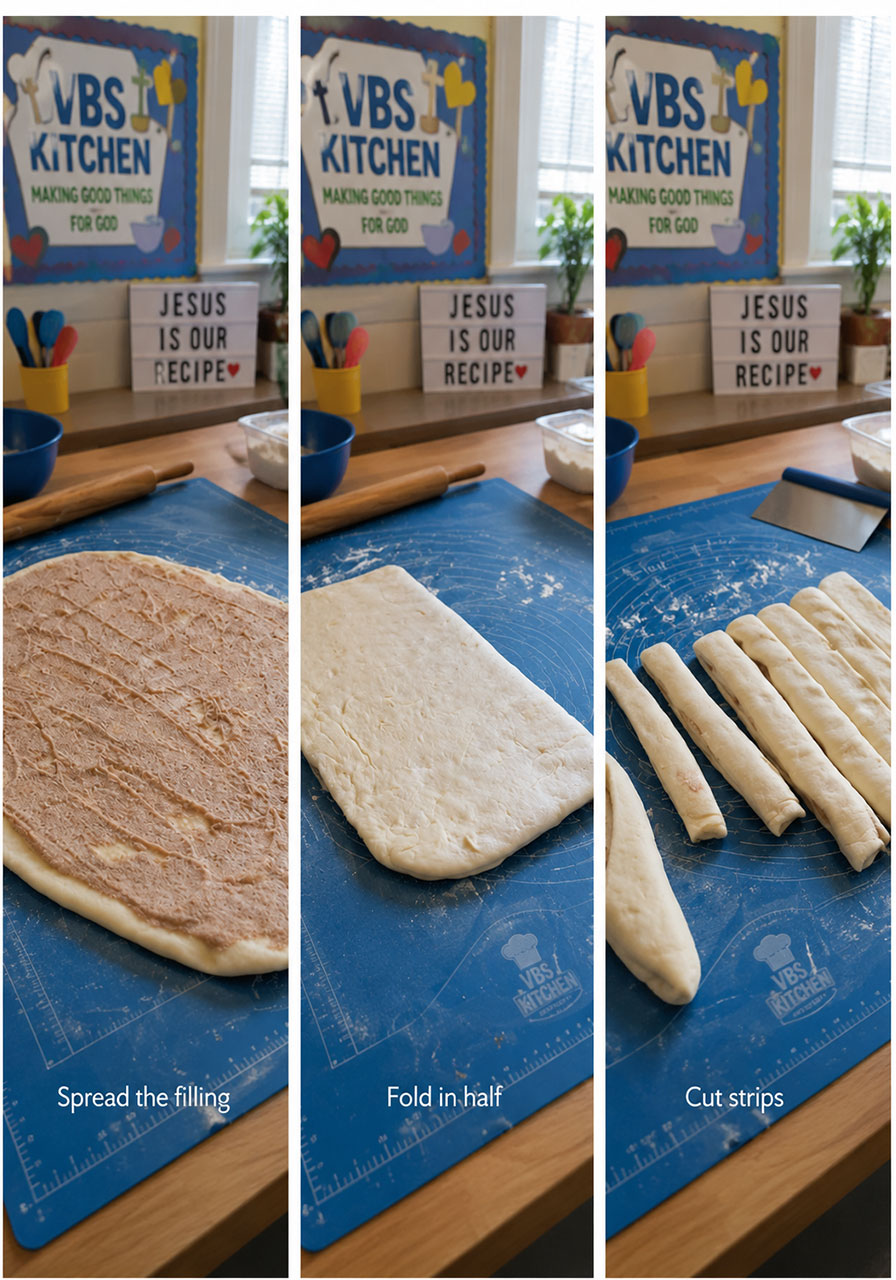
Flour your work surface and roll the dough out into a roughly 15×12 inch rectangle. The long side should be parallel to the edge of your counter.
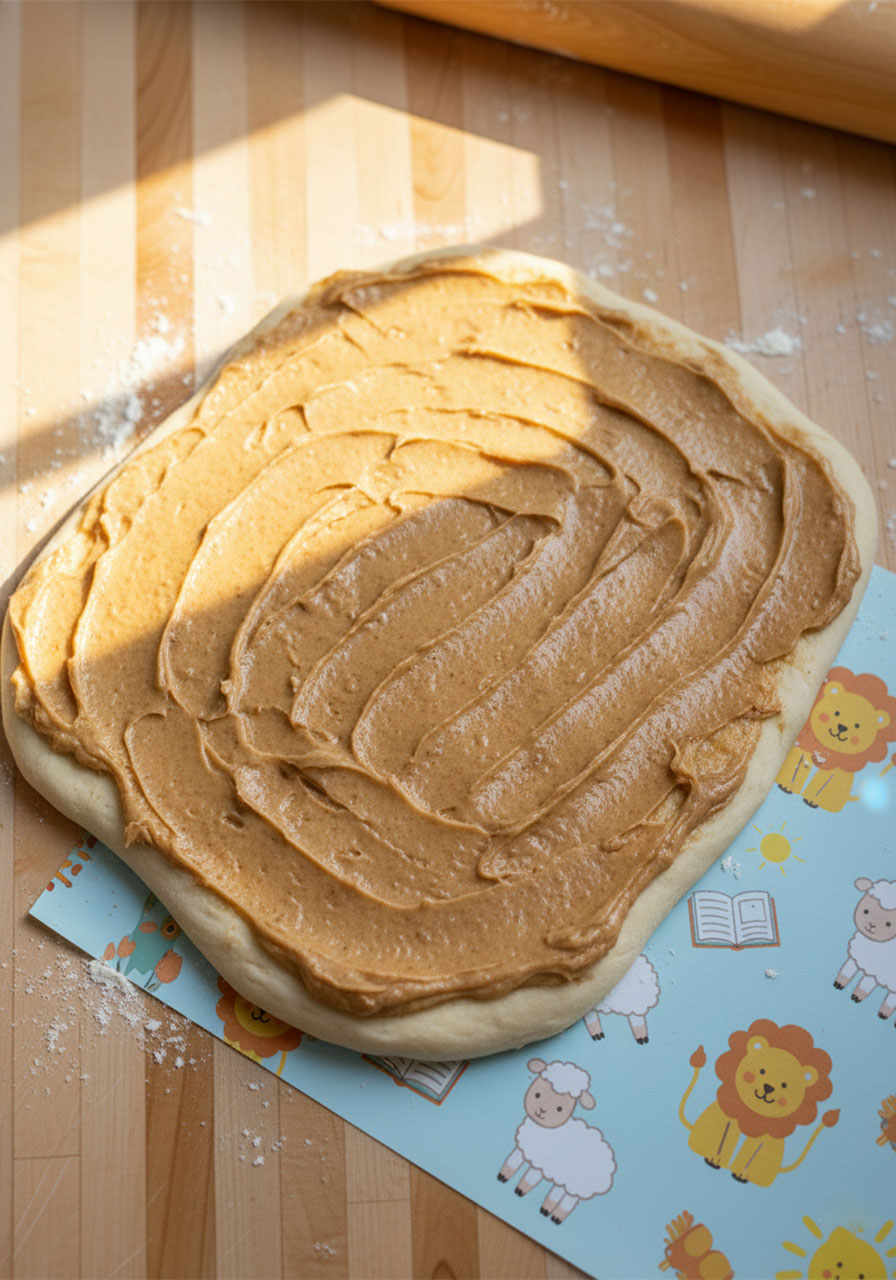
Spread the cinnamon filling evenly over the entire surface using a spatula or the back of a spoon.
Now fold the dough in half toward you, creating a rectangle that’s roughly 15×6 inches.
Cut the folded dough into 12 equal strips.
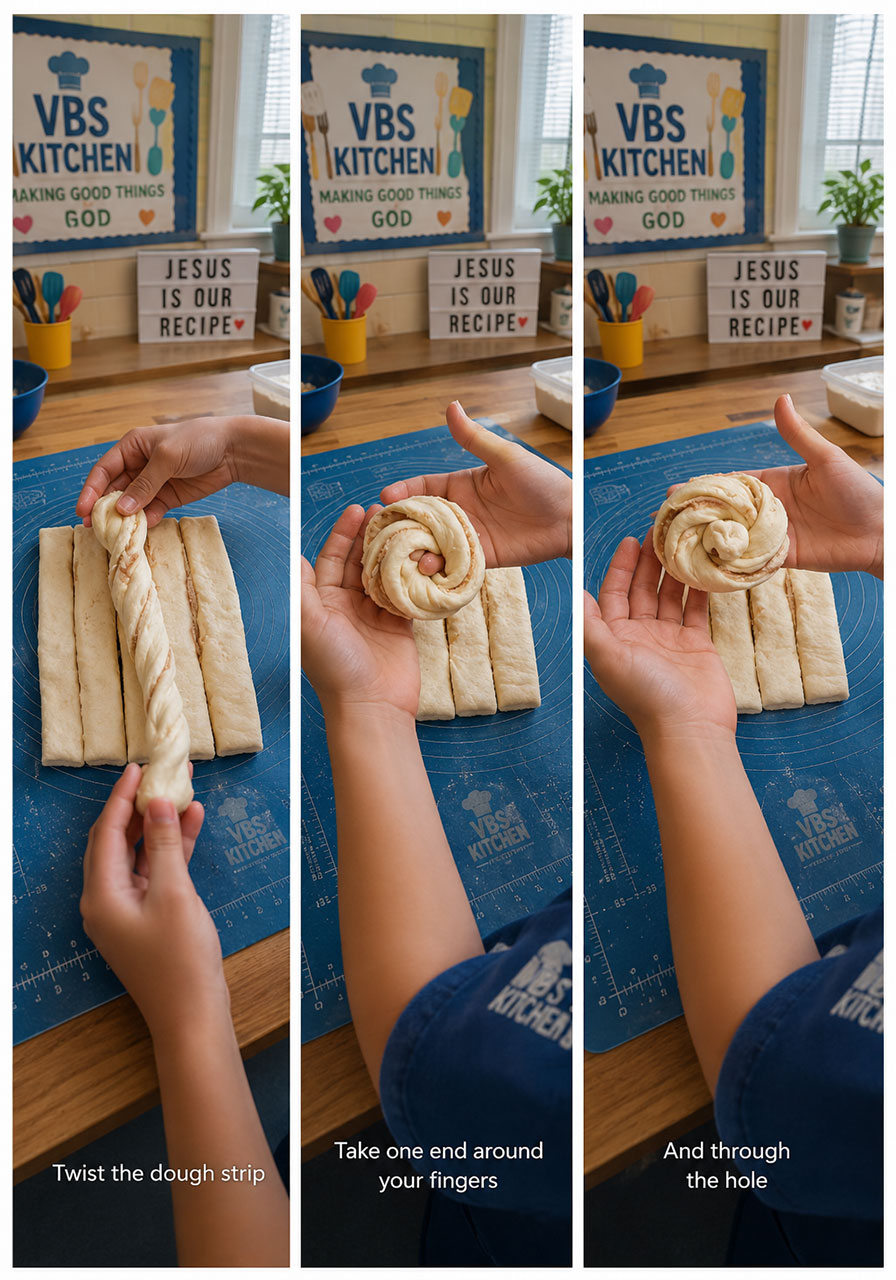
Take one strip and twist it a few times, then wrap one end around your fingers and tuck it through the hole to create a knot shape. It might look a little different each time – and that’s totally okay! Each bun has its own personality.
Place the shaped buns on a parchment-lined baking sheet, spaced evenly apart. Cover with a towel and let them proof for 30 to 40 minutes.
Step 5: Bake
Preheat your oven to 350°F.
Bake the buns for 28 to 32 minutes, turning the pan halfway through. They should be lightly golden on top and smell absolutely amazing.
Remove from the oven and let them cool on the baking sheet for 15 minutes before transferring to a cooling rack.
Step 6: Glaze
While the buns cool, whisk together the sifted powdered sugar and non-dairy milk until completely smooth and no lumps remain.
Place the cooling rack over an empty baking sheet (this will catch the drips – thank yourself later).
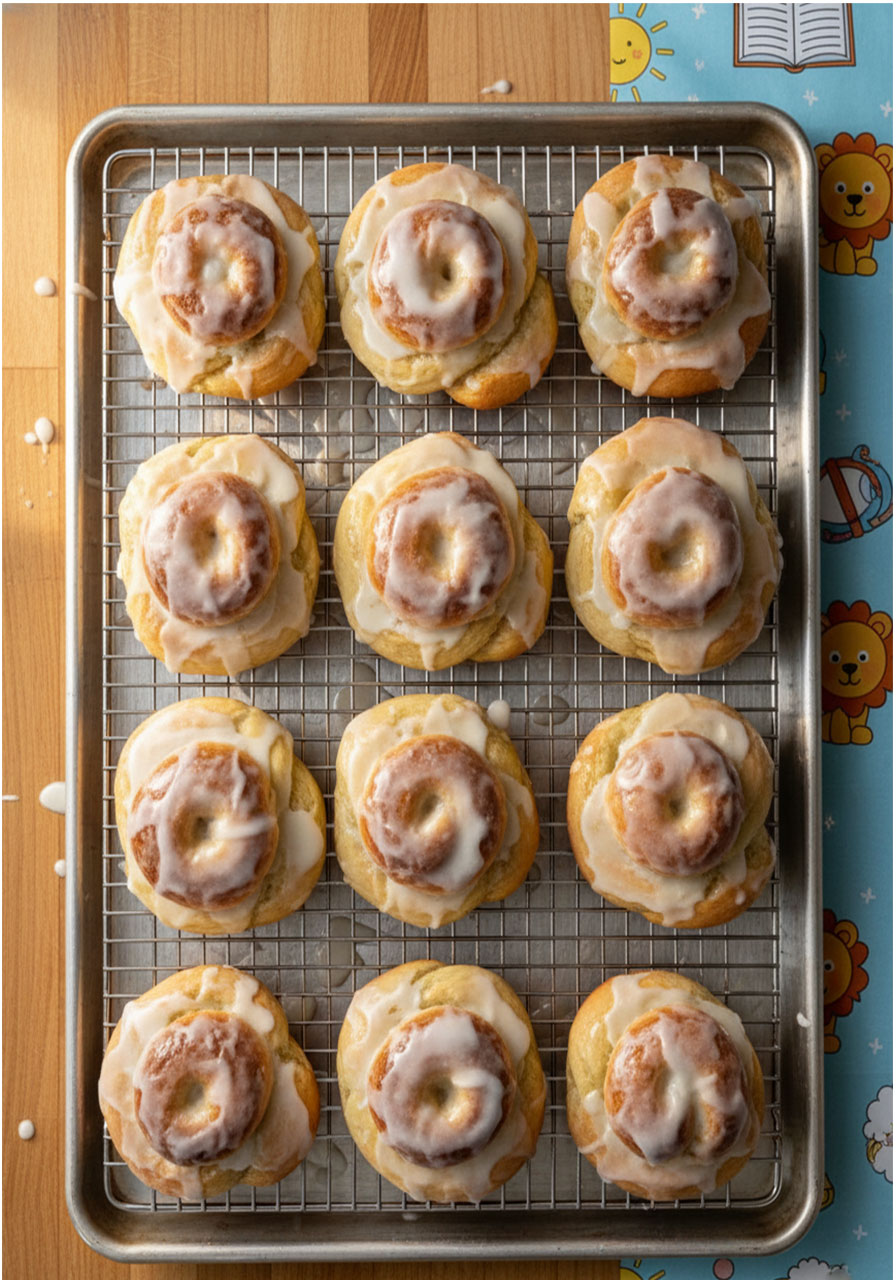
Spoon the glaze generously over each bun, covering as much surface as possible. The excess will drip off and the glaze will set into that signature crackly finish.
Then serve. And enjoy every single bite.
Tips for the Softest Honey Buns
Don’t overheat your milk. Liquid that’s too hot will kill the yeast. Aim for room temperature or slightly warm to the touch.
Let the dough rest before kneading. That 10-minute rest makes a big difference in texture.
Use fresh yeast. If your yeast doesn’t foam up in step one, it may be expired. Start with a new packet.
Don’t rush the rise. The full 1½ to 2 hour rise gives the buns their light, fluffy texture.
Sift your powdered sugar. It only takes 30 seconds and makes your glaze silky smooth.
Glaze while slightly warm. Not hot – warm. The glaze sets beautifully on a slightly warm bun.
Easy Variations to Try
This base recipe is incredibly versatile. Here are a few fun ways to switch it up:
- Add vanilla extract to the glaze for extra depth of flavor
- Swap cinnamon for cardamom in the filling for a warm, slightly floral twist
- Add orange zest to the dough for a bright, citrusy note
- Drizzle with melted dark chocolate instead of the sugar glaze for a more indulgent version
- Sprinkle with chopped pecans on top before baking for a little crunch
A Gentle Faith Note
There’s something grounding about baking from scratch.
It asks you to slow down. To follow steps patiently. To wait for the dough to rise. To trust the process even when things look a little messy in the middle.
That feels a lot like faith, doesn’t it?
When we nourish ourselves and others with food made with intention and care, it becomes more than just a recipe. It becomes an act of love. A way of honoring the bodies and community God has given us.
“Do you not know that your bodies are temples of the Holy Spirit?” – 1 Corinthians 6:19
So the next time you’re waiting for your dough to rise, take a breath. Say a quiet prayer. Let the warmth of the kitchen be a reminder that good things are worth waiting for.
How to Store Vegan Honey Buns
Room temperature: Store in an airtight container for up to 3 days. They stay soft and delicious.
Freezer: Freeze un-glazed buns in a sealed bag for up to 1 month. Thaw at room temperature, then warm briefly in the oven and add fresh glaze before serving.
Make ahead tip: You can shape the buns the night before, cover them, and refrigerate them overnight. The next morning, let them come to room temperature for about 30 minutes before baking.
What to Serve With These Honey Buns
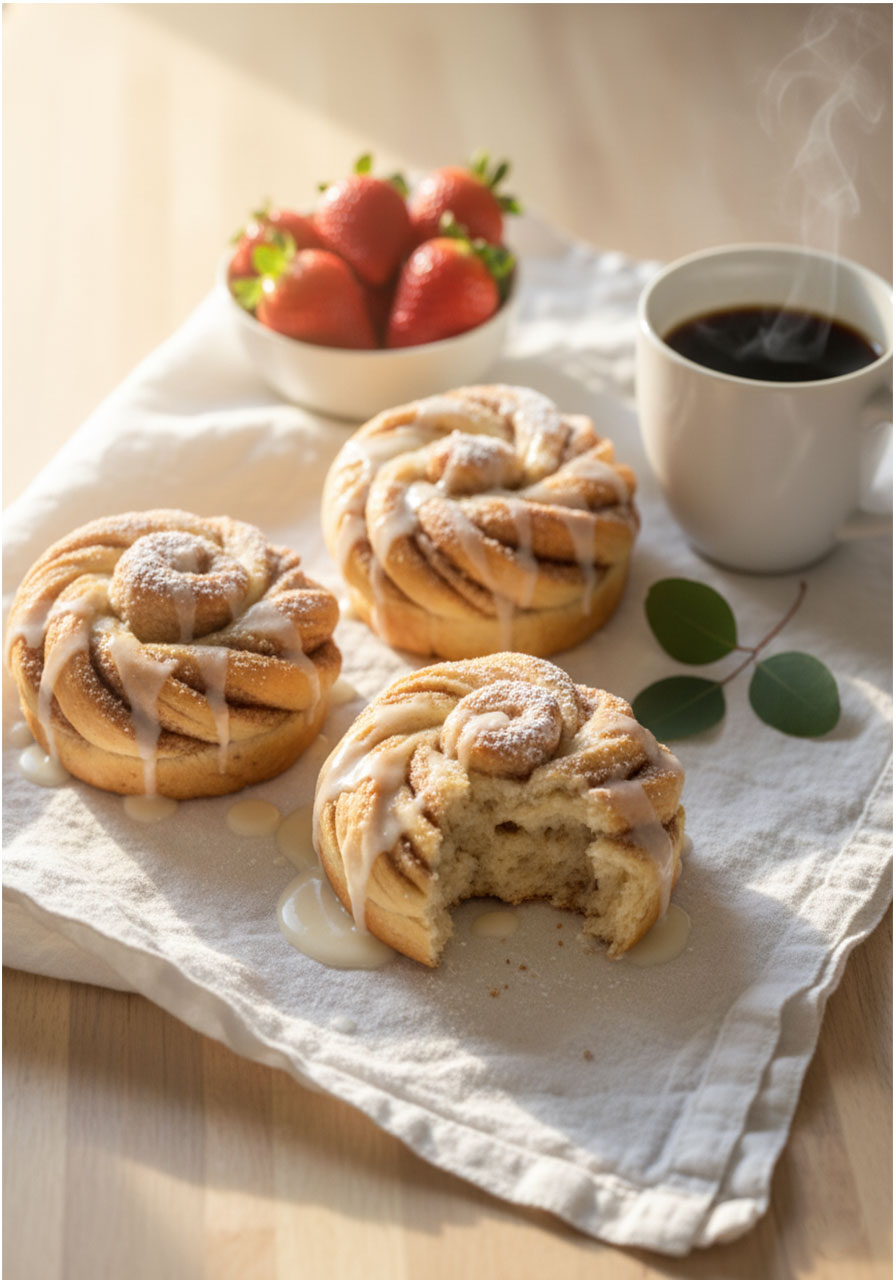
A warm cup of oat milk latte or herbal tea
Fresh berries or sliced fruit on the side
A glass of cold almond milk for a classic pairing
As part of a larger Sunday brunch spread alongside fruit salad and smoothies
Quick Recipe Checklist
- Warm milk + bloom yeast (10 min)
- Mix in butter, flour, salt → shaggy dough
- Rest dough 10 minutes
- Knead 5 minutes, adding flour as needed
- Rise in oiled bowl 1½–2 hours
- Make cinnamon filling while dough rises
- Roll dough into rectangle, spread filling, fold in half
- Cut 12 strips, twist and knot each one
- Proof shaped buns 30–40 minutes
- Bake at 350°F for 28–32 minutes
- Cool 15 minutes, glaze generously
- Serve and enjoy!
Frequently Asked Questions
Can I use active dry yeast instead of instant yeast?
Yes! Active dry yeast works here – just make sure you proof it in the warm milk and agave mixture first, and allow a little extra time for the rise.
What non-dairy milk works best?
Oat milk is highly recommended for its creamy texture and neutral flavor. Soy milk is also a great choice. Avoid using very thin milks like rice milk, as they may affect the dough texture.
Can I use maple syrup instead of agave?
You can! Maple syrup will work in the dough and filling, though it will add a slightly more distinct flavor. Light agave or vegan honey keeps the taste closer to the original.
My dough didn’t rise – what happened?
This usually means the yeast was either too old or the liquid was too hot. Make sure your milk is warm (not hot) and that your yeast is within its expiration date. Fresh yeast should foam within 10 minutes.
Can I make these the night before?
Absolutely! Shape the buns, place them on the baking sheet, cover tightly, and refrigerate overnight. The next morning, let them sit at room temperature for 30 minutes before baking.
Are these gluten-free?
This recipe uses regular all-purpose flour and is not gluten-free. A 1:1 gluten-free flour blend may work, but the texture may vary and hasn’t been tested with this recipe.
How do I get the glaze to set nicely?
Glaze the buns while they’re slightly warm (not hot). Spoon it generously and let the excess drip off. It will set into a beautiful crackly coating as it cools.
Can I add nuts or toppings to the filling?
Yes! Chopped pecans or walnuts mixed into the filling add a lovely texture. You can also sprinkle them on top before baking.
One Last Thought Before You Bake
You don’t need a special occasion to make something beautiful for yourself or the people you love.
A slow Saturday morning, a gathering of friends, a quiet Sunday before church – these honey buns fit right in.
Baking from scratch is one of those small, grounding rituals that reconnects us to the present moment. It slows us down. It asks something of us – patience, attention, care – and it gives so much back in return.
We hope this recipe becomes a staple in your home and a source of warmth and joy around your table.
“Come to me, all you who are weary and burdened, and I will give you rest.” – Matthew 11:28
Rest in the slowness of today. Bake something good. Share it freely.
And explore more wholesome, faith-inspired recipes and self-care ideas on the Christian Faith Goods blog.
A Simple Prayer Before You Begin
Lord, thank You for the gift of nourishment – for flour and sweetness and warm kitchens. May what I make today be a blessing to my body and to everyone I share it with. May this simple act of baking be a small offering of gratitude for all the good things You’ve placed in my life. Amen.
Vegan Honey Buns
Ingredients
For the Sweet Dough:
- 1½ cups non-dairy milk (oat milk recommended)
- ¼ cup agave nectar or store-bought vegan honey
- 2 teaspoons instant yeast
- 6 tablespoons melted non-dairy butter
- 3½ to 4 cups all-purpose flour
- 1 teaspoon kosher salt (or ½ teaspoon table salt)
For the Cinnamon Filling:
- 3 tablespoons non-dairy butter, softened
- ⅓ cup granulated sugar
- ⅓ cup agave nectar or store-bought vegan honey
- 2 teaspoons ground cinnamon
For the Glaze:
- 2 cups powdered sugar, sifted
- ¼ cup non-dairy milk
Instructions
Make the Sweet Dough:
- Warm the non-dairy milk to about room temperature. Add it to a large mixing bowl along with the agave and instant yeast. Stir and let the yeast bloom for 10 minutes until foamy.
- Add the melted non-dairy butter and stir to combine.
- Add 3½ cups of flour and the salt. Stir with a spatula until a shaggy dough forms. Let the dough rest for 10 minutes.
- Turn the dough out onto a floured surface and knead for about 5 minutes, adding up to ½ cup more flour as needed, until the dough is smooth and slightly tacky.
- Place the dough in a lightly oiled bowl, cover with a kitchen towel, and allow to rise for 1½ to 2 hours or until doubled in size.
Make the Filling:
- In a medium bowl, combine the softened non-dairy butter, granulated sugar, and ground cinnamon. Stir until well combined.
- Add the agave nectar and stir until smooth. Set aside.
Shape the Buns:
- Flour your work surface and turn the risen dough out onto it. Using a rolling pin, roll the dough into a roughly 15×12 inch rectangle with the long side parallel to the edge of your counter.
- Spread the cinnamon filling evenly across the entire surface of the dough.
- Fold the dough in half toward you, creating a roughly 15×6 inch rectangle.
- Cut the folded rectangle into 12 even strips.
- Take one strip and twist it a few times. Then take one end around your fingers and tuck it through the hole created to form a knot shape. Place on a parchment-lined baking sheet.
- Repeat with the remaining strips. Once all buns are on the baking sheet, cover with a towel and allow to proof for 30 to 40 minutes.
Make the Glaze:
- In a medium bowl, whisk together the sifted powdered sugar and non-dairy milk until completely smooth with no lumps. Set aside.
Bake the Buns:
- Preheat oven to 350°F.
- Bake the buns for 28 to 32 minutes, turning the pan halfway through. The buns should be lightly golden on top.
- Remove from oven and let cool on the baking sheet for 15 minutes.
- Transfer the buns to a cooling rack placed over an empty baking sheet to catch the glaze drips.
- Spoon the glaze generously over each bun, covering as much surface as possible. Let the excess drip off and allow the glaze to set before serving.
Notes
Storage
Store in an airtight container at room temperature for up to 3 days. Freeze un-glazed buns for up to 1 month. Thaw at room temperature, warm briefly, then glaze before serving.Notes
- Any plain non-dairy milk works in this recipe. Oat or soy milk gives the best texture.
- Make sure your milk is not too hot before adding the yeast – room temperature or just slightly warm is ideal.
- You can shape the buns the night before, cover, and refrigerate overnight. Let them come to room temperature for 30 minutes before baking.
- Sift the powdered sugar for the smoothest possible glaze.
Nutrition (Per Bun, Approximate)
Calories: 363 | Carbohydrates: 64g | Protein: 6g | Fat: 9g | Saturated Fat: 2g | Sodium: 288mg | Fiber: 2g | Sugar: 33g Nutrition information is approximate and provided for reference only. This post is for informational purposes and is not medical or nutritional advice.