Vegan Recipes
Raspberry Cookies (Easy Vegan & Gluten-Free Sugar Cookie Recipe)
Apr
You know those days when you just need to slow down, do something with your hands, and fill your kitchen with something that smells amazing?
That’s exactly what baking these raspberry cookies feels like.
Whether you’re making them for a Sunday afternoon with your kids, a women’s group gathering, or simply as a little treat for yourself after a long week – these cookies are everything.
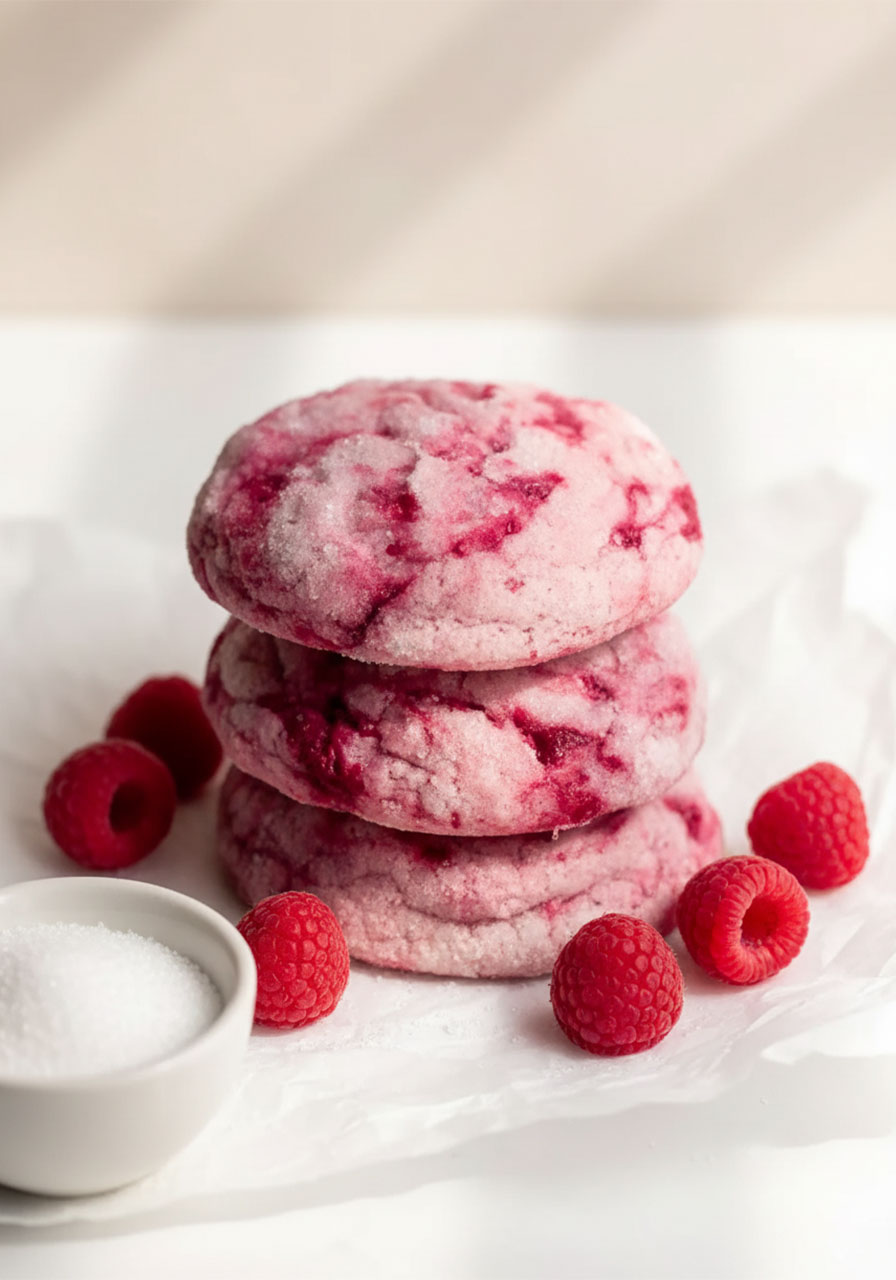
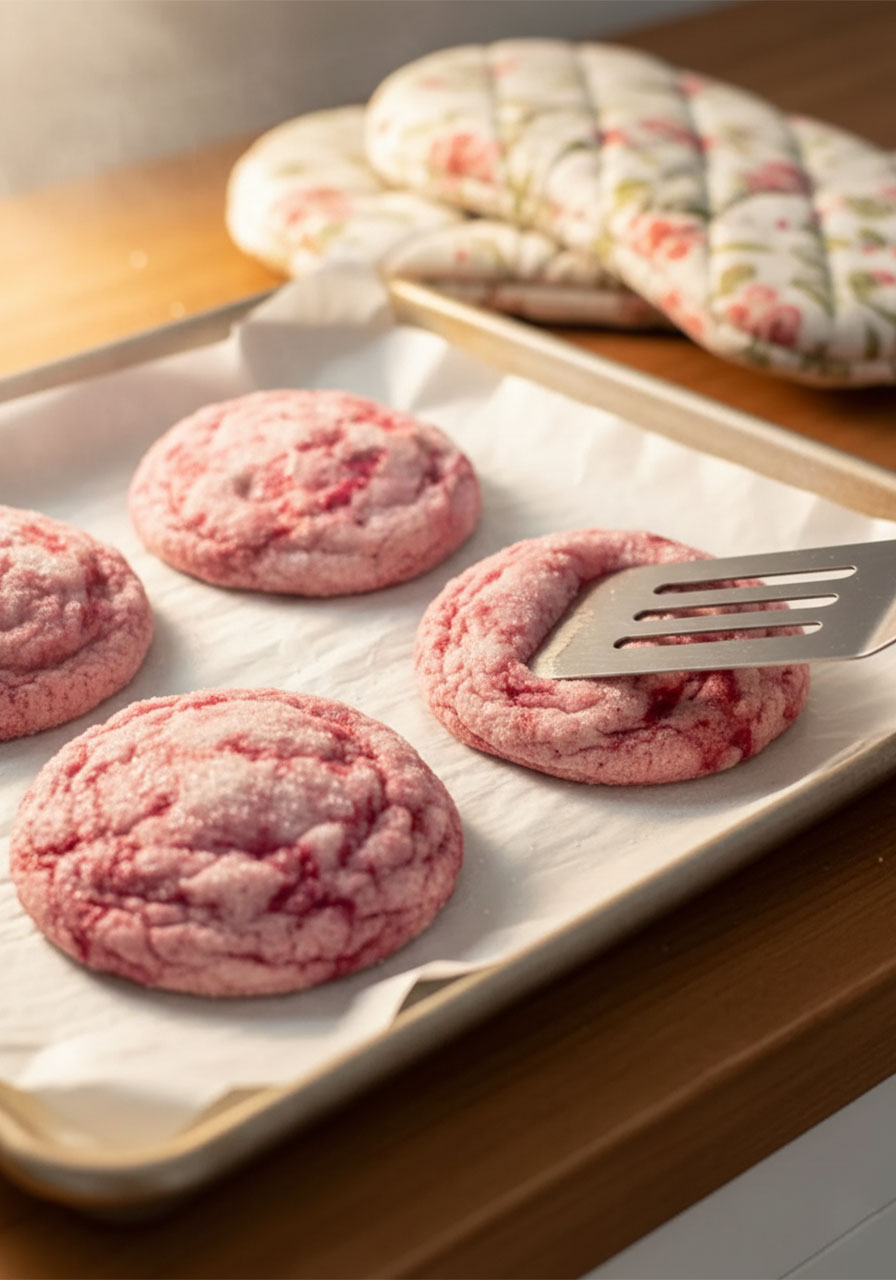
They’re soft in the middle. Slightly crispy on the edges. Rolled in sugar. Bursting with real raspberry flavor. And they stay soft for days.
Best of all? They’re gluten-free, egg-free, nut-free, and easily made vegan. So almost anyone at your table can enjoy them.
There’s something beautiful about nourishing yourself and the people you love with food made from scratch. It’s one of those quiet acts of care that never goes unnoticed.
“She watches over the affairs of her household and does not eat the bread of idleness.” – Proverbs 31:27
Let’s get baking.
In This Post You’ll Find:
- Why these raspberry cookies are so irresistible
- Full ingredient breakdown and smart substitutions
- Step-by-step instructions (with tips for perfect results every time)
- How to make them vegan or with all-purpose flour
- Storage and freezing tips
- Frequently asked questions
- Full printable-style recipe card at the bottom
Why You’ll Absolutely Love These Raspberry Cookies
These aren’t just pretty cookies. They’re genuinely one of the best cookies I’ve made – and I’ve made a lot of cookies.
Here’s what makes them so special:
They’re soft and chewy. Not flat, not crumbly – perfectly fluffy in the center with just enough structure to hold together beautifully.
They stay soft for days. Unlike many eggless cookies that go stale quickly, the moisture from the raspberries keeps these fresh longer than you’d expect.
Real raspberry flavor. We’re using both a homemade raspberry syrup and chopped frozen raspberries folded into the dough. You get that authentic tart-sweet raspberry taste in every single bite.
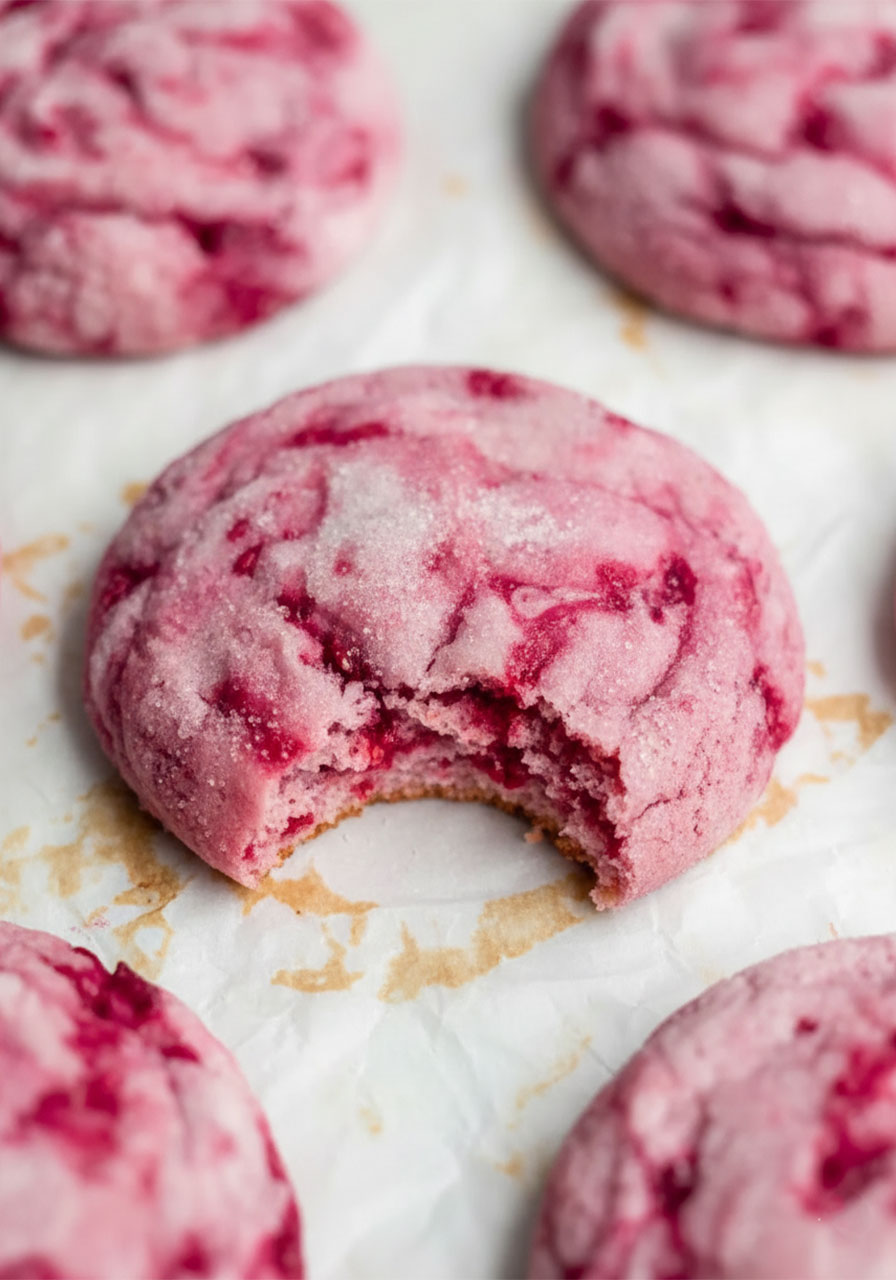
That sugar coating. Rolling the dough balls in granulated sugar gives you a slight crunch on the outside that perfectly balances the soft, pillowy center.
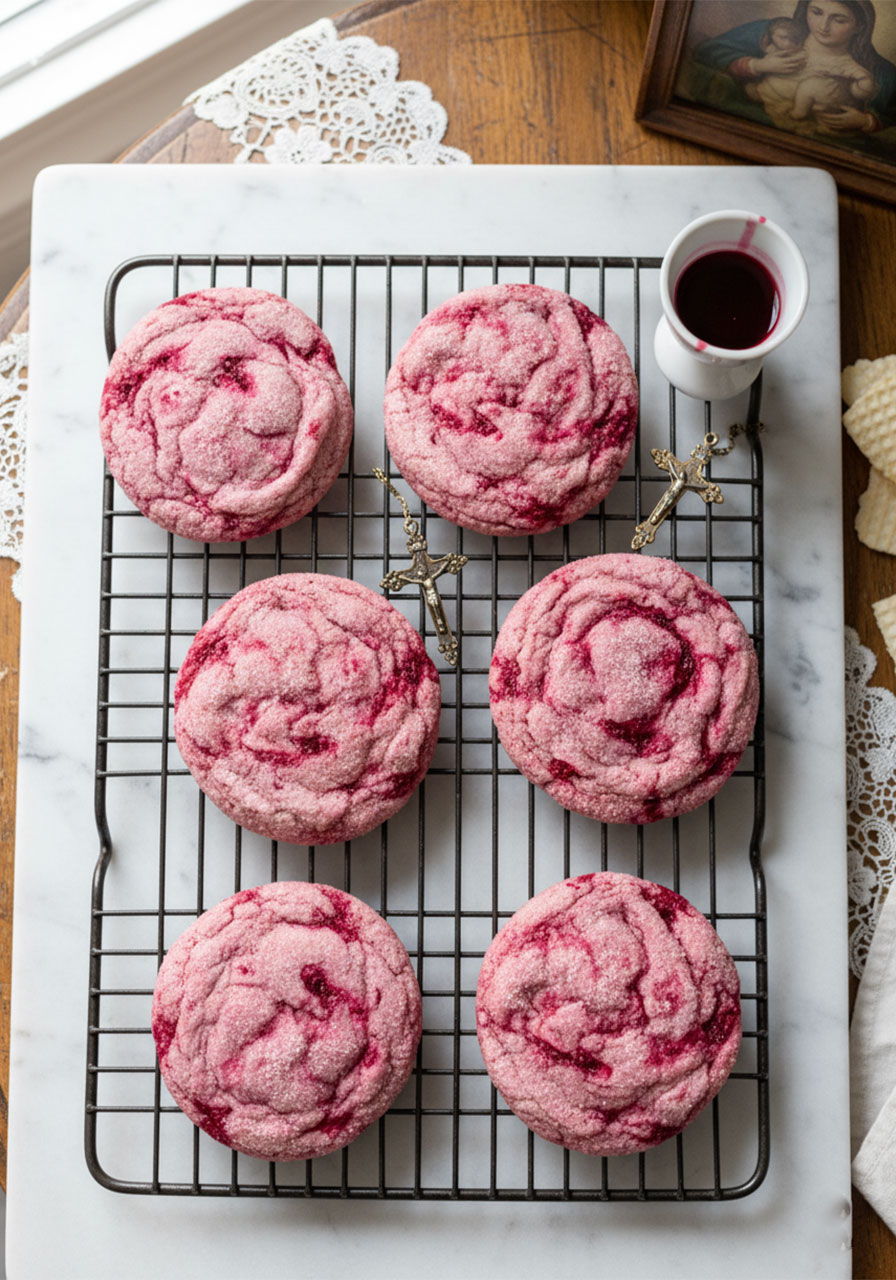
That gorgeous color. The dough turns a beautiful pale pink-mauve from the raspberry syrup alone – or a richer, deeper rose if you add a few drops of red food coloring. Either way, these cookies are stunning.
Allergy-friendly for almost everyone. Gluten-free, egg-free, nut-free, and easily dairy-free. These are the cookies you can bring to a gathering and almost everyone can enjoy.
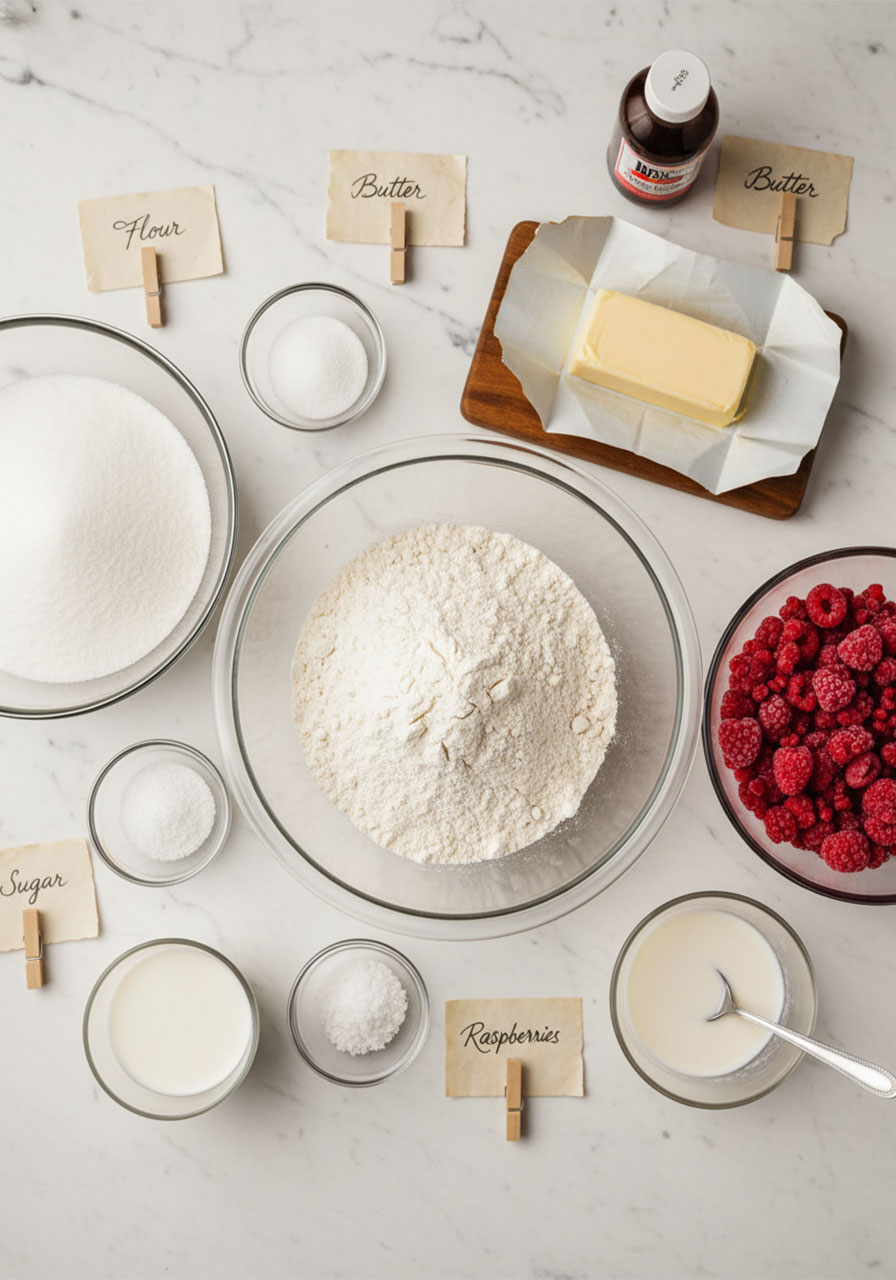
What You Need to Make Raspberry Cookies
Let’s walk through each ingredient so you understand what it does and why it matters.
For the Raspberry Syrup
Frozen Raspberries (1 cup). You’ll cook these down with sugar to create a concentrated raspberry syrup. Use frozen, not fresh – frozen berries break down more easily and give you more liquid.
Granulated Sugar (¼ cup). This sweetens and helps the berries break down into a syrupy consistency while cooking.
For the Cookie Dough
Gluten-Free Multipurpose Flour (2 cups, packed). The base of the cookie. Choose a brand with xanthan gum already included – it gives the cookies their bounce and helps them hold their shape. If you have nut allergies too, make sure to choose a brand made in a nut-free facility.
Cornstarch (1.5 tablespoons). Mixed into the dry ingredients, this small amount prevents the cookies from spreading too much during baking. Don’t skip it.
Baking Powder (1.5 teaspoons). Gives the cookies their lift and that fluffy interior texture.
Kosher Salt (½ teaspoon). Balances the sweetness and enhances the raspberry flavor.
Unsalted Butter or Vegan Baking Sticks (½ cup, room temperature). Must be at room temperature – not melted, not cold. Room temp butter creams properly with the sugar, which creates that light, soft texture. If the butter is melted, the cookies will spread into a flat mess.
Granulated Sugar (1¼ cups + 2 tablespoons separate for rolling). The main sweetener in the dough. The extra 2 tablespoons are for rolling the dough balls before baking.
Cornstarch + Water Mixture (2 rounded tablespoons cornstarch + 3 tablespoons water). This acts as the egg replacer. It helps bind everything together. Don’t confuse this with the cornstarch in the dry ingredients – these are two separate uses.
Milk or Non-Dairy Milk (3 tablespoons). Adds a little moisture to help bring the dough together. Use any milk you prefer.
Raspberry Syrup (3 tablespoons). The strained, cooled syrup from step one. This infuses real raspberry flavor throughout the entire dough.
Red Food Coloring (3 drops, optional). Gives the cookies a deeper, more vibrant pink color. Totally optional – the syrup alone will give a soft mauve. If using gel or paste food coloring, you may need less.
Frozen Raspberries, chopped (½ cup). Folded in at the end, these create those beautiful crimson streaks and pops of tart fruit flavor throughout each cookie. Must be frozen and chopped – not fresh, not whole.
Substitutions and Variations
How to Make These Vegan
These cookies are very easy to make fully vegan with just a few swaps:
- Use a gluten-free flour that is dairy-free
- Choose a sugar brand that is certified vegan
- Swap the butter for vegan baking sticks
- Use any non-dairy milk (oat, almond, soy, coconut – all work well)
- If using food coloring, look for a plant-based or vegan-certified brand
How to Make These with All-Purpose Flour
Not gluten-free? No problem. Use 2 packed cups (about 336 grams) of regular all-purpose flour instead. You still need to freeze the dough before baking – the lack of eggs means the dough needs that chilling step to hold its shape.
How to Make Smaller Cookies
Use a small cookie scoop and roll the dough into 1-inch balls. Bake at the same temperature (325°F) but reduce the baking time to about 13 minutes. You should get around 24 smaller cookies from this batch.
How to Make Raspberry Cookies: Step-by-Step
This recipe has a few steps, but don’t let that intimidate you. Each one is simple, and I’ll walk you through exactly what to expect at each stage.
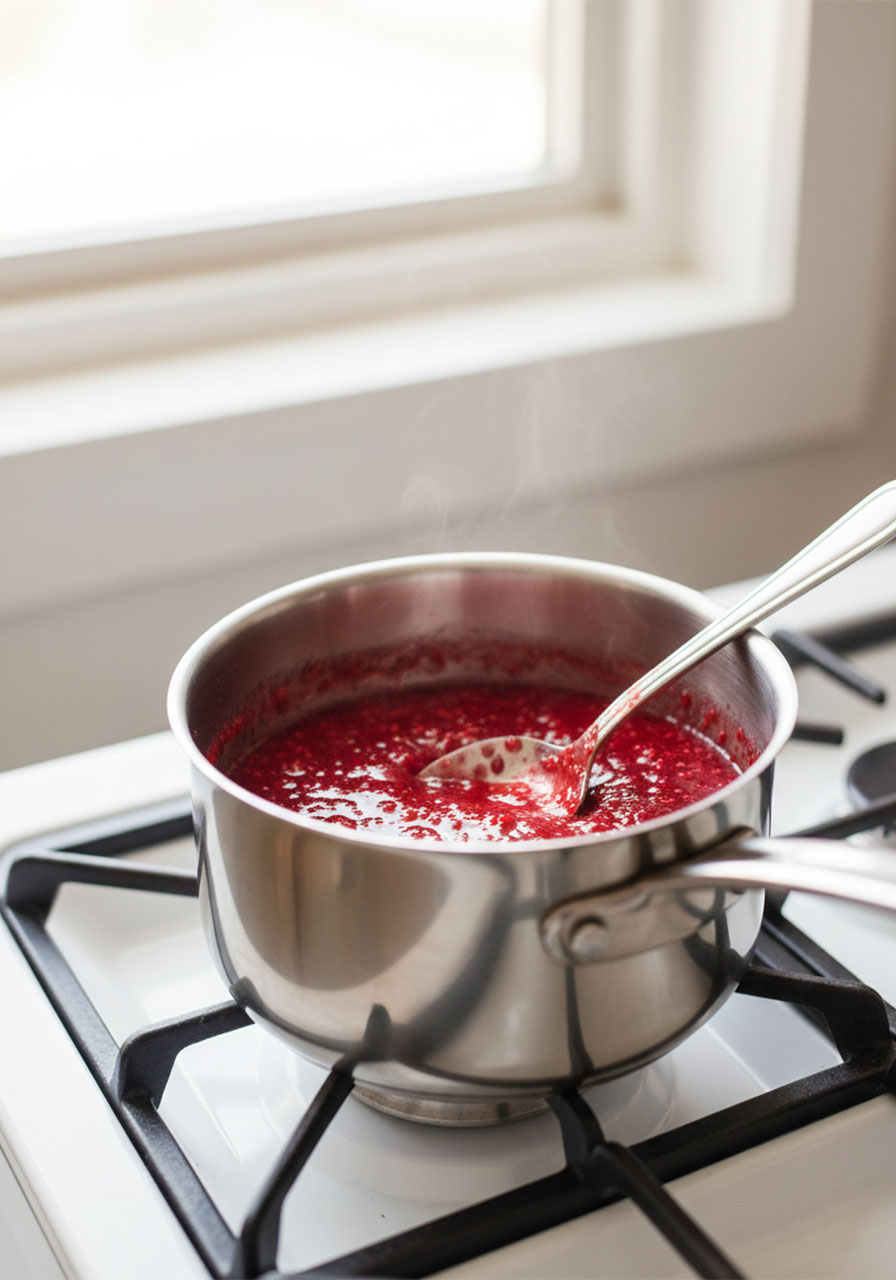
Step 1: Make the Raspberry Syrup
In a small saucepan over medium heat, combine 1 cup of frozen raspberries and ¼ cup of granulated sugar.
Stir constantly for about 10 minutes until the berries break down and the mixture becomes syrupy. It’s okay if it looks a little chunky – that’s normal.
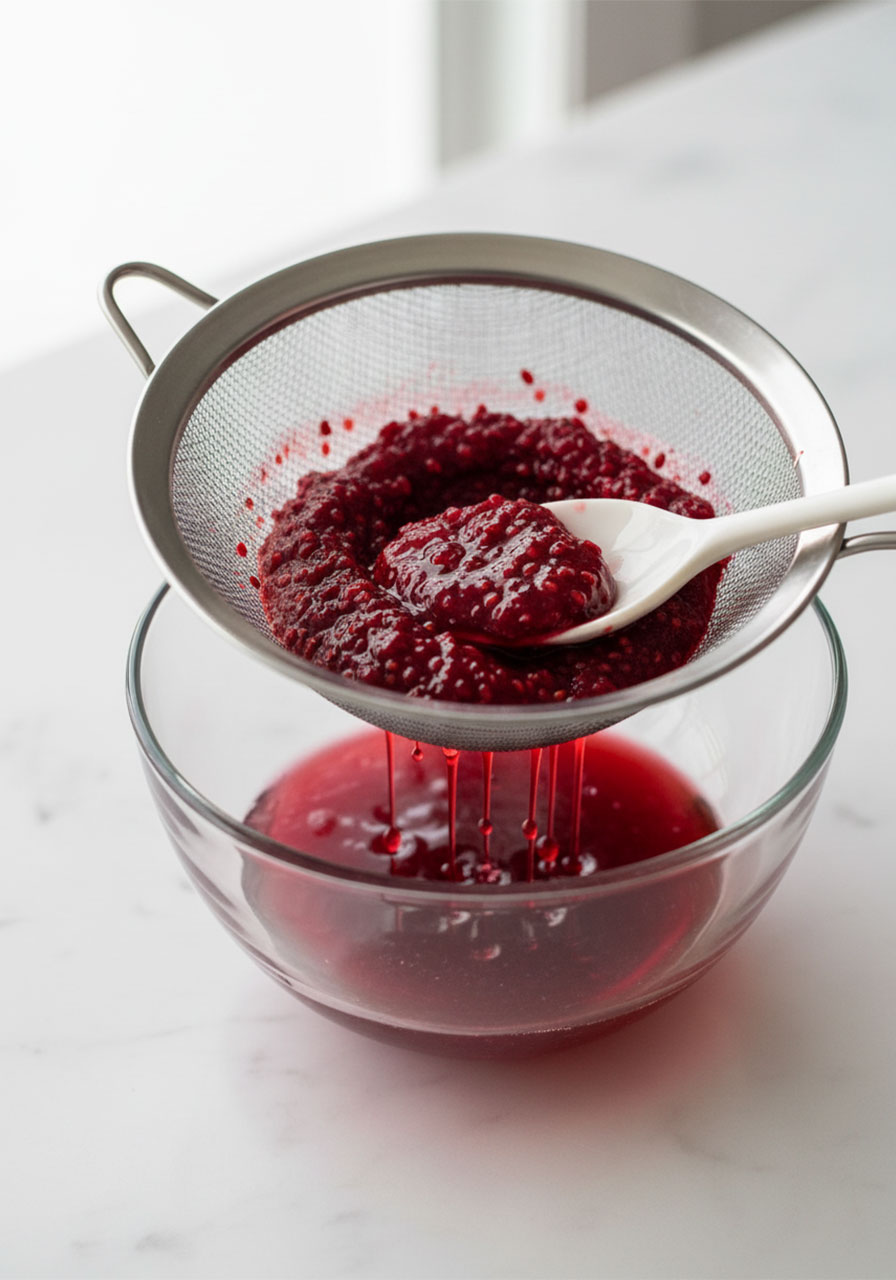
Set a fine mesh strainer over a bowl. Pour the raspberry mixture through the strainer and let it drain. Press gently with a spoon to get all the liquid out.
You should end up with about 2 to 3 tablespoons of strained raspberry syrup. Set it aside to cool completely before using. This step is crucial – if you skip the straining, you’ll have seeds throughout your cookies and too much liquid, which will cause the dough to spread.
Step 2: Chop the Frozen Raspberries
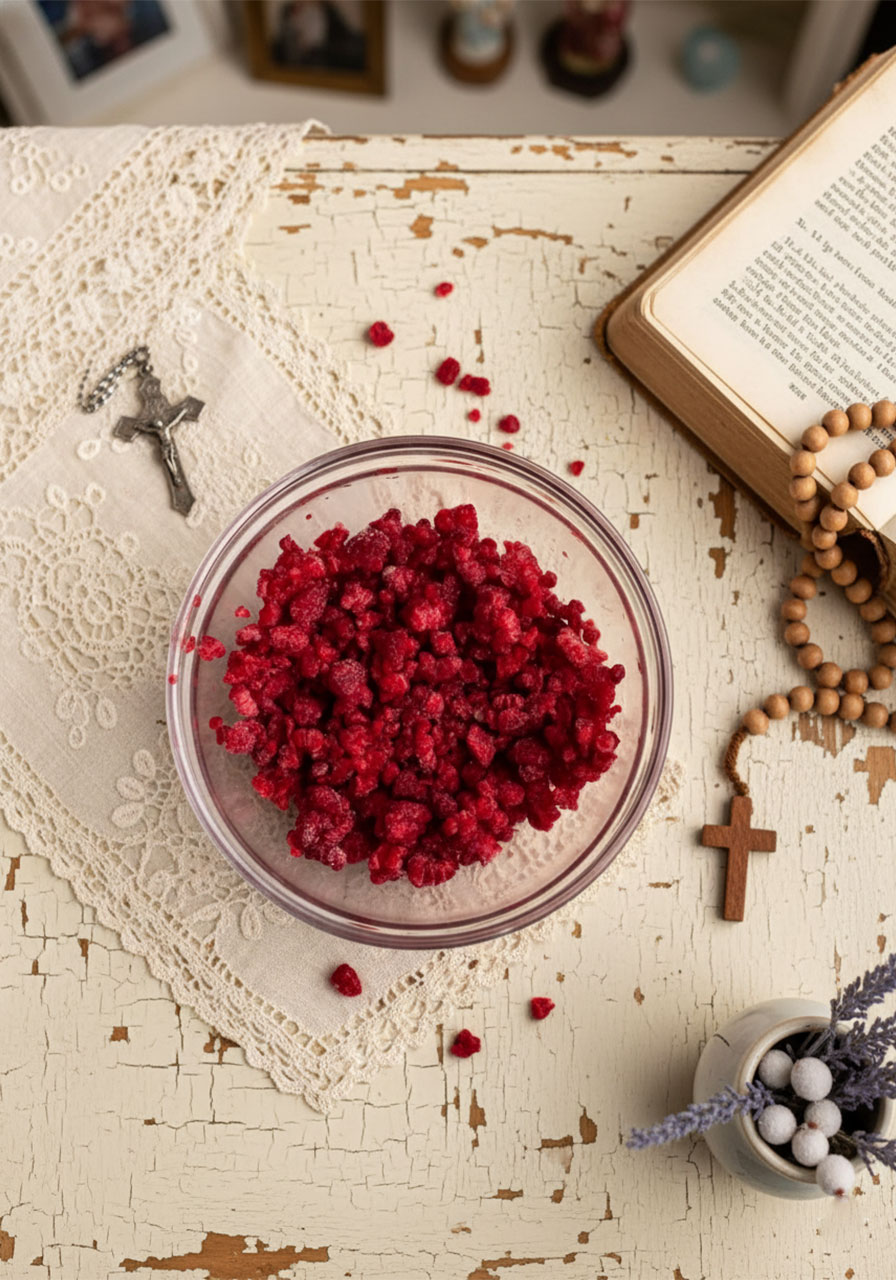
Measure out ½ cup of frozen raspberries. Using a knife, rough chop them into small pieces. Be careful not to over-chop – you want small pieces, not raspberry pulp.
Place the chopped raspberries into a freezer-safe bowl and return them to the freezer. They need to stay frozen until the moment you fold them into the dough.
Step 3: Mix the Dry Ingredients
In a large bowl, whisk together the gluten-free flour, baking powder, 1.5 tablespoons of cornstarch, and kosher salt. Set aside.
Step 4: Make the Cornstarch Water
In a small bowl, stir together the 2 rounded tablespoons of cornstarch with 3 tablespoons of water. It will be thick and tacky at first – keep stirring until it becomes thin and watery. This is your egg replacer.
Step 5: Cream the Butter and Sugar
In the bowl of a stand mixer fitted with the paddle attachment (or use a hand mixer), beat the room-temperature butter and 1¼ cups of granulated sugar together for 2 to 3 minutes until light, soft, and creamy.
This step matters more than you’d think. Properly creamed butter and sugar creates air pockets in the dough, which is what gives the cookies that fluffy center.
Step 6: Add the Wet Ingredients
With the mixer on low, slowly add in the cornstarch water mixture, the 3 tablespoons of milk, and the cooled raspberry syrup.
The mixture will look pink and a little chunky at this point – that’s completely normal. Keep mixing until it comes together.
Step 7: Add the Flour Mixture and Raspberries
Slowly add the dry flour mixture to the wet ingredients, a little at a time, mixing until just combined. Don’t overmix.
If you’re using red food coloring, add 3 to 4 drops now and mix until the color is evenly blended throughout the dough.
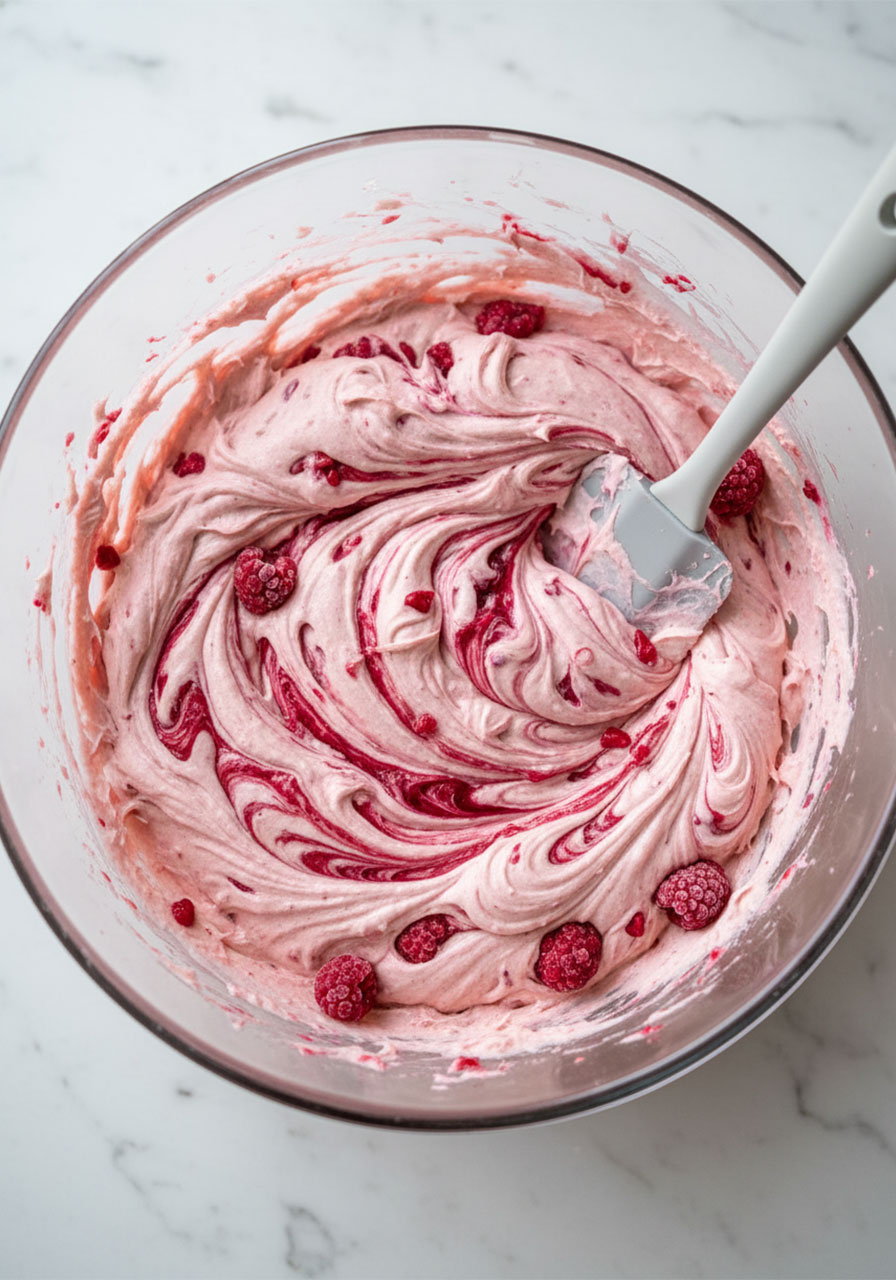
Finally, take the frozen chopped raspberries out of the freezer and gently fold them in with a spatula. Do this quickly and carefully. You want the raspberries distributed throughout the dough without over-mixing, which would make it slimy.
The dough will turn a gorgeous marbled pink color with deep crimson swirls from the berries.
Step 8: Freeze the Dough
Cover the dough bowl with plastic wrap and place it in the freezer for at least 1 hour.
This is not optional. Without this step, the cookies will spread into flat, thin puddles when they hit the oven. Eggless cookie dough needs to be frozen – not just chilled in the fridge – to hold its shape properly.
Step 9: Scoop, Roll in Sugar, and Bake
After the dough has frozen for at least 1 hour, preheat your oven to 325°F. Line a baking sheet with parchment paper.
Using a 2-ounce large cookie scoop, scoop the dough into 12 balls.
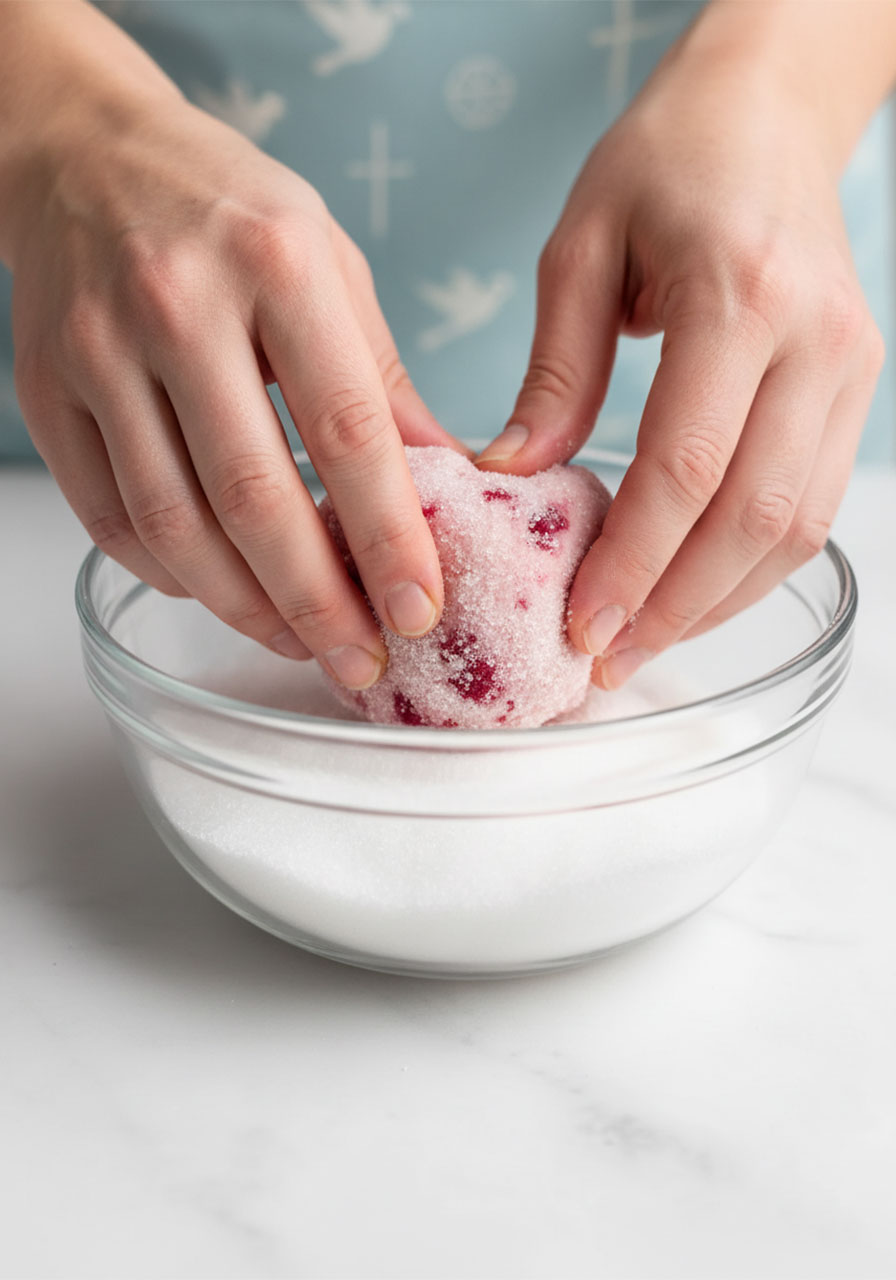
Drop each dough ball into the reserved 2 tablespoons of granulated sugar and roll to coat completely.
Place the sugar-coated dough balls about 3 to 4 inches apart on the prepared baking sheet. If they don’t all fit, keep the extra dough balls in the freezer until the first batch finishes baking. It’s best to bake only 6 at a time.
Bake for 15 minutes, or until the bottoms are lightly golden.
Step 10: Reshape and Cool
As soon as the cookies come out of the oven, use a spatula to gently push any uneven edges back into a round circle shape. Work quickly – the cookies are soft and pliable right out of the oven, and this is your window to get them perfectly round.
Let them cool on the baking sheet for 5 minutes before transferring to a wire rack.
Expert Baking Tips for Perfect Raspberry Cookies
These tips make the difference between good cookies and absolutely perfect ones.
Use packed cups of flour. When working with gluten-free flour, packed cups give you a more accurate amount and help the cookies keep their shape. Or better yet, use the gram measurement if your recipe provides it.
Room temperature butter is non-negotiable. Not softened, not melted – room temperature. Set it out on the counter about 30 to 60 minutes before you start baking.
Always strain the raspberry liquid. Not straining it means seeds in every bite and too much moisture in the dough. It’s a quick step that makes a big difference.
Frozen raspberries only – and chop them. Fresh raspberries add too much moisture and will cause the dough to spread everywhere. Whole frozen raspberries have the same problem. Chop them small and keep them frozen until the moment they hit the dough.
The freezer step is mandatory. If you skip it, the cookies will be flat and thin. They must be frozen – the fridge is not cold enough.
Wash your cookie scoop mid-batch if needed. If the dough starts sticking to the scoop, rinse it under cold water and dry it before continuing.
Reshape immediately out of the oven. You have about 60 seconds to push the cookies back into a nice round shape before they set. Use a spatula and work gently but quickly.
How to Store and Freeze These Cookies
Storing baked cookies: Keep them in an airtight container in the refrigerator for up to 3 days. They stay remarkably soft thanks to all the moisture from the raspberries.
Freezing unbaked dough: Scoop the dough into balls and wrap each ball in plastic wrap. Place them in a zip-top bag and freeze for up to 30 days. When ready to bake, roll in sugar and bake straight from frozen – you may need to add 1 to 2 extra minutes to the bake time.
A Gentle Encouragement
Baking is one of those grounding, present-moment activities that has a way of quieting the noise of a busy day.
There’s something meditative about measuring, mixing, and waiting. It asks you to slow down. And in that slowness, there’s space to breathe, to be still, to feel at peace.
Taking care of your body – feeding it, nourishing it with real ingredients, allowing yourself a treat made with love – is not indulgence. It’s stewardship.
“Do you not know that your bodies are temples of the Holy Spirit?” – 1 Corinthians 6:19
Give yourself permission to enjoy what you make. You deserve it.
Raspberry Cookies: Quick Baking Checklist
✅ Make and strain the raspberry syrup – let it cool completely
✅ Chop frozen raspberries and return to freezer
✅ Whisk dry ingredients
✅ Make cornstarch water egg replacer
✅ Cream room temperature butter and sugar (2–3 min)
✅ Add wet ingredients – mix until combined
✅ Slowly mix in flour; fold in frozen raspberries
✅ Cover dough and freeze for at least 1 hour
✅ Preheat oven to 325°F
✅ Scoop, roll in sugar, bake 6 at a time for 15 minutes
✅ Reshape immediately out of oven; cool 5 min before transferring
Frequently Asked Questions
Can I use fresh raspberries instead of frozen?
No – and this is really important. Fresh raspberries have much higher water content, which will make the dough wet and slimy, and the cookies will spread out into a thin mess in the oven. Always use frozen raspberries for this recipe.
Do I really need to freeze the dough? Can I just refrigerate it?
The freezer is essential here. Eggless doughs are more prone to spreading, and refrigerating is simply not cold enough to prevent it. Freeze for at least 1 full hour before baking.
My dough looks pink and chunky after adding the wet ingredients. Is that okay?
Yes, completely normal! The dough often looks curdled or chunky at that stage. Once you add the flour, it will come together into a smooth, beautiful dough.
Can I make these without food coloring?
Absolutely. The raspberry syrup naturally gives the dough a soft, pale mauve color, and the chopped frozen raspberries create beautiful crimson streaks throughout. They look gorgeous without any food coloring at all.
Can I make these cookies smaller?
Yes! Use a small cookie scoop or roll into 1-inch balls. Bake at the same temperature (325°F) but reduce the time to 13 minutes. The batch will yield about 24 smaller cookies.
Are these cookies safe for people with celiac disease?
They can be – as long as you choose a certified gluten-free flour made in a dedicated gluten-free facility. Always check labels and certifications if you’re baking for someone with celiac disease.
Can I use a hand mixer instead of a stand mixer?
Yes, a hand mixer works perfectly for this recipe. Just make sure to beat the butter and sugar long enough to get it light and creamy.
How long do these cookies stay soft?
Because of the moisture from the raspberries, these cookies stay soft for several days – much longer than typical eggless cookies. Store them in an airtight container in the fridge for up to 3 days.
Closing Encouragement
Whether you’re baking these for a quiet evening at home, a gathering with friends, or just because you needed something joyful to do with your hands today – I hope these cookies bring you a little sweetness.
Baking from scratch is a gift you give yourself. It’s a reminder that you can create something beautiful, something nourishing, something worth savoring.
May your kitchen be warm, your cookies be soft, and your heart be full.
“Come to me, all you who are weary and burdened, and I will give you rest.” – Matthew 11:28
Now go enjoy one of those cookies. You earned it.
Explore more nourishing recipes and faith-inspired self-care ideas on the Christian Faith Goods blog.
A Simple Blessing
Lord, thank You for the simple gifts – warm kitchens, sweet treats, and moments of rest. Bless the hands that made this food and the hearts that share it. May every bite be a small reminder of Your goodness. Amen.
Raspberry Cookies (Gluten-Free, Egg-Free, Easily Vegan)
Ingredients
For the Raspberry Syrup:
- 1 cup frozen raspberries
- ¼ cup granulated sugar
For the Cookie Dough:
- 2 cups gluten-free multipurpose flour, packed (use a brand with xanthan gum)
- 1½ tablespoons cornstarch
- 1½ teaspoons baking powder
- ½ teaspoon kosher salt
- ½ cup unsalted butter or vegan baking sticks, room temperature
- 1¼ cups granulated sugar (plus 2 tablespoons kept separate for rolling)
- 2 rounded tablespoons cornstarch mixed with 3 tablespoons water
- 3 tablespoons milk or non-dairy milk
- 3 tablespoons raspberry syrup (from above, cooled)
- 3 drops red food coloring (optional)
- ½ cup frozen raspberries, chopped into small pieces
Instructions
Make the Raspberry Syrup:
- In a small saucepan over medium heat, cook 1 cup frozen raspberries and ¼ cup granulated sugar, stirring constantly, until broken down and syrupy – about 10 minutes.
- Strain through a fine mesh strainer into a bowl. Press to extract all liquid. You should get about 2–3 tablespoons of syrup. Set aside to cool completely.
Prepare the Raspberries:
- Rough chop ½ cup frozen raspberries into small pieces. Do not over-chop.
- Place in a freezer-safe bowl and return to the freezer until needed.
Make the Cookie Dough:
- In a large bowl, whisk together the gluten-free flour, 1½ tablespoons cornstarch, baking powder, and kosher salt. Set aside.
- In a small bowl, stir together 2 rounded tablespoons cornstarch with 3 tablespoons water until thin and watery. Set aside.
- In a stand mixer with the paddle attachment, beat the butter and 1¼ cups sugar together on medium speed for 2–3 minutes until light and creamy.
- With mixer on low, slowly add the cornstarch water mixture, milk, and cooled raspberry syrup. Mix until combined (dough may look pink and chunky – this is normal).
- Slowly add the flour mixture, a little at a time, until just combined.
- Add 3–4 drops red food coloring if using, and mix until evenly blended.
- Fold in the frozen chopped raspberries gently with a spatula. Do not overmix.
- Cover bowl with plastic wrap and freeze for at least 1 hour. Do not skip or substitute the fridge – it must be the freezer.
Bake:
- After freezing, preheat oven to 325°F. Line a baking sheet with parchment paper.
- Using a 2-ounce large cookie scoop, scoop dough into 12 balls.
- Roll each ball in the reserved 2 tablespoons of granulated sugar to coat completely.
- Place dough balls 3–4 inches apart on the prepared baking sheet. Bake 6 at a time; keep remaining dough balls in the freezer.
- Bake for 15 minutes or until bottoms are lightly golden.
- Immediately reshape cookies into circles using a spatula. Cool on baking sheet for 5 minutes, then transfer to a wire rack.
Notes
- Smaller cookies: Use a small cookie scoop; bake at 325°F for 13 minutes. Makes about 24 cookies.
- Vegan: Use dairy-free GF flour, vegan sugar, vegan baking sticks, non-dairy milk, and vegan food coloring.
- All-purpose flour: Substitute 2 packed cups (336g) regular flour. Still freeze the dough before baking.
- Storing: Keep in an airtight container in the fridge for up to 3 days.
- Freezing dough: Wrap dough balls in plastic wrap, place in zip-top bag, and freeze for up to 30 days.
Nutrition (per cookie, estimated)
- Calories: 245 kcal
- Carbohydrates: 43g
- Protein: 2g
- Fat: 9g
- Saturated Fat: 5g
- Fiber: 3g
- Sugar: 26g
- Sodium: 153mg