Prep Time: 30 minutes | Cook Time: 12 minutes | Total Time: 45 minutes | Yield: 15 cookies
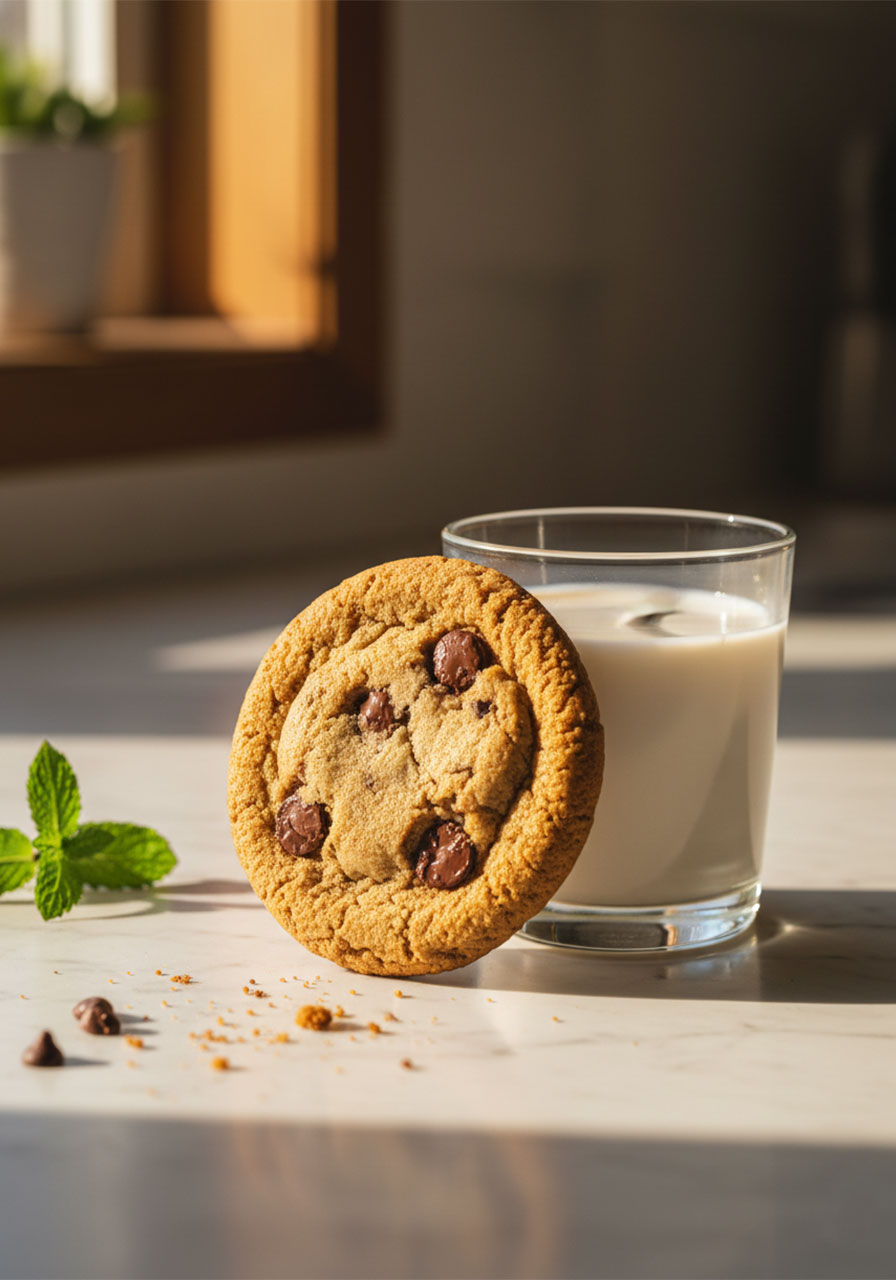
There are days when you just need a warm, gooey cookie fresh out of the oven.
Maybe the week has been long. Maybe the kids have been a handful. Maybe you just want something sweet and comforting that doesn’t require a trip to the store.
These vegan chocolate chip cookies were made for exactly those moments.
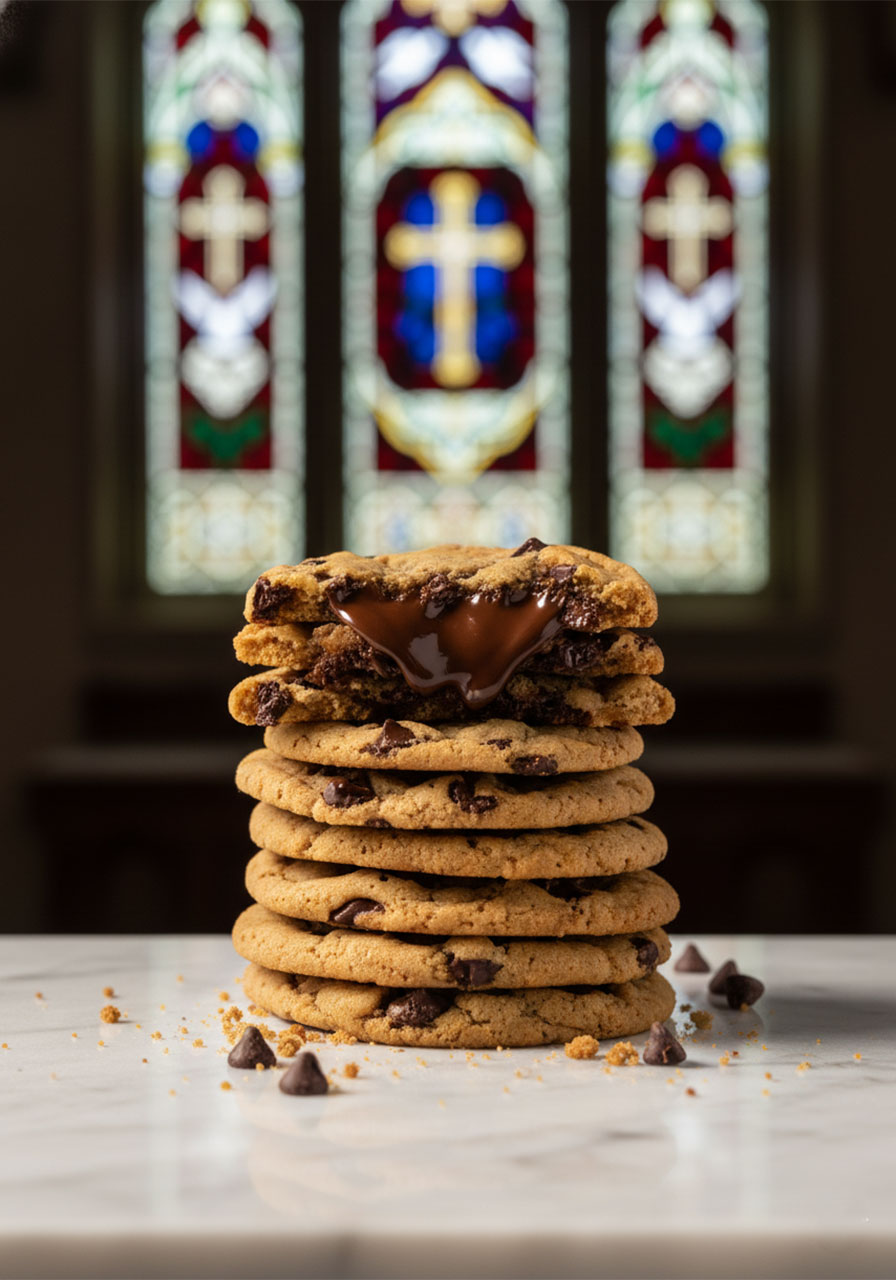
They’re crispy on the outside, soft and chewy in the center, and absolutely loaded with melted chocolate in every single bite.
And the best part? Nobody – not your husband, not your mother-in-law, not your pickiest dinner guest – will ever guess these are completely dairy-free and egg-free.
I’ve baked these for non-vegan friends and family more times than I can count. Every single time, the plate is empty within minutes.
Whether you’re eating plant-based, avoiding dairy, baking for someone with allergies, or simply curious about wholesome ingredient swaps – this recipe is your new go-to.
Why these cookies are so soft and chewy (the secret matters!)
Exactly what ingredients to use and why each one works
Step-by-step instructions with tips for first-timers
How to store, freeze, and prep your dough ahead of time
High-altitude baking adjustments
A gentle faith note about stewarding our bodies well
Why You’ll Love These Cookies
Let me be honest with you – I’m a little picky about chocolate chip cookies.
I don’t want cakey. I don’t want flat and greasy. I want that perfect, classic tollhouse-style cookie that pulls apart with that gorgeous gooey center and golden crispy edge.
These deliver exactly that – without a single egg or drop of dairy milk.
Here’s what makes them special:
Crispy golden edges with a soft, chewy, gooey center
Rich, caramelized flavor from brown sugar
Melty chocolate pockets in every bite
No weird ingredients – everything is pantry-friendly
Kid-approved and non-vegan-approved – truly crowd-pleasing
Easy to make ahead and freeze for later
They’re also vegan, vegetarian, dairy-free, and egg-free – which means more people at your table get to enjoy them.
And there’s something so joyful about baking something from scratch and sharing it generously. Hospitality has always been at the heart of community – and a plate of warm cookies on the counter has a way of bringing people together.
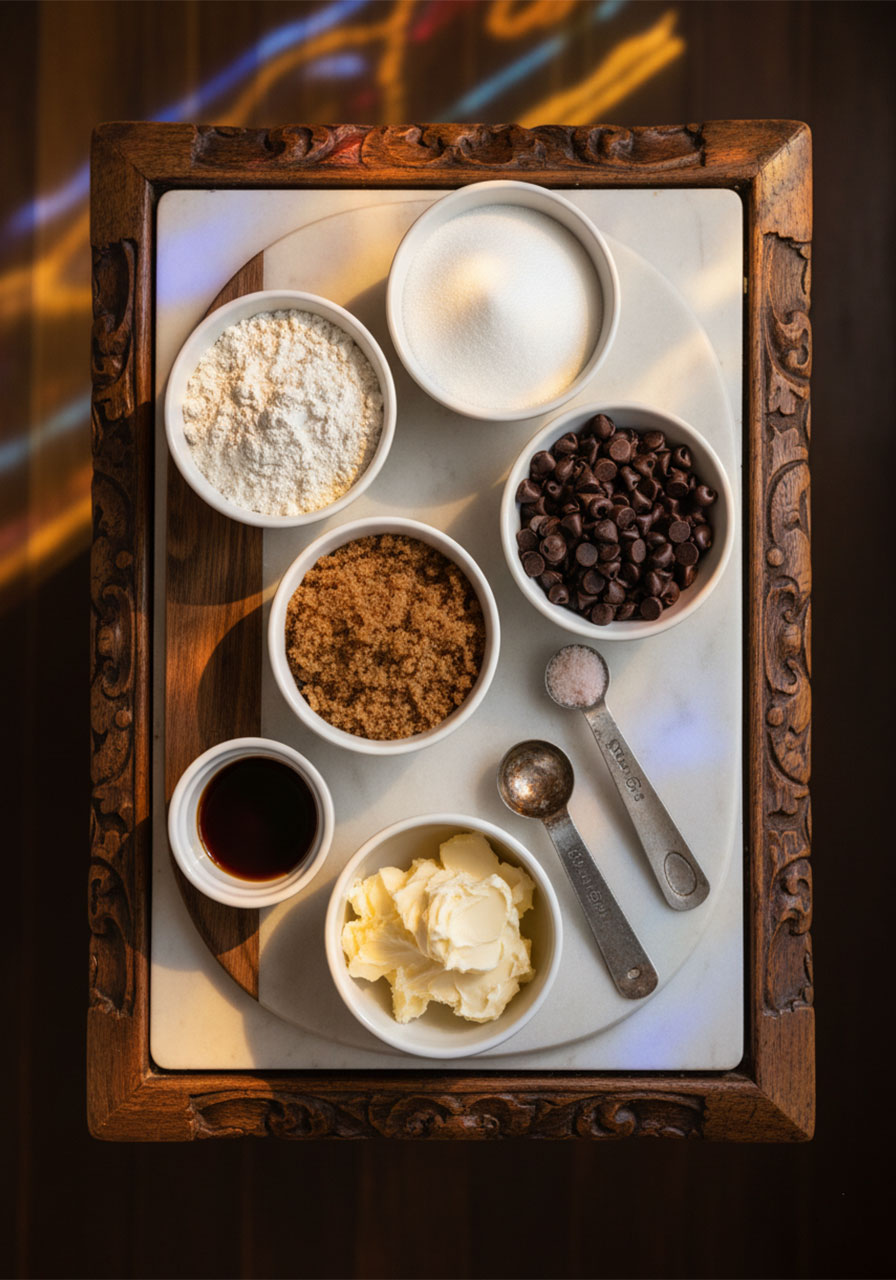
Ingredients You’ll Need
One of the things I love most about this recipe is how simple the ingredient list is. No fancy substitutes. No specialty store runs. Just real, straightforward ingredients.
Vegan Butter
This is the base of your cookie dough. Use vegan butter from a tub – not the stick version. Tub-style vegan butter tends to be softer and blends more smoothly.
The Earth Balance brand works beautifully here. Make sure it’s slightly softened before you start – not melted, just soft enough to cream.
Light Brown Sugar
Brown sugar is what gives these cookies their signature chewy texture and that hint of caramel flavor we all love.
Make sure to pack it firmly into your measuring cup. Loose brown sugar will throw off your measurements and affect the texture.
Granulated Sugar
A small amount of regular white sugar or cane sugar is paired with the brown sugar. This balance creates the perfect sweetness without making the cookies overly rich.
All-Purpose Flour
Standard all-purpose flour gives these cookies their structure.
Here’s the most important tip in this entire recipe: measure your flour correctly. Never scoop flour directly from the bag with your measuring cup – this packs it in and causes dry, crumbly cookies.
Instead, spoon the flour gently into your measuring cup, then level it off with a flat edge. Better yet, use a kitchen scale and weigh out 240 grams.
Vegan Chocolate Chips
Use your favorite brand of dairy-free chocolate chips. Enjoy Life is a popular option. You can also mix regular-sized chips with mini chips or chocolate chunks for extra chocolatey depth in every bite.
Plant-Based Milk
Any non-dairy milk works here – almond, soy, oat, cashew, or coconut milk all do the job beautifully. Use whatever you have on hand.
Vanilla Extract
Don’t skip this. Vanilla is what gives the cookies that warm, classic, nostalgic flavor. Pure vanilla extract or vanilla bean paste both work wonderfully.
Baking Soda
This helps the cookies rise and gives them a slightly fluffy, lifted texture as they bake.
Salt
Just a little. Salt balances the sweetness and actually makes the chocolate flavor taste richer. It’s a small addition that makes a big difference.
Step-by-Step Instructions
These cookies come together in just a few simple steps. Let me walk you through each one.
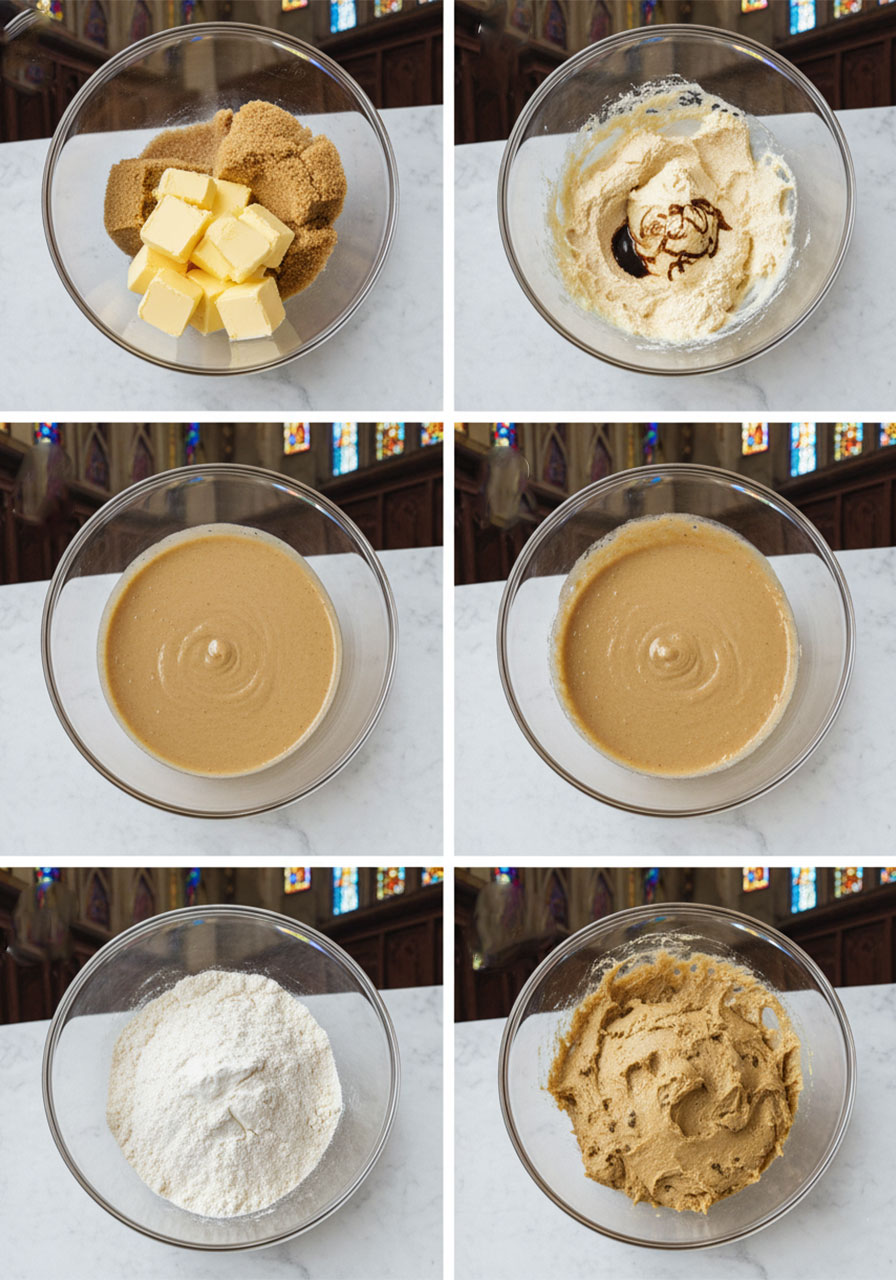
Step 1: Cream the Butter and Sugars
Add your vegan butter, packed brown sugar, and granulated sugar to a large mixing bowl.
Using a handheld mixer or stand mixer, cream them together on medium speed for about 1–2 minutes – just until combined and slightly fluffy.
Don’t over-mix here. Whipping too much air into the dough causes cookies to collapse and spread flat while baking. One to two minutes is plenty.
Step 2: Add the Milk and Vanilla
Pour in your plant-based milk and vanilla extract. Mix again briefly to combine.
The dough will look slightly grainy or crumbly at this point – that’s completely normal. Keep going!
Step 3: Add the Dry Ingredients
Add your spooned-and-leveled all-purpose flour, baking soda, and salt to the bowl.
Use a spatula or wooden spoon to fold everything together gently until just combined. Avoid over-stirring – this keeps the cookies tender.
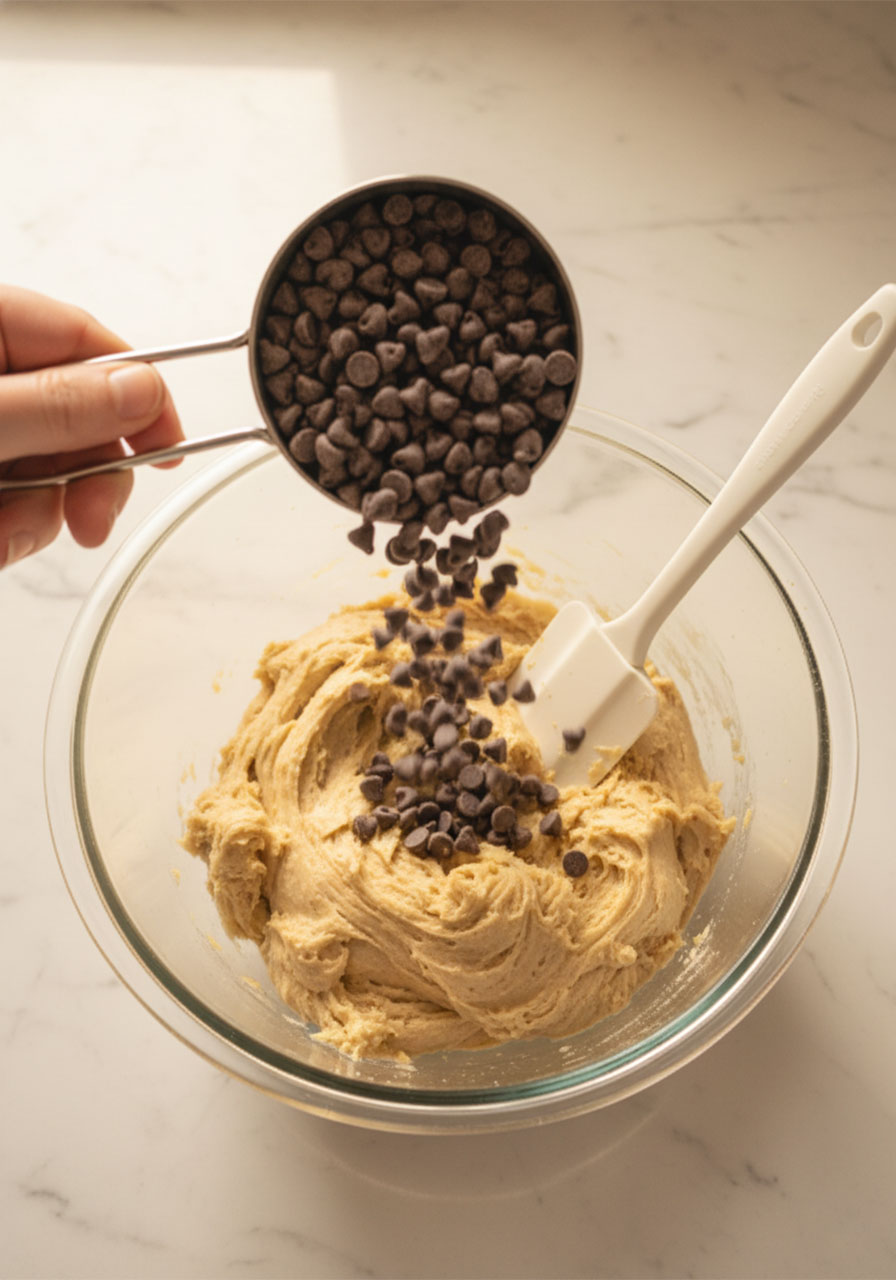
Step 4: Fold in the Chocolate Chips
Add your vegan chocolate chips and stir them through the dough. Try to distribute them evenly so every cookie gets plenty of chocolate.
Want extra indulgence? Press a few extra chips on top of each ball of dough before baking. The visual of melted chocolate on top makes them absolutely irresistible.
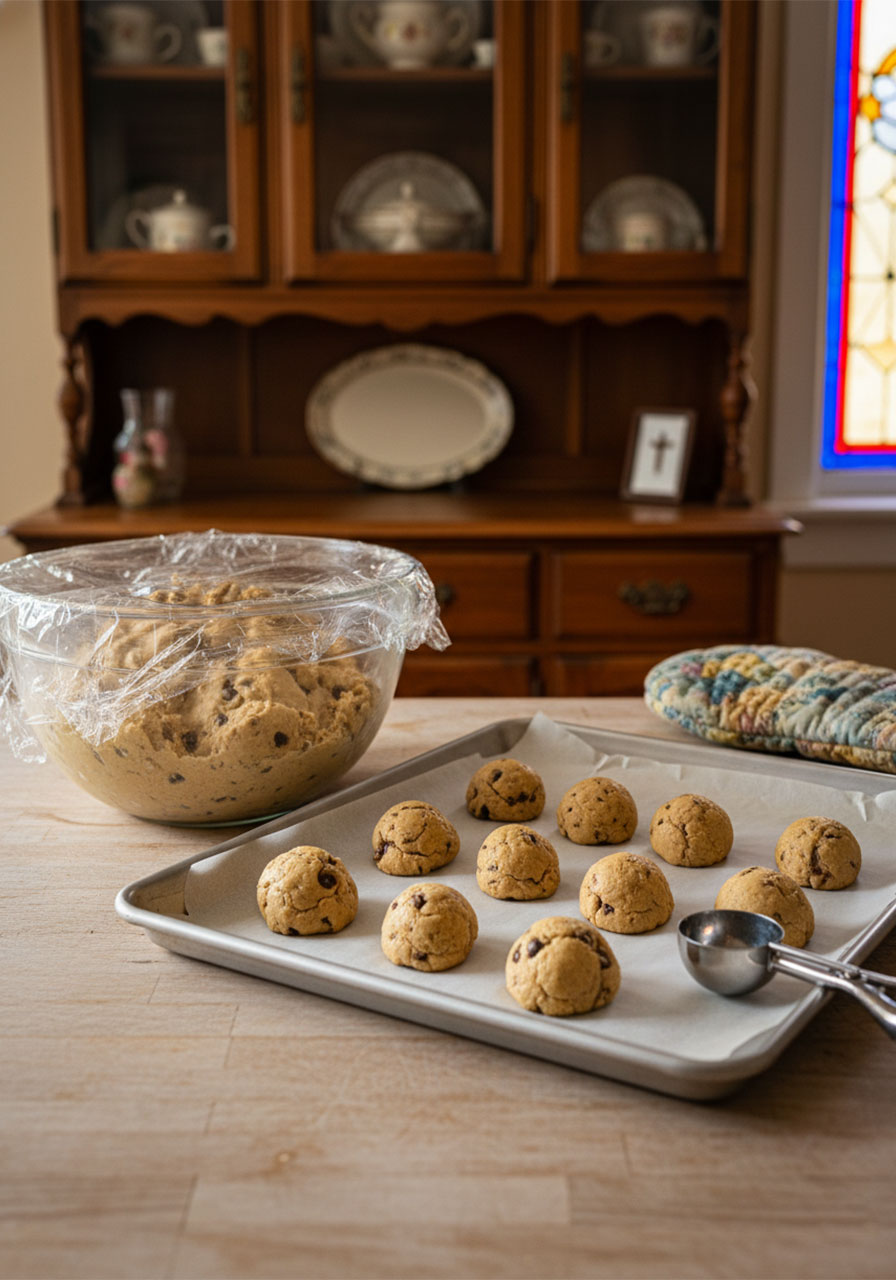
Step 5: Chill the Dough
Cover the bowl tightly with plastic wrap and place it in the refrigerator for at least 30 minutes.
I know – this is the hard part. But please don’t skip it. The chilling step is what makes these cookies truly great. (More on why below!)
If you have time, chill for a full hour or even overnight. The longer you chill, the better the flavor and texture.
Step 6: Preheat and Prep
Preheat your oven to 350°F. Line a large baking sheet with parchment paper or lightly grease it with oil.
Step 7: Scoop and Roll
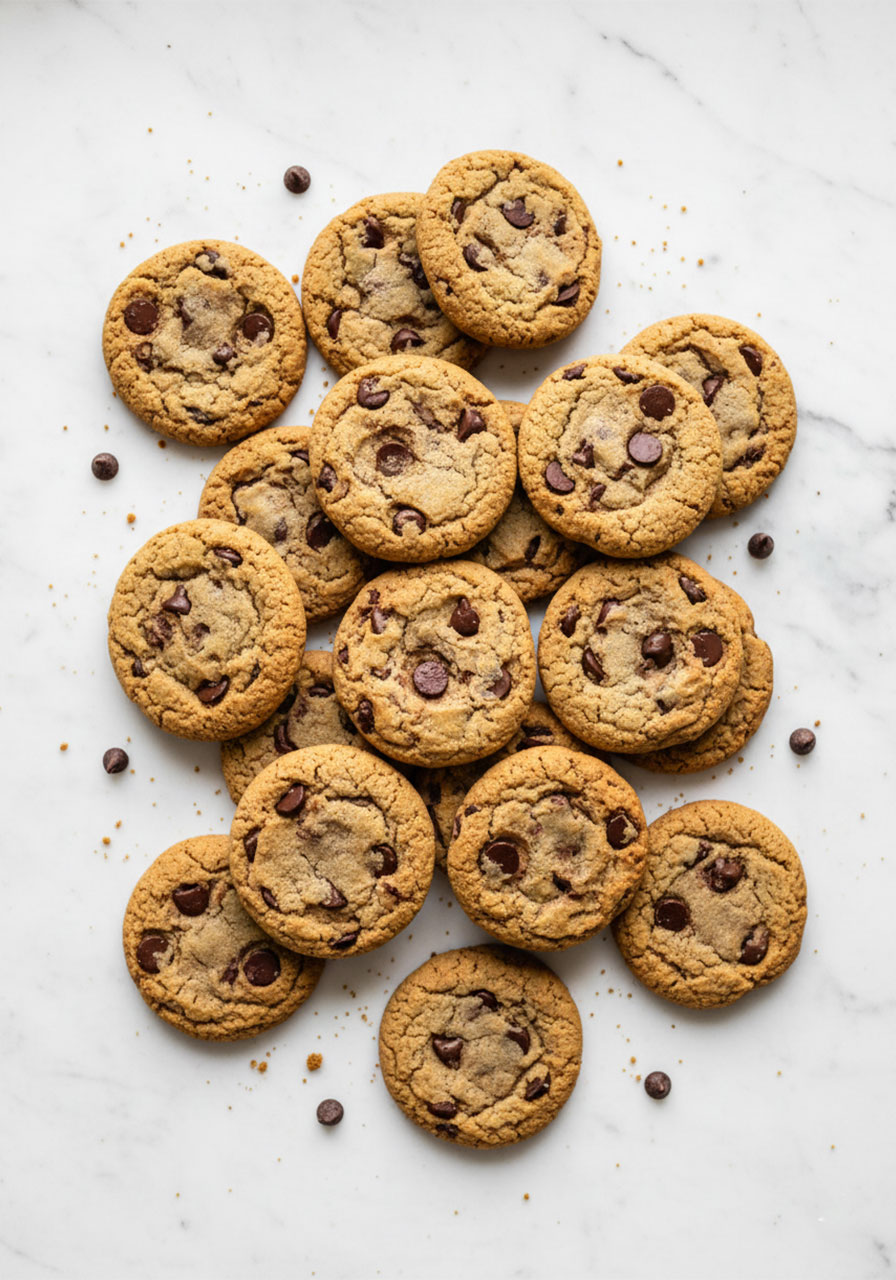
Use a cookie scoop or tablespoon to scoop the dough into balls – roughly 1.5 inches wide. You should get about 15 cookies from this batch.
Roll each ball gently between your palms to smooth it out, then place on the prepared baking sheet with 2 inches of space between each cookie.
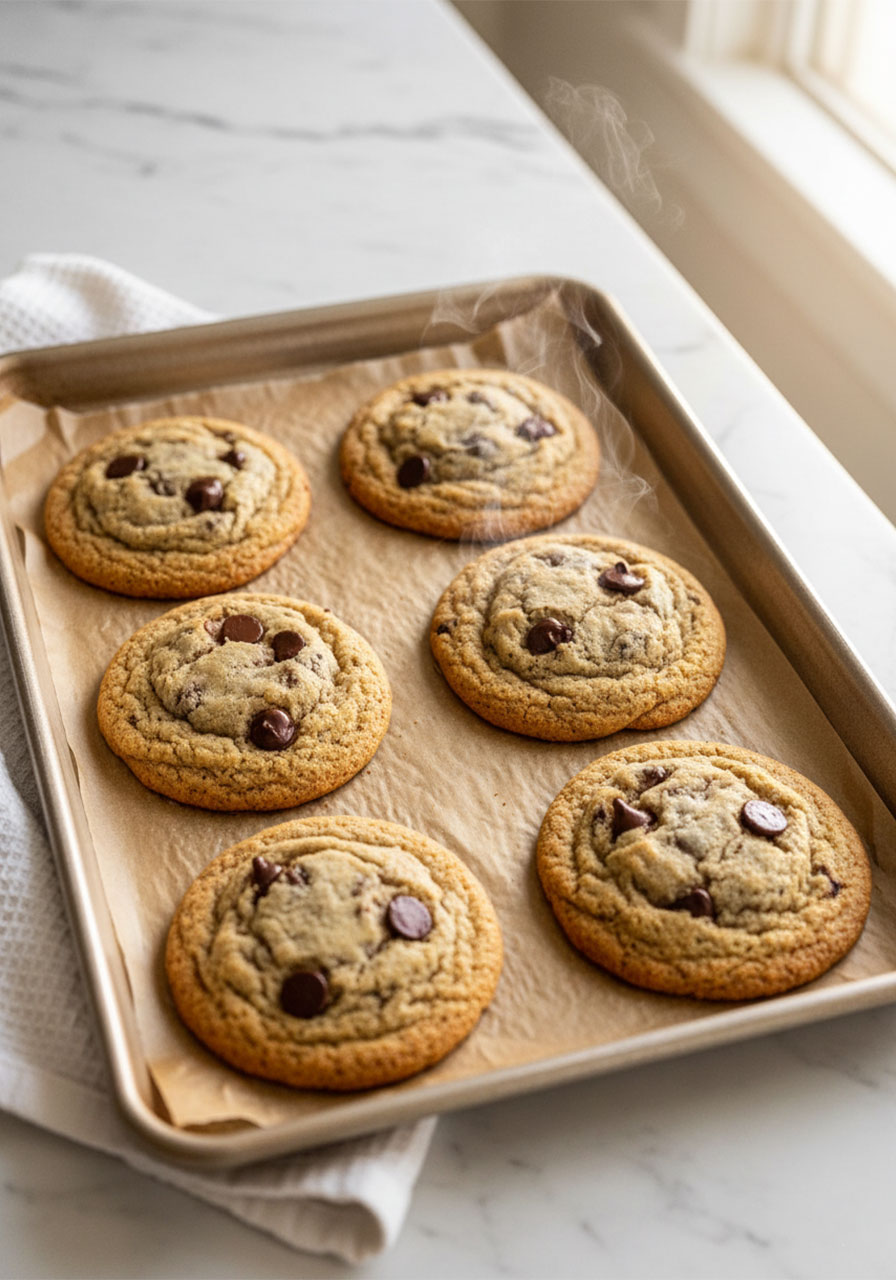
Step 8: Bake
Bake on the middle rack of your oven for 12 minutes.
Here’s the key: pull them out while the center still looks underdone. Seriously – they should look like they need another couple of minutes. They don’t.
The cookies will continue to cook on the hot pan after you remove them from the oven.
Step 9: Cool on the Pan
Let the cookies rest on the hot baking sheet for 5–10 minutes before transferring them.
During this resting time, they’ll de-puff, firm up, and settle into that perfect chewy texture. This step is what gives you a soft, gooey center with crispy golden edges.
Then enjoy – preferably warm, with a cup of tea or your favorite plant-based milk on the side.
Why You Must Chill the Cookie Dough
I’ll be honest – when I first started baking, I used to skip the chilling step constantly. I was impatient and just wanted cookies NOW.
Then I learned what a difference it actually makes – and I never skip it anymore.
Here’s what chilling does for your cookies:
Better Flavor
When the dough rests in the fridge, the ingredients have time to meld and develop together. The result is a deeper, richer, more complex flavor – almost like the cookies have been baked at a fine bakery.
Even just 30 minutes makes a noticeable difference. Overnight? Extraordinary.
Less Spread
Cold butter spreads much more slowly in the oven than room-temperature butter. Chilled dough also allows the flour time to fully hydrate.
Both of these factors mean your cookies stay thick and round – instead of spreading into flat, crispy discs.
Chewier Texture
Chilling the dough produces a noticeably chewier, denser cookie – which is exactly what we’re going for here.
The minimum is 30 minutes. But if you can plan ahead and chill overnight, you’ll be amazed at the difference.
The Secret to Perfectly Soft and Gooey Cookies
This is the single most important tip in this entire recipe.
Do not overbake.
When you pull the cookies from the oven at 12 minutes, the centers will still look soft, pale, and slightly underdone. This is intentional. This is correct.
The hot baking sheet continues cooking the bottoms for another 5–10 minutes as they cool. By the time they’re ready to eat, the centers will be perfectly set – soft and gooey, not raw.
If you wait until the centers look fully baked before pulling them out, you’ll end up with dry, crumbly cookies. Trust the process.
A few more texture tips:
Bake on the middle rack for a softer texture (lower rack = crispier bottom)
Don’t over-cream the butter and sugar – 1–2 minutes only
Measure flour correctly – too much flour = dry, cakey cookies
Let them cool on the pan – not on a wire rack – for the first 5–10 minutes
Is Vegan Cookie Dough Safe to Eat Raw?
Oh, the raw cookie dough question. We’ve all been there – sneaking spoonfuls before the cookies make it to the oven.
Here’s what you need to know: even without eggs, raw cookie dough is not considered safe to eat.
While eggs are a known concern, raw flour can also carry harmful bacteria that may cause foodborne illness. So it’s best to wait for the finished cookie – which is absolutely worth it, I promise.
If you’re craving edible cookie dough (totally valid), the solution is to make a heat-treated dough specifically designed for raw eating. There are lots of great recipes for edible vegan cookie dough online.
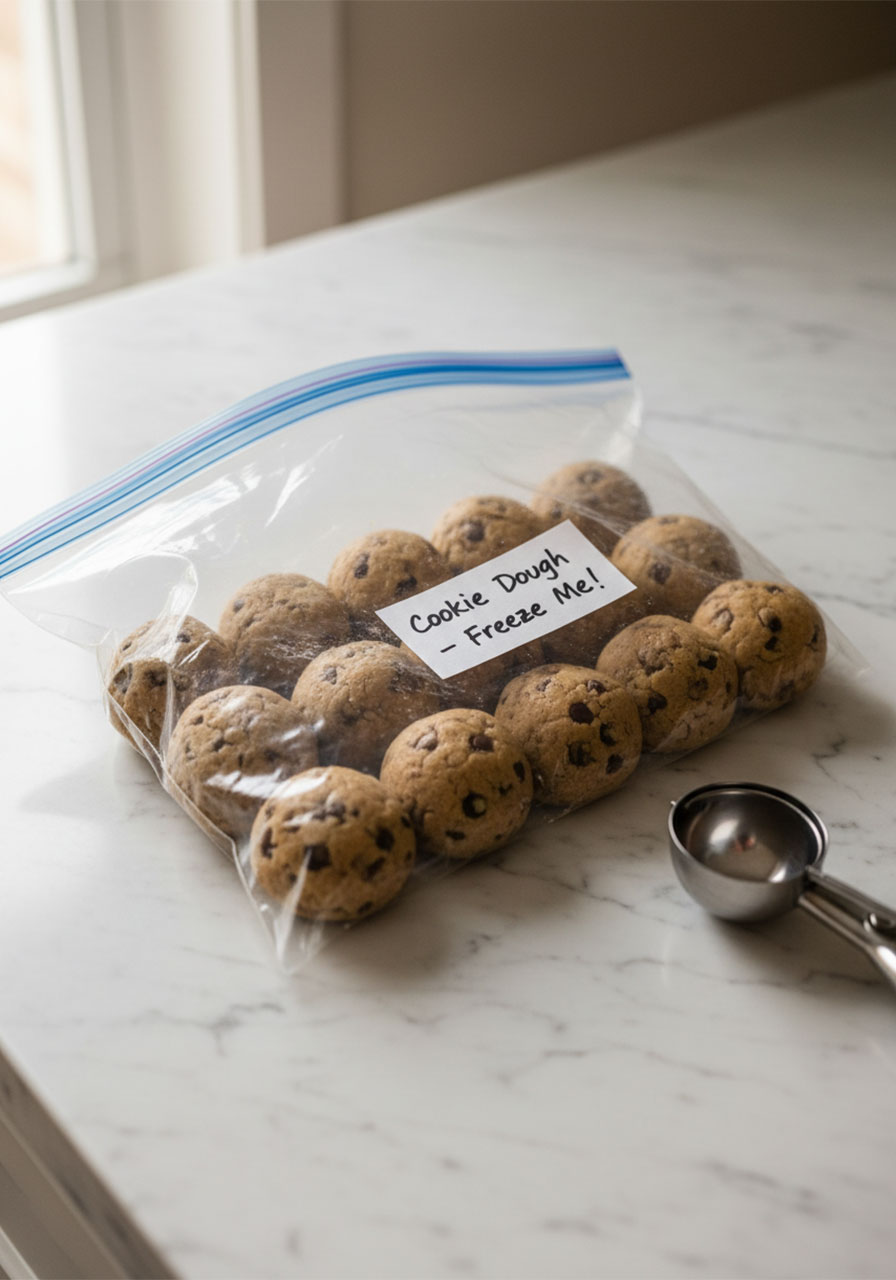
Can You Freeze Vegan Cookie Dough?
Yes! This is one of my favorite things about this recipe.
You can prep a batch of cookie dough, freeze it, and have fresh-baked cookies ready in minutes whenever the craving hits.
Here’s how:
Scoop the dough into balls as instructed
Place the dough balls on a baking sheet and freeze for 30 minutes
Transfer the frozen balls to a zip-lock freezer bag, pressing out as much air as possible
Store in the freezer for up to one month
When you’re ready to bake, place them directly on a lined baking sheet from frozen and add 2–3 extra minutes to the baking time.
Honestly, there is something so peaceful about knowing a little treat is waiting in your freezer for a hard day. It’s a small act of kindness toward your future self.
High-Altitude Baking Tips
If you live at 3,500 feet above sea level or higher, you may notice your cookies spreading more than usual and browning faster.
This happens because the lower air pressure at high altitudes causes baked goods to rise and spread more quickly.
Here’s an easy adjustment:
Add 2 tablespoons extra flour to the recipe
Remove 2 tablespoons of sugar from the recipe
These small changes help stabilize the dough and give you that thick, chewy result regardless of your elevation.
How to Store These Cookies
Freshly baked cookies are always best the day they come out of the oven – warm, gooey, and perfect.
But if you have leftovers (if!), here’s how to store them:
Room temperature: Store in an airtight container for up to 4–5 days. Place a slice of bread in the container – it keeps the cookies soft by absorbing excess moisture.
Refrigerator: Store for up to one week. Warm for 10–15 seconds in the microwave before eating to bring back that gooey texture.
Freezer (baked): Fully baked cookies can be frozen for up to 2 months in a sealed bag. Thaw at room temperature or warm gently in the oven at 300°F for 5 minutes.
Variations and Substitutions
Once you’ve mastered this base recipe, there are so many fun ways to make it your own.
Mix-In Ideas
Chopped walnuts or pecans – adds crunch and a lovely nutty flavor
Dried cranberries – a beautiful sweet-tart combination with dark chocolate
Shredded coconut – adds chewiness and a subtle tropical flavor
Peanut butter chips – for a chocolate-peanut butter dream cookie
Sea salt flakes on top – a pinch of flaky sea salt right before baking elevates these to bakery level
Flour Swaps
I haven’t personally tested this recipe with gluten-free all-purpose flour, but a good 1:1 gluten-free flour blend (like Bob’s Red Mill or King Arthur’s GF blend) often works well in cookie recipes. If you try it, let me know how it goes!
Sugar Variations
Coconut sugar can be substituted for the granulated sugar if preferred. Keep in mind it has a deeper, more molasses-like flavor that will slightly alter the taste – but it’s delicious in its own right.
A Note on Sharing and Generosity
There’s something genuinely sweet about making food by hand and sharing it with people you love.
Whether it’s a plate left on a neighbor’s doorstep, a batch brought to a church gathering, or cookies baked with your kids on a slow Saturday afternoon – food made with intention carries something extra in it.
Baking from scratch, choosing wholesome ingredients, taking care of our bodies and the people around us – these are all small, quiet ways of living out values that matter.
As Proverbs 31 reminds us, a woman who takes care of her household with diligence and love is doing something meaningful – even in the kitchen.
So bake these cookies with joy. Share them freely. And don’t forget to save a couple warm ones for yourself.
“She looks well to the ways of her household and does not eat the bread of idleness.” – Proverbs 31:27
Frequently Asked Questions
Can I use coconut oil instead of vegan butter?
Coconut oil can work as a substitute, but the texture and spread will be different. Vegan butter (especially tub-style) gives a much closer result to traditional cookies. If using coconut oil, opt for refined coconut oil to avoid a strong coconut flavor.
Why did my cookies turn out flat?
A few possible reasons: the dough wasn’t chilled long enough, the butter was too warm or melted, too much air was whipped into the dough during mixing, or the flour was under-measured. Chill the dough, and measure your flour by spooning – not scooping.
Why did my cookies turn out dry or crumbly?
This is almost always a flour measurement issue. Scooping flour packs it into the cup and adds way more than the recipe calls for. Use the spoon-and-level method, or weigh 240 grams on a kitchen scale.
Can I double this recipe?
Absolutely! This recipe doubles beautifully. Just make sure to bake in batches on separate sheets – don’t overcrowd the pan.
How do I know when the cookies are done?
The edges should look golden and set, but the centers should still look slightly underdone and pale. This is correct! Remove them at this point and let them rest on the hot pan for 5–10 minutes. They’ll firm up perfectly as they cool.
Can I make these gluten-free?
A 1:1 gluten-free all-purpose flour blend may work in this recipe. Results can vary by brand – look for blends that contain xanthan gum for best structure.
What vegan chocolate chips do you recommend?
Enjoy Life Foods brand is widely available and totally dairy-free. Lily’s, Trader Joe’s semi-sweet chips, and many store brands are also vegan – just check the label.
How long can I keep the dough in the fridge?
Covered cookie dough can be stored in the refrigerator for up to 3 days. This is great for prepping ahead of time!
Closing Encouragement
You don’t have to be a professional baker to create something beautiful in your kitchen.
This recipe is simple, forgiving, and made for real life – for busy mornings, slow weekends, and everything in between.
Whether you’re baking for your family, for a friend who needs some joy delivered to their door, or just for yourself on a quiet evening – these cookies are worth every minute.
Take care of yourself. Take care of the people you love. And enjoy every single warm, gooey bite.
For more wholesome recipes and faith-filled encouragement for your daily life, explore more on the Christian Faith Goods blog.
Chewy Vegan Chocolate Chip Cookies
The best vegan chocolate chip cookies – crispy on the edges, soft and gooey in the center, and loaded with melted chocolate in every bite. Made with simple pantry staples and completely dairy-free and egg-free.
1/2 cup vegan butter, slightly softened (tub-style recommended)
1 cup light brown sugar, packed
3 tablespoons granulated sugar
1/4 cup plant-based milk (almond, oat, soy, or cashew)
2 teaspoons vanilla extract
1 3/4 cups all-purpose flour (240g – spoon and level, do not scoop)
1 teaspoon baking soda
1/2 teaspoon salt
1 cup vegan chocolate chips
Instructions
Add vegan butter, packed brown sugar, and granulated sugar to a large bowl. Using a handheld mixer or stand mixer, cream together on medium speed for 1–2 minutes, until just combined. Do not over-mix.
Add the plant-based milk and vanilla extract. Mix briefly to combine.
Add the all-purpose flour, baking soda, and salt. Fold together with a spatula until evenly combined. Do not over-stir.
Stir in the vegan chocolate chips until evenly distributed throughout the dough.
Cover the bowl tightly with plastic wrap and refrigerate for at least 30 minutes (up to overnight for best results).
When ready to bake, preheat oven to 350°F (175°C). Line a large baking sheet with parchment paper.
Scoop dough into balls approximately 1.5 inches wide. Roll gently between your palms and place on the prepared baking sheet, spacing 2 inches apart. Makes approximately 15 cookies.
Bake on the middle rack for 12 minutes. Remove from the oven while the centers still appear slightly underdone – this is correct and intentional.
Let cookies cool on the hot baking sheet for 5–10 minutes before transferring. They will firm up and de-puff as they cool, resulting in a soft chewy center with crispy edges.
Enjoy warm – best fresh from the oven!
Notes
Flour measurement is critical: Spoon flour gently into the measuring cup and level off with a flat edge. Do not scoop directly from the bag. For accuracy, weigh 240 grams.
Do not over-bake: Cookies should look underdone when removed from the oven. They continue to cook on the hot pan as they cool.
Middle rack: Baking on the middle rack gives softer cookies. Lower rack produces crispier bottoms.
Chilling is key: At minimum, chill 30 minutes. For best flavor and texture, chill 1 hour or overnight. Dough can be refrigerated up to 3 days.
Prevent spread: Don’t over-cream the butter and sugar. Chill the dough. Measure flour accurately.
High altitude (3,500+ ft): Add 2 tablespoons flour and remove 2 tablespoons sugar to prevent over-spreading.
Freezing dough: Roll into balls, freeze on a sheet for 30 minutes, transfer to a zip-lock bag, freeze up to 1 month. Bake from frozen, adding 2–3 minutes to baking time.
Storage: Store baked cookies in an airtight container at room temperature up to 4–5 days. Add a slice of bread to keep them soft.
NUTRITION (per cookie, approximate)
Calories: 245
Fat: 11g
Saturated Fat: 5g
Carbohydrates: 37g
Fiber: 1.5g
Protein: 3g
Nutrition information is approximate and provided for general reference only. It is not intended as medical or dietary advice.