Vegan Recipes
Vegan Brookies Recipe (Ooey Gooey Brownie Cookies!)
May
Some desserts just feel like a gift.
And honestly? These vegan brookies are exactly that.
If you’ve ever stood in front of the dessert table unable to choose between a fudgy brownie and a warm chocolate chip cookie – this recipe solves that problem once and for all.
Two layers. One pan. Zero dairy. And every single bite is pure chocolatey joy.
Whether you’re baking for a family gathering, a church potluck, or just a quiet evening when you need something sweet – this is the recipe you’ll come back to again and again.
There’s something beautiful about sharing food made with intention. As 1 Corinthians 10:31 reminds us, “Whatever you do, do it all for the glory of God.” Even the way we nourish ourselves and the people we love can be an act of care and gratitude.
Now, let’s make something delicious.
In This Post, You’ll Find:
- Why these vegan brookies work so well
- The best plant-based butter for baking
- Easy ingredient swaps and substitutions
- Common mistakes to avoid
- Storage and freezing tips
- Serving ideas
- Full recipe card at the bottom
What Are Brookies, Exactly?
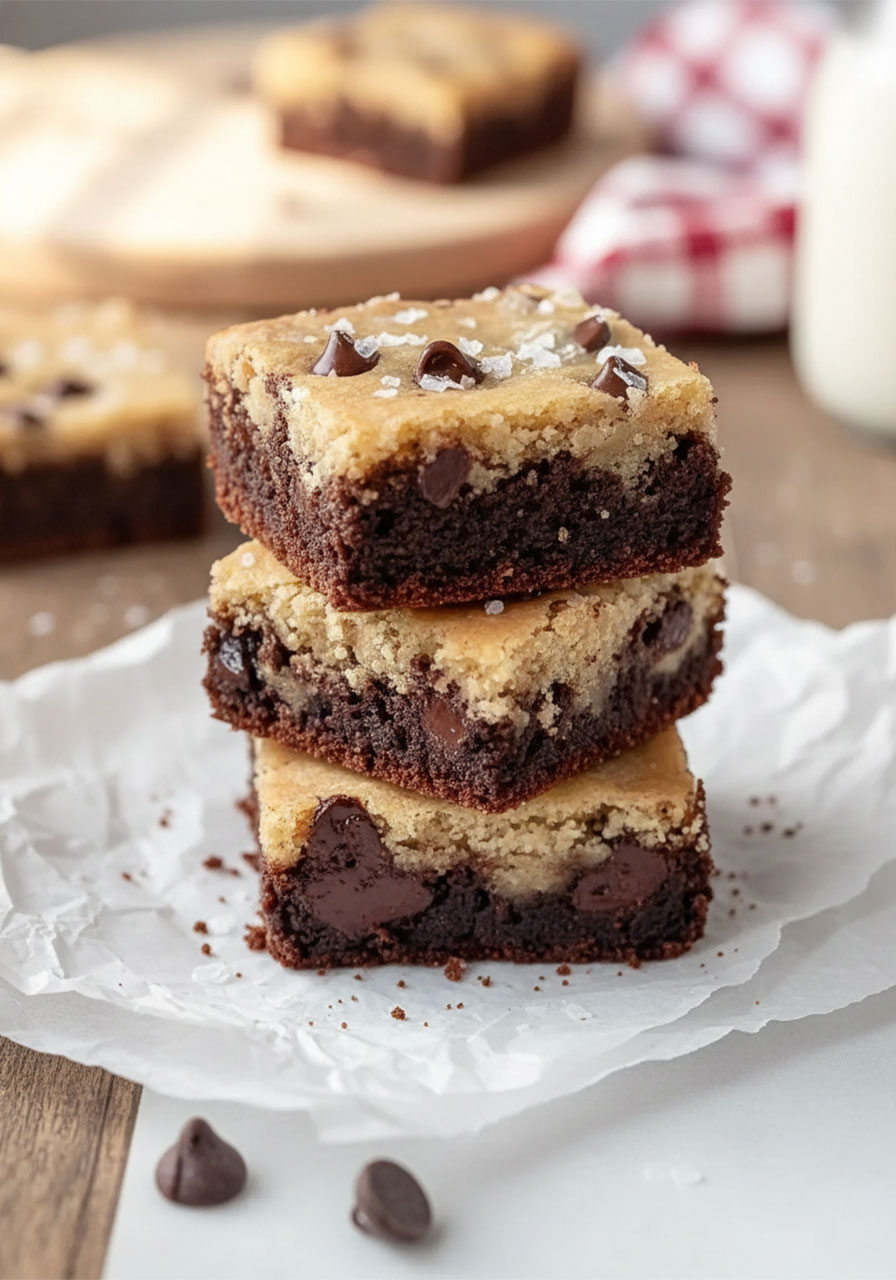
A brookie is exactly what it sounds like – a brownie and a cookie baked together into one dessert bar.
The bottom layer is a rich, fudgy chocolate brownie base.
The top layer is a soft, chewy chocolate chip cookie dough.
They bake together in one pan, and the result is something truly special. The two layers stay distinct – you get that dense chocolate richness on the bottom and a slightly crispy, golden cookie layer on top.
This version is completely vegan. No eggs. No dairy. But trust me – you will not miss either one.
Why You’ll Love This Recipe
1. It’s Completely Plant-Based
Made without any eggs or dairy, these brookies are perfect for vegans, those with lactose intolerance, or anyone trying to reduce animal products.
And they taste just as good – if not better – than the original.
2. No Fancy Ingredients Needed
Everything in this recipe is easy to find at most grocery stores.
Plant-based butter. Non-dairy milk. Ground flaxseed. Simple pantry staples you probably already have.
3. Two Desserts in One
Can’t decide what to bake? You don’t have to.
Brownies AND cookies, together, in one beautiful pan. It’s a win every single time.
4. Perfect for Sharing
These are a crowd-pleaser at parties, potlucks, bake sales, and church events.
No one will guess they’re vegan. And once they take a bite, they won’t care.

How to Make Vegan Brookies (Step-by-Step)
Don’t let the two layers intimidate you.
This recipe is genuinely straightforward, and once you’ve made it once, you’ll have it memorized.
Here’s exactly what to do:
Step 1: Preheat Your Oven and Prep Your Pan
Start by preheating your oven to 350°F (180°C).
Grease your 8×8-inch baking dish and line it with parchment paper.
Leave a little overhang on the sides – this makes it so much easier to lift the brookies out cleanly once they’ve cooled.
Step 2: Make Your Flax Egg
In a small bowl, combine 2 tablespoons of ground flaxseed with 5 tablespoons of non-dairy milk.
Stir it together and set it aside for 2–3 minutes.
You’ll notice it thickens up into a gel-like consistency – that’s exactly what you want. This is your egg replacer, and it works beautifully as a binder in the brownie layer.
Step 3: Make the Brownie Layer
In a large microwave-safe bowl, add your plant-based butter and dairy-free chocolate chips.
Microwave in 30-second intervals, stirring between each, until everything is fully melted and smooth.
Stir in the granulated cane sugar and let the mixture cool for a few minutes. You don’t want it so hot that it cooks the flax egg when you add it.
Once it’s cooled slightly, stir in your prepared flax egg mixture.
Now sift in the flour, cocoa powder, baking powder, and salt.
Gently fold everything together until just combined. Stop as soon as you no longer see dry flour streaks.
Press this brownie batter evenly into the bottom of your prepared baking dish. Set aside.
Step 4: Make the Cookie Dough Layer
In a separate large bowl, melt your second portion of plant-based butter in the microwave for 20–30 seconds.
Whisk in the granulated cane sugar and brown sugar until they’re mostly dissolved and the mixture looks smooth.
Stir in the non-dairy milk and vanilla essence.
Sift in the flour, cornstarch, baking soda, and salt. Gently mix until a thick dough comes together.
Fold in the chocolate chips.
The dough will be quite thick – that’s normal. If needed, press the chocolate chips in with your hands to distribute them evenly throughout the dough.
Step 5: Assemble the Brookies
Using a cookie scoop or large spoon, drop dollops of cookie dough all over the top of the brownie layer.
Then gently press and spread the dough into an even layer that covers the brownie batter completely.
It doesn’t have to look perfect – it just needs to be roughly even so both layers bake at the same rate.
Optional but recommended: Pop the assembled pan into the fridge for 30 minutes before baking. This helps the layers stay distinct and prevents the cookie dough from spreading too much.
Step 6: Bake
Cover the baking dish loosely with aluminum foil.
Bake for 20 minutes with the foil on.
Then remove the foil and continue baking for another 15–20 minutes, until the top is light golden brown.
Start checking a few minutes before the time is up. Plant-based butter tends to brown faster than regular butter, so keep an eye on it toward the end.
The center may still look slightly soft when you pull it out – that’s okay. It will continue to firm up as it cools.
Step 7: Cool, Slice, and Serve
Let the brookies cool in the pan for at least 15–20 minutes before slicing.
I know it’s tempting to dig in right away – but this cooling time is important. It’s what gives you those clean, beautiful slices with defined layers.
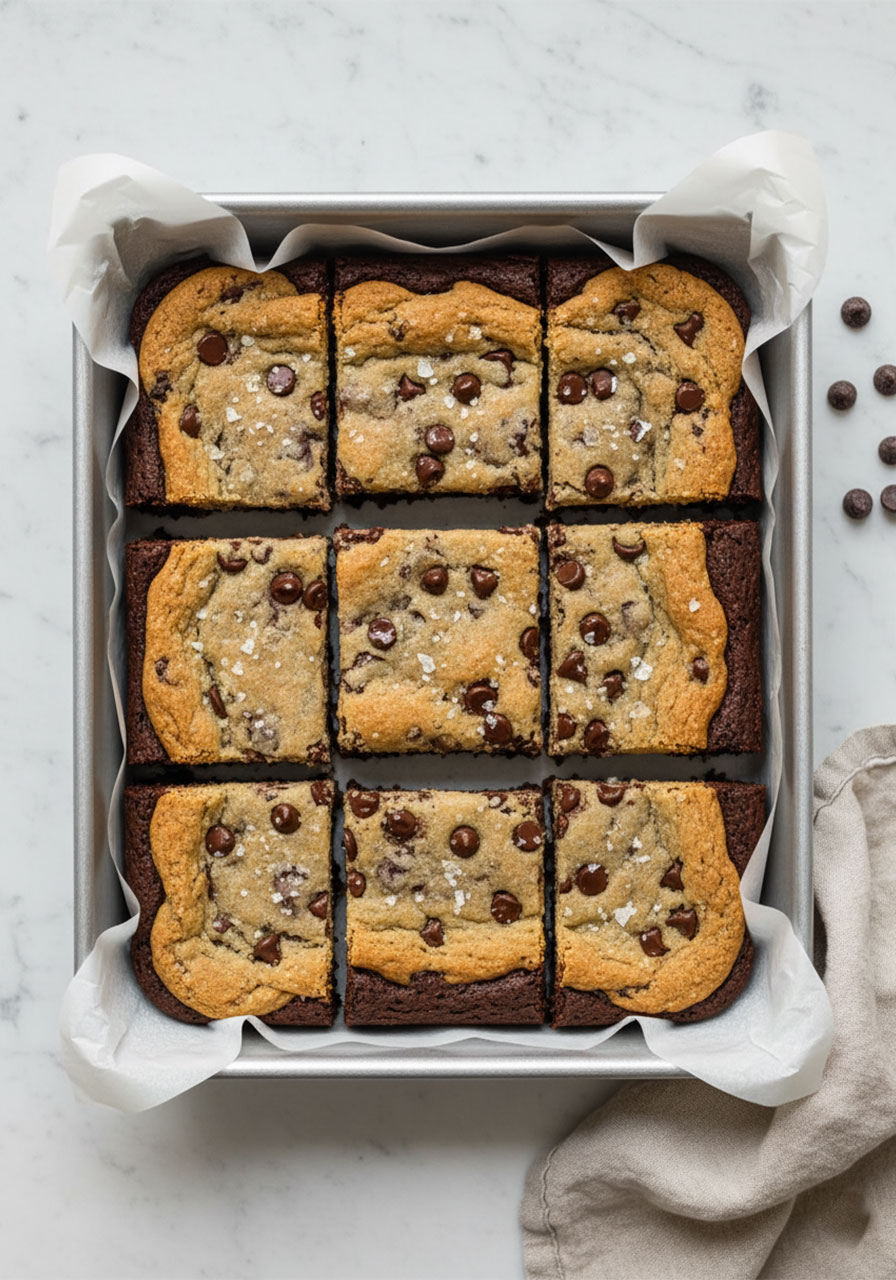
Once cooled, lift the brookies out using the parchment overhang, place on a cutting board, and slice into squares.
Finish with a sprinkle of flaky sea salt on top if you’d like. Then serve as-is, or with a scoop of dairy-free vanilla ice cream on the side.
And enjoy every single bite.
Choosing the Best Plant-Based Butter
Not all dairy-free butter is the same – and this matters when you’re baking.
For the best results, choose a stick-style vegan butter, not a tub spread. Stick butters have a more consistent fat content and behave more like traditional butter in baked goods.
Some reliable options to look for:
- Earth Balance Baking Sticks – widely available and great for baking
- Miyoko’s Cultured Vegan Butter – rich flavor and excellent texture
- Country Crock Plant Butter Sticks – easy to find at most stores
One important tip: let your plant-based butter come to room temperature before using it.
But don’t let it get too warm. If it starts to look oily or separates, it’s gone too far. You want it soft but still holding its shape.
Ingredient Swaps and Substitutions
This recipe is wonderfully flexible. Here’s what you can swap if needed:
Plant-Based Butter
Solid coconut oil works as a 1:1 replacement. Just know it may add a subtle coconut flavor to your brookies. Some people love that – others prefer neutral butter.
Ground Flaxseed
Ground chia seeds work equally well in the same amount. You can also use 3 tablespoons of mashed banana or unsweetened applesauce, though this can make the texture slightly more cakey than chewy.
Looking for a packaged egg replacer? Bob’s Red Mill Egg Replacer is another great option that many bakers swear by.
Non-Dairy Milk
Any plant-based milk works here. Oat milk, almond milk, soy milk, and cashew milk are all great choices.
Avoid canned coconut milk – it’s too thick and will affect the texture.
Cornstarch
Arrowroot powder or potato starch can be substituted in the same amount. These keep the cookies soft and chewy.
Plain Flour
A 1:1 gluten-free flour blend works if needed. Just make sure it contains xanthan gum for the right texture. One reader made these with Bob’s Red Mill 1:1 GF flour and coconut oil and said they turned out delicious!
Chocolate Chips
Any dairy-free chocolate works – dark chocolate chunks, mini chips, or even a roughly chopped vegan chocolate bar. Just double-check the label if you need it to be fully plant-based.
Mistakes to Avoid When Making Vegan Brookies
A few small things can make a big difference in how these turn out. Here’s what to watch for:
Overmixing the Dough
This is the most common mistake.
Overmixing develops the gluten in the flour and leads to a tough, dense texture. Mix just until everything is combined – then stop.
Skipping the Chilling Step
Once your brownie layer is pressed into the pan and your cookie dough is ready, resist the urge to bake immediately.
Chilling the assembled layers for at least 30 minutes helps prevent spreading and keeps the two layers distinct and beautiful.
Scooping Flour Directly From the Bag
When you scoop flour with the measuring cup, you compact it – which means you end up adding more flour than the recipe intends. This makes the brookies dry and dense.
Instead, spoon the flour into the measuring cup and level it off with a straight edge.
Pulling Them Out Too Early (or Waiting Too Long)
Plant-based butter can brown faster than regular butter, so check your brookies a few minutes before the recommended time is up.
They’ll continue to set as they cool on the pan, so a slightly underdone center when you pull them out is actually perfect.
A gooey center is never a bad thing!
How to Serve Vegan Brookies
These brookies are incredible on their own – but here are a few ways to make them even better:
- Cold glass of oat milk or almond milk – perfect for dunking, and such a cozy combination
- Slightly warm with a scoop of dairy-free vanilla ice cream – let it melt just a bit into the chocolatey layers. Yes, it’s as good as it sounds.
- Dessert bar setup – if you’re hosting, set out brookies alongside small cups of different plant-based milks and a bowl of fresh berries for a fun mix-and-match dessert station
- Sprinkle of flaky sea salt – this is optional but highly recommended. The salty-sweet contrast takes these to a whole new level.

Storage and Freezing Tips
Room Temperature
Store your brookies in an airtight container at room temperature for up to 5 days.
A helpful trick: place a slice of bread in the container with them. The bread absorbs moisture and keeps the brookies soft and chewy longer.
Make sure they’re completely cooled before you seal them up.
Freezing
These freeze beautifully.
Layer them in a freezer-safe container with parchment paper between each row. They’ll keep for up to 3 months.
Having a stash of frozen brookies on hand is one of life’s simple pleasures.
Thawing
Let frozen brookies thaw at room temperature for about an hour.
For that fresh-baked taste, pop one in the microwave for 10–15 seconds. The chocolate chips get warm and slightly melty again – which is absolutely wonderful.
A Faith Note
There’s something grounding about baking from scratch.
It asks you to slow down. To measure carefully. To be present in the process.
Whether you’re making these for yourself, for your family, or to bring to someone who needs a little love – the act of preparing food with intention is a form of care. It’s a quiet way of saying: you matter, and I made something just for you.
Proverbs 31:15 speaks of the woman who “provides food for her family.” That spirit – of nourishment, generosity, and love – is something we can carry into every kitchen moment, even the sweet ones.
So enjoy every bite, friend. You deserve it.
Quick Checklist Before You Bake
- ✅ Plant-based butter softened to room temperature
- ✅ Flax egg mixed and rested for at least 2–3 minutes
- ✅ Flour measured by spooning (not scooping)
- ✅ Baking dish greased and lined with parchment
- ✅ Oven preheated to 350°F (180°C)
- ✅ Plan to chill assembled layers before baking
- ✅ Flaky salt ready for topping (optional but recommended)
Frequently Asked Questions
Do these taste as good as regular brookies made with eggs and butter?
Yes – genuinely. The texture is fudgy, chewy, and rich. Most people can’t tell the difference.
Can I make these gluten-free?
Yes. A 1:1 gluten-free flour blend works well. Make sure it contains xanthan gum. One reader made them with Bob’s Red Mill 1:1 GF flour and loved the result.
I don’t have flaxseed. What can I use?
Ground chia seeds work in the same amount. Bob’s Red Mill Egg Replacer is another great packaged option found at most grocery stores. Mashed banana or applesauce (3 tablespoons) can also work, but may make the texture slightly cakey.
Why is the cookie layer still underdone after the recommended baking time?
A few things can cause this – thick cookie dough layer, oven calibration differences, or the pan size. If needed, continue baking in 5-minute increments with the foil off until the top is light golden brown. Remember, they’ll firm up as they cool.
Can I use coconut oil instead of plant-based butter?
Yes, solid coconut oil works as a 1:1 swap. A couple of readers noted they were a bit greasy the day of baking but less so the next day. The flavor is still great.
How do I get clean slices?
Let them cool fully in the pan before cutting – at least 15–20 minutes. Use a sharp knife and wipe it clean between slices for the neatest cuts.
Can I double the recipe?
Absolutely! Use a 9×13-inch baking dish and expect to add 5–10 extra minutes to the baking time.
Are these kid-friendly?
Very much so. They’re sweet, chocolatey, and completely egg- and dairy-free. Perfect for school events, playdates, or just a fun baking activity with the kids.
More Recipes You’ll Love
[Internal link suggestion: Vegan Chocolate Chip Cookies]
[Internal link suggestion: Healthy Plant-Based Snacks for Busy Women]
[Internal link suggestion: Easy No-Bake Energy Balls]
[Internal link suggestion: Clean Eating Desserts That Actually Satisfy]
Closing Encouragement
You don’t need a special occasion to bake something wonderful.
Sometimes the most nourishing thing you can do for yourself – and for the people around you – is slow down, get in the kitchen, and make something from scratch with love.
These vegan brookies are proof that you don’t have to sacrifice flavor to eat with intention. They’re indulgent, deeply chocolatey, and made with ingredients that work for almost everyone at the table.
So go ahead – preheat that oven. You’ve got everything you need.
Explore more wholesome recipes and faith-filled encouragement on the Christian Faith Goods blog.
Double Layer Vegan Brookies
Ingredients
Brownie Layer:
- 1/2 cup (115g) plant-based butter
- 1/2 cup (80g) dairy-free chocolate chips
- 1 cup (200g) granulated cane sugar
- 2 tablespoons ground flaxseed
- 5 tablespoons non-dairy milk
- 1/4 cup (25g) cocoa powder
- 1 1/2 cups (180g) plain flour
- 1/2 teaspoon baking powder
- 1/4 teaspoon salt
Cookie Dough Layer:
- 1/2 cup (115g) plant-based butter
- 1/2 cup (100g) granulated cane sugar
- 1/2 cup (100g) packed brown sugar
- 1/2 tablespoon vanilla essence
- 1/4 cup (60ml) non-dairy milk
- 2 cups (240g) plain flour
- 1 tablespoon cornstarch
- 1/2 teaspoon baking soda
- 1/4 teaspoon salt
- 1/2 cup (80g) dairy-free chocolate chips
Optional topping:
- flaky sea salt
- dairy-free vanilla ice cream
Instructions
- Preheat and Prep.Preheat your oven to 350°F (180°C). Grease and line an 8×8-inch baking dish with parchment paper. Set aside.
- Make the Flax Egg.In a small bowl, mix the ground flaxseed with 5 tablespoons of non-dairy milk. Stir and let sit for 2–3 minutes until it thickens into a gel. This is your egg replacer.
- Make the Brownie Layer.In a large microwave-safe bowl, combine the plant-based butter and dairy-free chocolate chips. Microwave in 30-second intervals, stirring between each, until fully melted and smooth.Stir in the granulated cane sugar and let the mixture cool for a few minutes.Add the flax egg mixture and stir to combine.Sift in the flour, cocoa powder, baking powder, and salt. Gently fold everything together until just combined – do not overmix.Press the brownie batter evenly into the prepared baking dish.
- Make the Cookie Dough Layer.In a separate large bowl, melt the plant-based butter in the microwave for 20–30 seconds.Whisk in the granulated cane sugar and brown sugar until mostly dissolved.Stir in the non-dairy milk and vanilla essence.Sift in the flour, cornstarch, baking soda, and salt. Mix gently until a thick dough forms.Fold in the chocolate chips. The dough will be thick – press the chips in evenly as needed.
- Assemble.Using a cookie scoop or spoon, place dollops of cookie dough over the brownie layer.Gently spread and press it into an even layer covering the brownie base completely.Optional: Chill the assembled pan in the fridge for 30 minutes before baking for better-defined layers.
- Bake.Cover the baking dish loosely with aluminum foil. Bake for 20 minutes.Remove the foil and bake for another 15–20 minutes, until the top is light golden brown.Check a few minutes before the end of baking time – plant-based butter browns faster than regular butter.
- Cool and Slice.Remove from the oven and let cool in the pan for at least 15–20 minutes. The brookies will continue to set as they cool.Slice into squares. Sprinkle with flaky sea salt if desired. Serve as-is or with a scoop of dairy-free vanilla ice cream.
Notes
Storage Tips
- Room temperature: Store in an airtight container for up to 5 days. Add a slice of bread to keep them soft.
- Freezer: Freeze in a single layer, then stack with parchment paper between layers. Keeps up to 3 months.
- Reheating: Microwave for 10–15 seconds for that fresh-baked, melty chocolate feel.
Notes and Tips
- Do not overmix either layer – mix just until combined for the best soft, chewy texture.
- Spoon flour into your measuring cup rather than scooping directly; this prevents adding too much flour.
- Chilling the assembled pan before baking (optional but recommended) helps the layers stay distinct.
- Brookies will look slightly underdone when you pull them out – that’s perfect. They firm up as they cool.
- For gluten-free brookies, use a 1:1 gluten-free flour blend with xanthan gum.