Vegan Recipes
Fluffy Vegan Japanese Pancakes (Soft, Cloud-Like & Dairy-Free!)
May
These Pancakes Will Change Your Saturday Morning
You know that feeling when breakfast feels like a little gift?
Like someone took the time to make something beautiful – just for you?
That’s exactly what these fluffy vegan Japanese pancakes feel like.
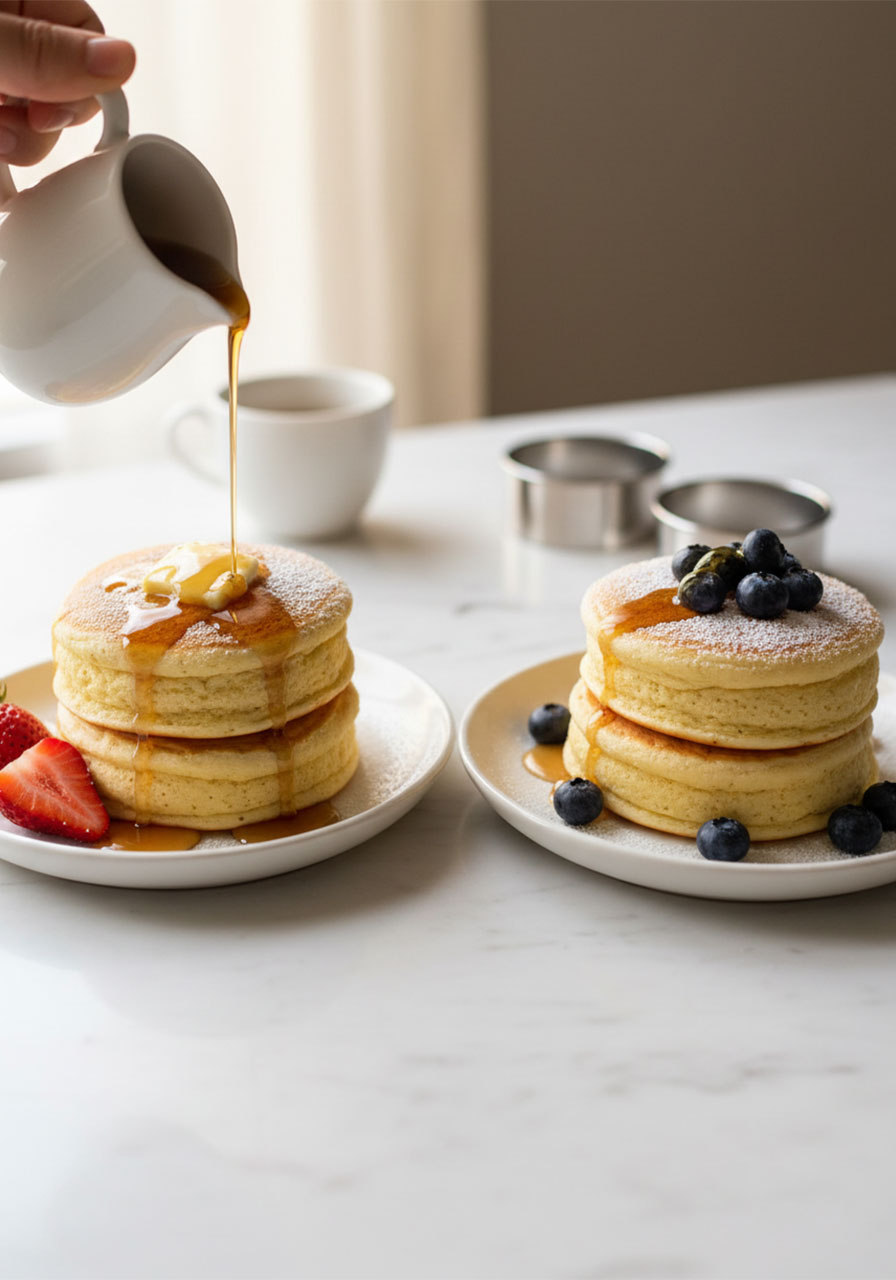
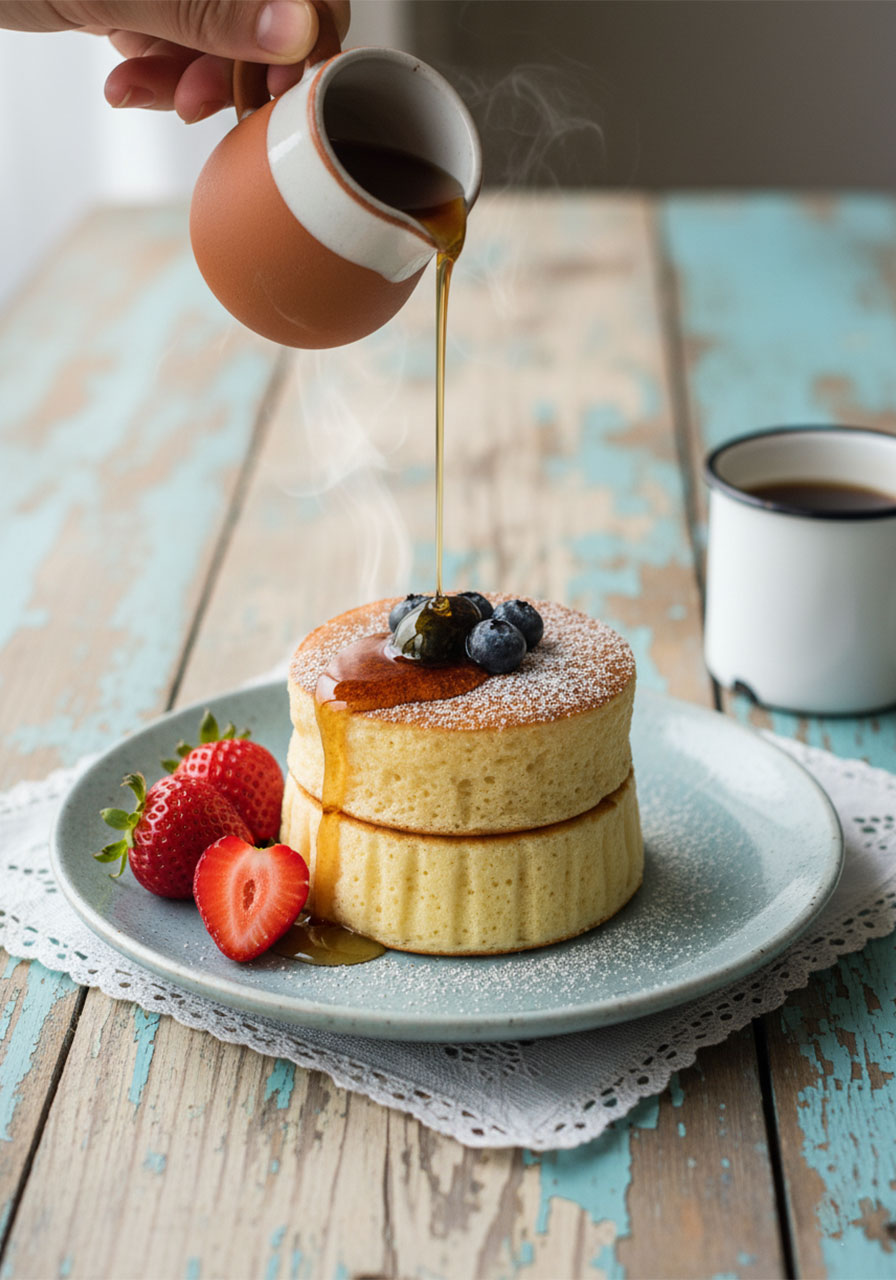
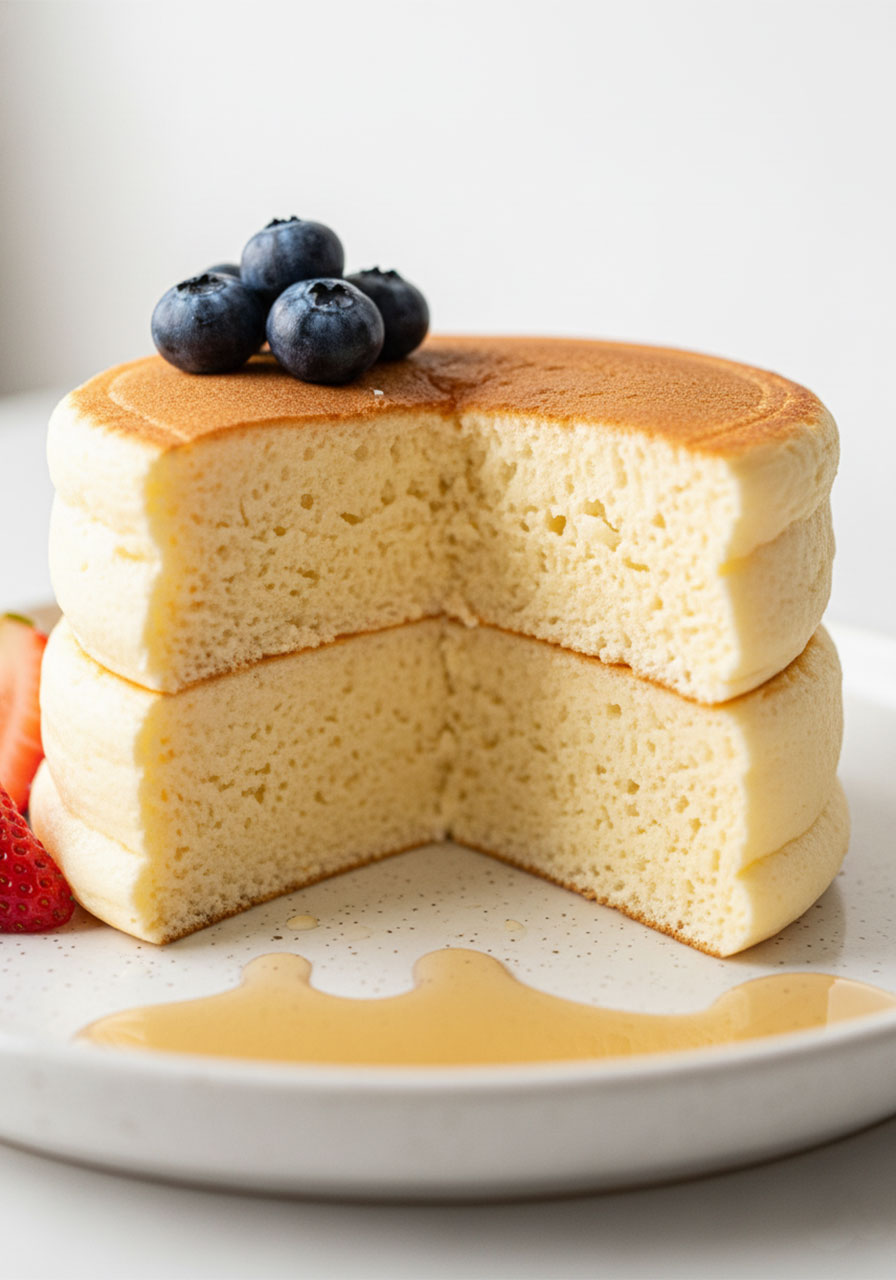
They’re tall. They’re cloud-soft. They’re golden on the outside and pillowy in the middle.
And yes – they’re completely plant-based.
No eggs. No dairy. Just pure, peaceful deliciousness.
Whether you’re making them for a slow Sunday brunch, a special breakfast with your kids, or a self-care morning all to yourself – these pancakes are worth every moment it takes to make them.
Because sometimes, taking care of your body starts with something as simple as a really, really good breakfast.
In This Post, You’ll Learn:
- What makes Japanese pancakes so different (and so amazing)
- Every ingredient you need and why it matters
- Step-by-step instructions even beginners can follow
- Tips and tricks so yours turn out perfect
- Topping ideas to make them feel extra special
- A complete recipe card you can save and come back to
What Are Japanese Pancakes – And Why Is Everyone Obsessed?
If you’ve scrolled through Pinterest or Instagram lately, you’ve probably seen them.
Those impossibly tall, perfectly round, jiggly pancakes that look more like little soufflé cakes than anything you’d find at IHOP.
Japanese pancakes – sometimes called Hottokēki (ホットケーキ) or soufflé pancakes – are a staple in Japanese cafés.
They’re known for being:
- Extra thick – often 2–3 inches tall
- Incredibly light and airy
- Slightly custardy on the inside
- Soft with a gentle bounce when you press them
Traditional versions use a lot of eggs – especially whipped egg whites – to get that signature height and texture.
But this version? It gets there with aquafaba (the liquid from a can of chickpeas) whipped into fluffy peaks.
It works beautifully. And honestly, it might even convert a few non-vegans along the way.
Why This Recipe Is Perfect for a Nourishing Morning
Here’s something worth sitting with for a moment.
Taking time to make a real, wholesome breakfast – instead of grabbing something rushed – is an act of care for yourself.
It’s a way of saying: I matter. My body matters. This morning matters.
1 Corinthians 6:19-20 reminds us that our bodies are temples – worth honoring, worth nourishing.
These pancakes aren’t just a trend. They’re an invitation to slow down.
To put on some soft music. To make something with your hands. To sit at the table and actually enjoy your food.
That kind of intentional morning does something good for your mind and spirit, not just your stomach.
What You Need to Make Vegan Fluffy Japanese Pancakes
Let’s talk ingredients. There are two versions of this recipe – one with aquafaba (Version 1, which gives you the fluffiest results) and one without (Version 2, for when you don’t have it on hand).
Here’s what you’ll need for Version 1 (with aquafaba):
The Wet Ingredients
Lite canned coconut milk (¾ cup / 180ml) – This is the sweet spot. Full-fat coconut milk makes the pancakes too heavy. Carton coconut milk doesn’t have enough fat and makes them dry. Lite canned is just right.
Apple cider vinegar (1 tbsp) – Combined with the coconut milk, this creates a plant-based “buttermilk” that adds flavor and helps the batter rise.
Vanilla extract (1 tbsp) – Don’t skip this. It adds warmth and depth.
Aquafaba (¼ cup / 60ml) – This is the liquid from a can of no-sodium chickpeas. When whipped, it creates light, stable foam that mimics egg whites. It’s the magic ingredient that makes these pancakes soar.
Cream of tartar (¼ tsp) – This stabilizes the aquafaba so your peaks hold their shape longer.
The Dry Ingredients
Pastry flour (1 cup / 120g) – Lower in protein than all-purpose flour, which means a more tender, delicate crumb. If you don’t have it, use 1 cup all-purpose flour minus 1 tbsp, then add 1 tbsp cornstarch.
Potato starch (2 tbsp / 20g) – The secret to that silky, tender texture. Don’t swap this for tapioca or corn starch – potato starch or arrowroot starch only.
Granulated sugar (3 tbsp / 36g) – Use organic cane sugar to keep the pancakes a nice light color.
Baking powder (1.5 tbsp / 21g) – A generous amount for a good lift.
Nutritional yeast (½ tsp, optional) – Adds a subtle savory depth that mimics the eggy flavor of traditional Japanese pancakes.
Black salt (small pinch, optional) – Also known as kala namak. It has a mild eggy taste that rounds out the flavor beautifully.

Equipment You’ll Need
Before you start, gather your tools. Having everything ready makes the process much smoother.
Kitchen scale – Highly recommended. This recipe is sensitive to proportions, and weight measurements are far more accurate than volume.
Ring molds – These are what give the pancakes their signature tall, cylindrical shape. You can buy them online, or DIY them with bristol board cut into a 3cm x 30cm strip, wrapped into a circle and stapled.
A deep pan or skillet with a lid – The lid traps steam, which helps the pancakes cook through without burning.
Electric hand mixer – For whipping the aquafaba into peaks.
Mixing bowls, spatula, whisk, and sifter – Standard kitchen tools you likely already have.
A quick tip: spray your ring molds with oil, or line them with parchment paper to prevent sticking.

How to Make Fluffy Vegan Japanese Pancakes – Step by Step
This recipe takes patience, but it’s absolutely worth it.
Read through all the steps before you start so nothing surprises you mid-cook.
Step 1: Make the Vegan Buttermilk
Combine the lite coconut milk and apple cider vinegar in a small bowl or measuring cup.
Stir gently and set aside for 2–3 minutes. It will slightly curdle – that’s exactly what you want.
Step 2: Mix the Dry Ingredients
Sift the pastry flour, potato starch, baking powder, nutritional yeast, and black salt into a large mixing bowl.
Add the sugar and whisk everything together until well combined.
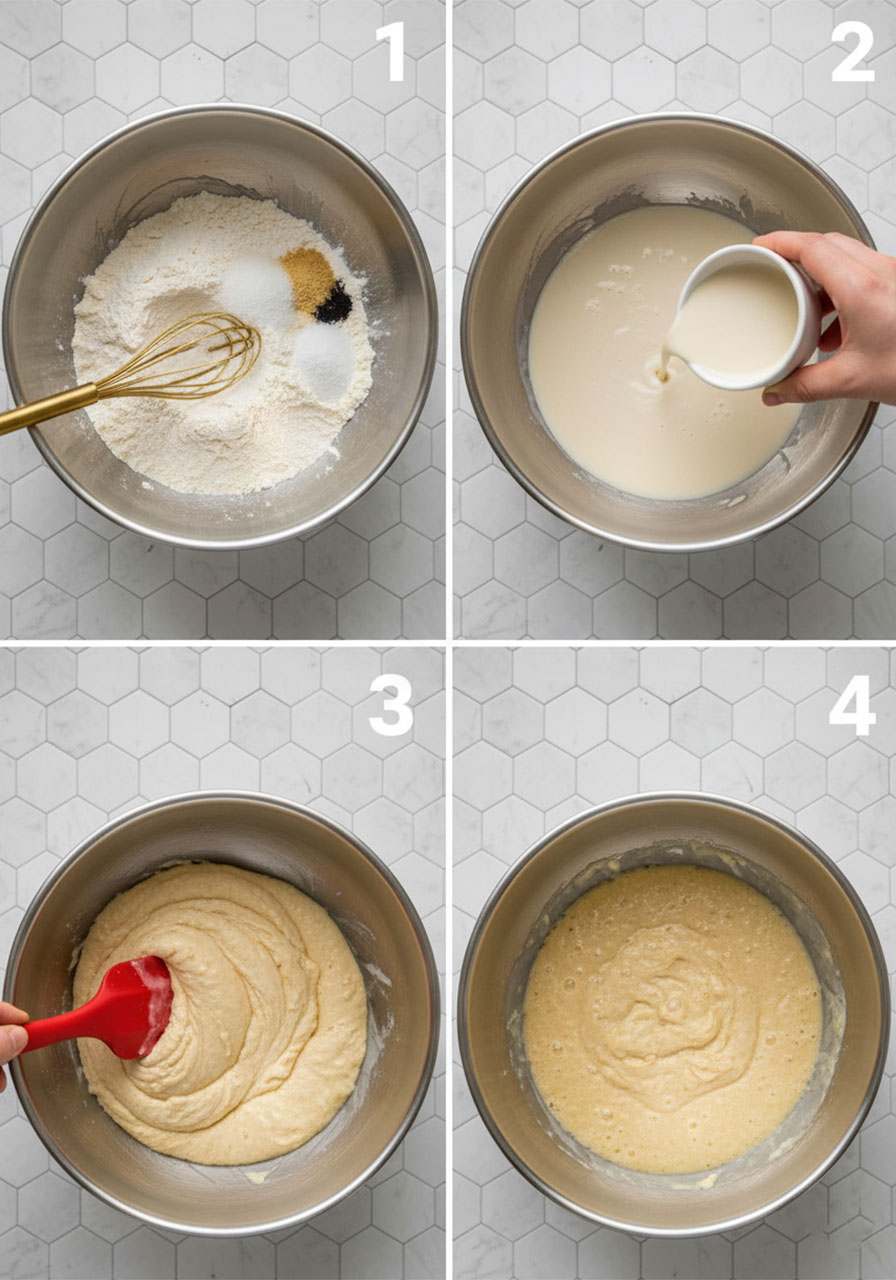
Step 3: Combine Wet and Dry
Make a well in the center of the dry ingredients.
Pour in the buttermilk mixture and vanilla extract.
Using a spatula, gently fold everything together – not a whisk. Use folding motions only.
Stop when just combined. The batter should still look lumpy. That’s good. That means you haven’t over-mixed.
A lumpy batter = fluffy pancakes. A smooth batter = flat, dense pancakes.
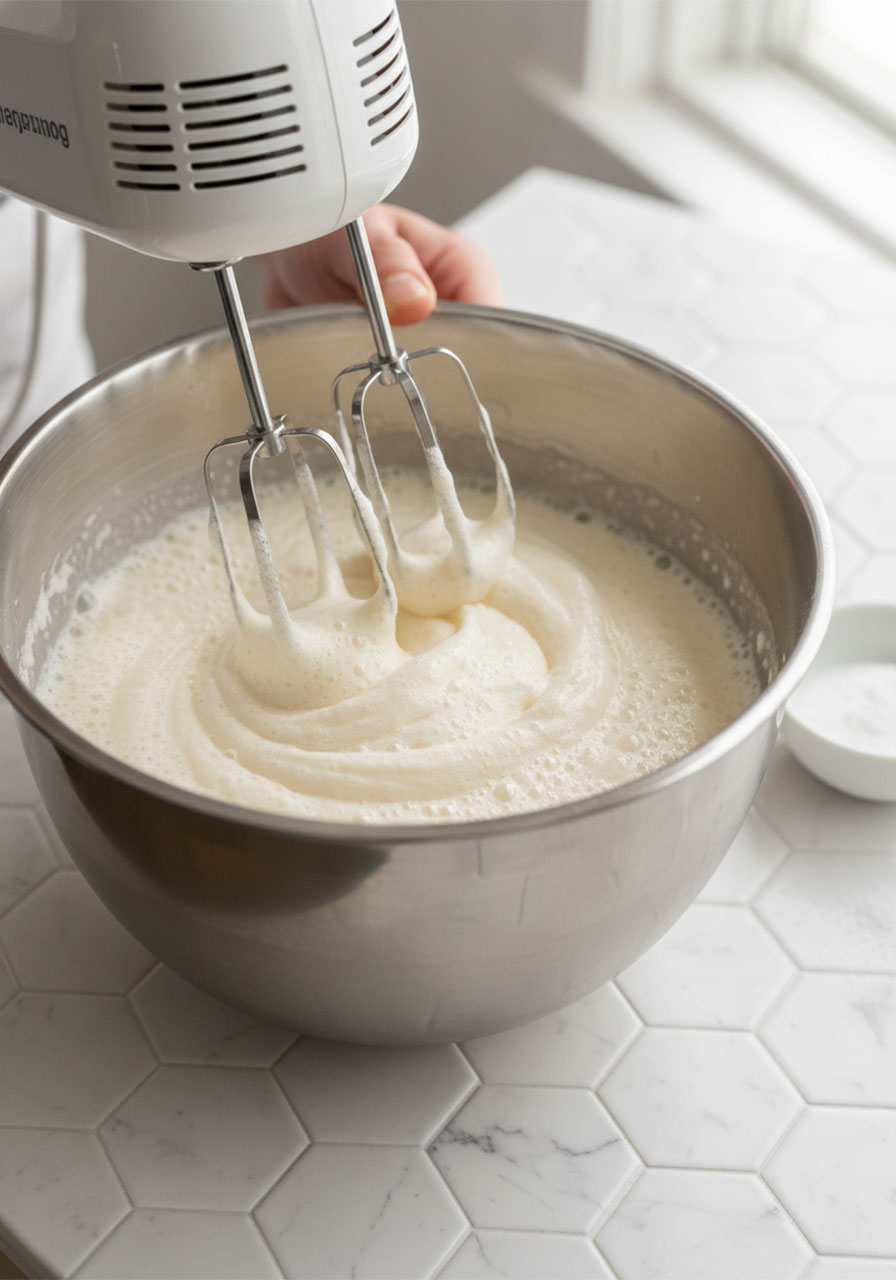
Step 4: Whip the Aquafaba
In a separate clean bowl, pour in the aquafaba.
Using your electric hand mixer, whip on medium-high speed until foamy.
Add the cream of tartar, then continue whipping until semi-stiff peaks form – the foam should hold its shape but still have a gentle curve at the tip.
Don’t over-whip. You don’t want fully stiff, dry peaks.
Step 5: Fold in the Aquafaba
Using your spatula, gently fold the whipped aquafaba into the batter in 2–3 additions.
Use slow, sweeping motions. You want to keep as much air as possible.
There should still be some lumps and the faintest streaks of foam – that’s perfect.
Step 6: Heat Your Pan
Place a deep skillet or pan over medium heat and let it warm up for a few minutes.
Then reduce the heat to low.
Spray the pan with oil or lay down a sheet of parchment paper.
Place your ring molds on the pan.
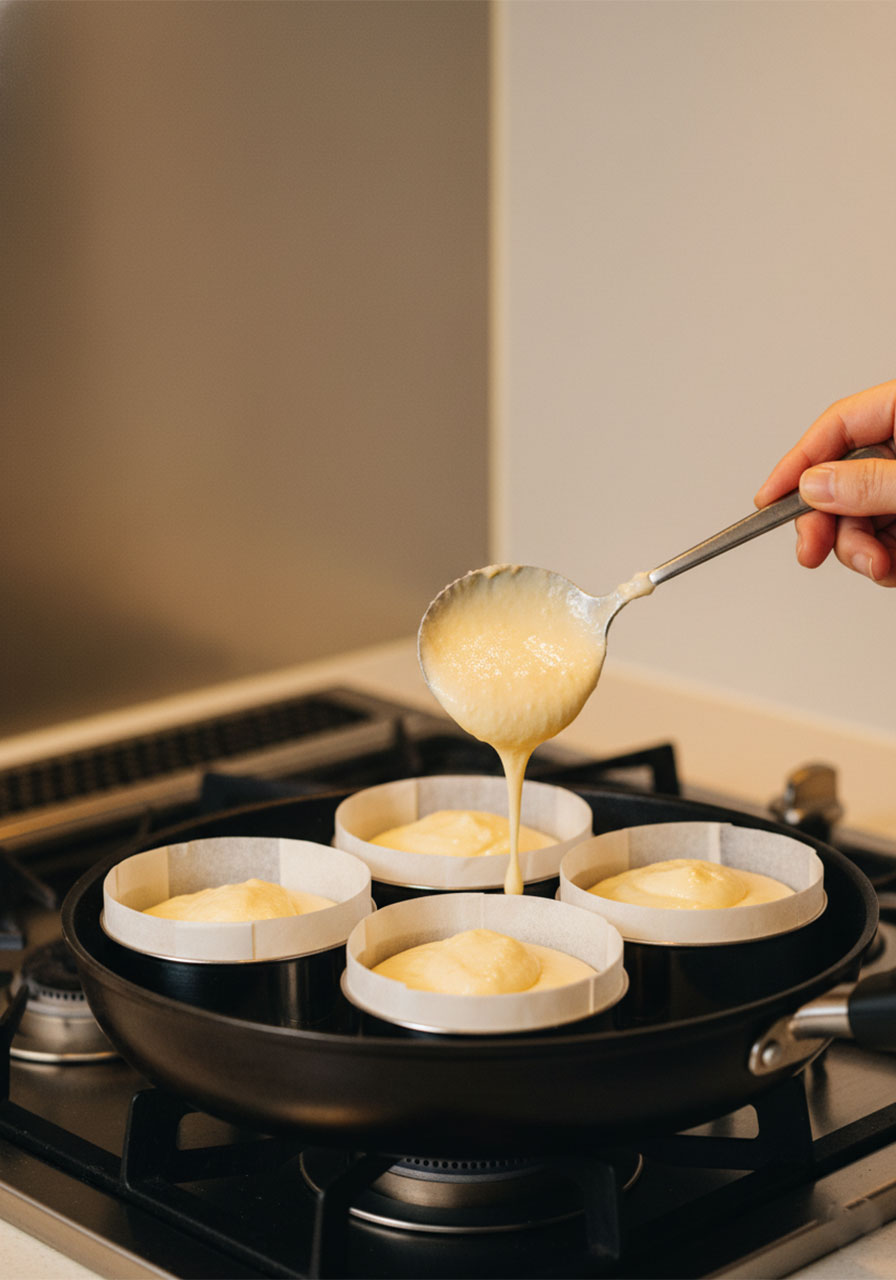
Step 7: Fill and Cook (First Side)
Spoon the batter into each ring mold, filling them about 70-80% full. Don’t overfill – the batter will rise.
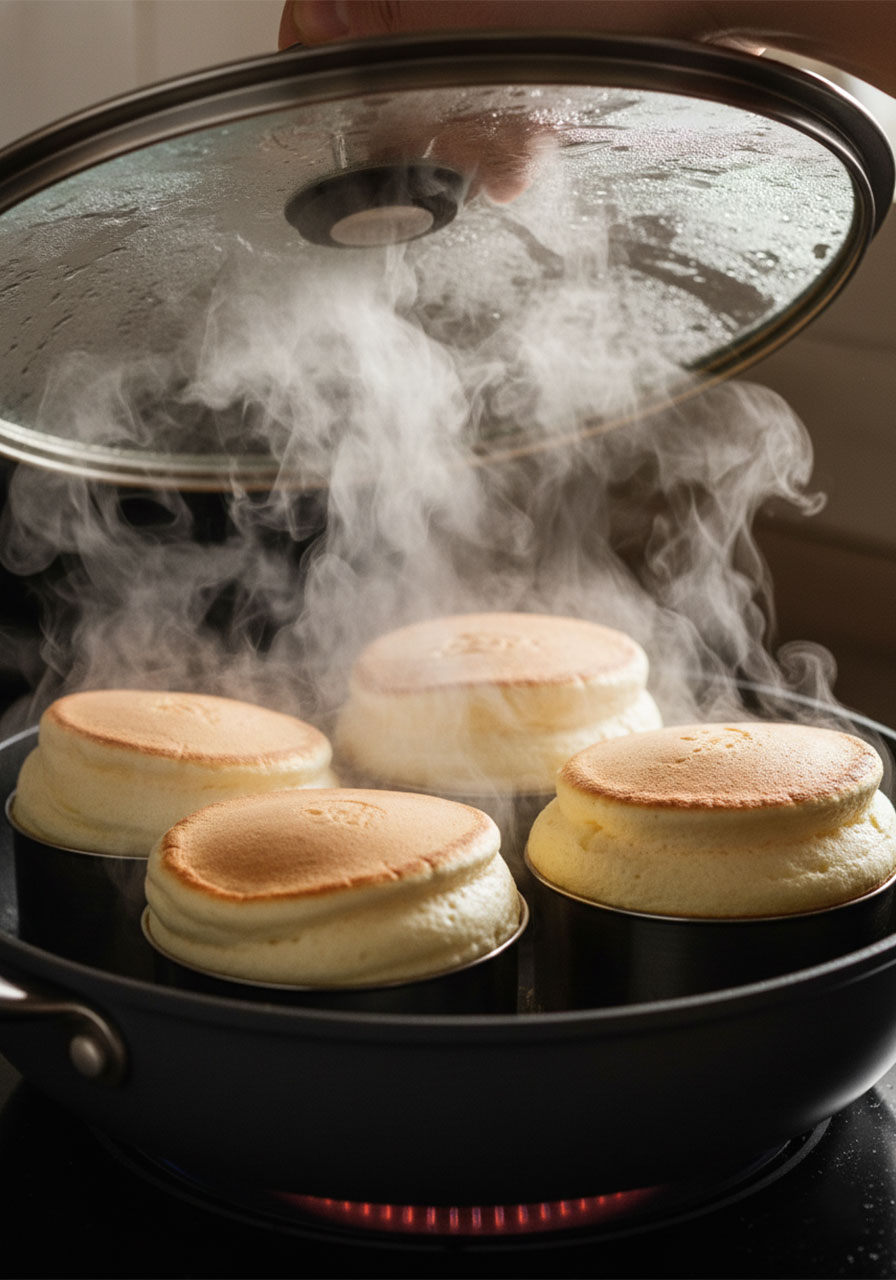
Place the lid on the pan and cook on low:
- Smaller pancakes (3cm ring molds): 9–12 minutes
- Extra fluffy pancakes (5cm ring molds): 14–17 minutes
The pancakes are ready to flip when the sides look set, the batter has risen, and the top is no longer wet or shiny.
Step 8: Flip and Finish
This is the nerve-wracking part – but you’ve got this.
Carefully slide a thin spatula under the ring mold and flip the whole thing in one confident motion.
Replace the lid and cook again:
- Smaller pancakes: 5–8 minutes
- Extra fluffy pancakes: 10–15 minutes
Test doneness with a toothpick inserted in the center. It should come out clean or with just a few moist crumbs.
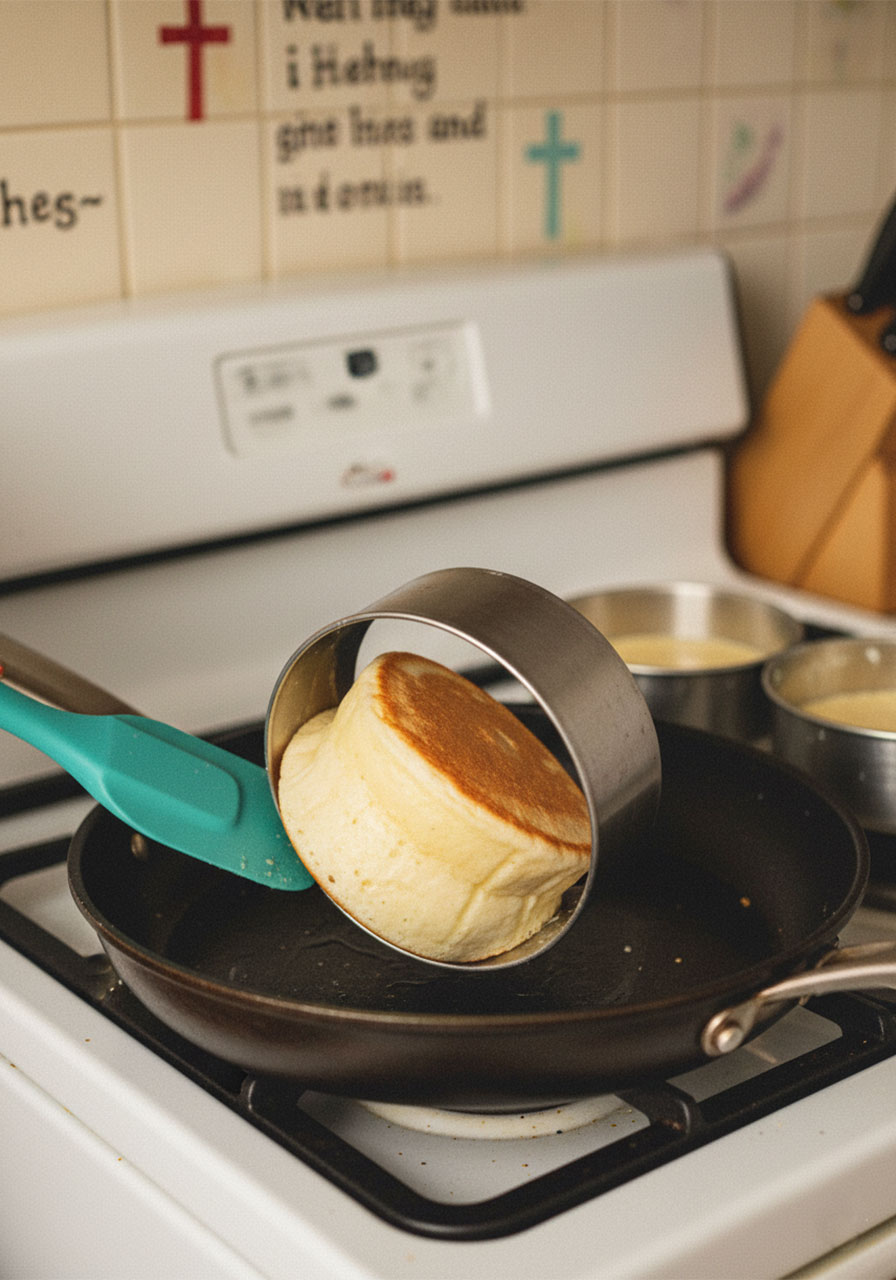
Step 9: Serve Immediately
Carefully remove the ring molds – use a thin knife to run around the edge if needed.
Transfer to a plate and eat right away. These pancakes are best fresh and warm.
Tips for Perfect Fluffy Japanese Pancakes Every Time
These pancakes can be a little tricky your first time. Here’s what to keep in mind:
Use a scale. Volume measurements vary person to person. Weight measurements don’t. This recipe really benefits from precision.
Start with smaller ring molds. 3cm height is much more forgiving than 5cm. Master the shorter version first, then go tall.
Never rush the heat. Cooking on low and slow is non-negotiable. Higher heat means burnt bottoms and raw centers.
Don’t over-mix the batter. Seriously. Lumpy is your friend here. Over-mixing develops gluten and deflates the air you worked hard to build.
Write down your timing. Every stove and pan is different. When you find the timing that works for your setup, write it down. It’ll save you next time.
Be patient with the flip. Wait until the top is truly no longer wet before flipping. If you flip too early, they’ll collapse.
It might take 2–3 tries. That’s completely normal and actually part of the fun. Each batch teaches you something new.
Topping Ideas to Make Them Extra Special
Once your pancakes are plated, this is where the magic really comes together.
Some of our favorite toppings:
- A pat of vegan butter melting over the top
- A dusting of powdered sugar
- Fresh strawberries and blueberries
- A generous drizzle of pure maple syrup
- Coconut whipped cream
- A scoop of vegan vanilla ice cream (yes, for breakfast – no judgment here)
- Sliced peaches or mango for a tropical twist
The combination of soft pancake, cold fruit, and warm syrup is honestly one of the most satisfying breakfast experiences you’ll have.
Version 2 – No Aquafaba? No Problem
If you don’t have aquafaba on hand, or you don’t own an electric mixer, there’s still a way to make these work.
Version 2 uses coconut yogurt instead. The pancakes won’t be quite as tall, but they’ll still be wonderfully soft and fluffy.
Here’s what changes:
- Replace aquafaba and cream of tartar with 1 tbsp coconut yogurt
- Use 2 tsp baking powder + ½ tsp baking soda instead of the larger amount of baking powder
- Skip the whipping step entirely – just fold the yogurt into the buttermilk mixture
The method and cook time remain the same.
A Faith Note: The Art of the Slow Morning
We live in a world that glorifies busy.
Breakfast gets skipped. Mornings feel like a race to the door. We eat standing over the sink or in the car.
But there’s something countercultural – and genuinely restorative – about choosing a slow morning.
About pulling out the mixing bowls. About letting the pancakes cook low and slow, watching them rise gently under the lid.
About sitting down at the table. Actually tasting your food. Breathing.
“Come to me, all you who are weary and burdened, and I will give you rest.” – Matthew 11:28
Rest isn’t just about sleep. It’s about pace.
A slow, intentional morning – even once a week – can do something quietly powerful for your soul. It reminds you that you’re worth the extra time. That nourishing your body is a form of gratitude.
So the next time you make these pancakes, let it be a little ritual. Put your phone away. Enjoy the process. Give yourself that gift.
Quick Checklist: Your Fluffy Vegan Japanese Pancakes Routine
- Gather all ingredients and equipment before you start
- Make your vegan buttermilk first and let it sit
- Sift and whisk dry ingredients together
- Fold wet into dry – lumpy batter is the goal
- Whip aquafaba to semi-stiff peaks
- Fold aquafaba into batter gently
- Heat pan to medium, then reduce to low before cooking
- Fill ring molds 70-80% full
- Cook covered, flip only when top is no longer wet
- Test with a toothpick before removing from heat
- Serve immediately with your favorite toppings
- Savor every single bite
Frequently Asked Questions
Can I make these ahead of time?
These pancakes are truly best eaten fresh off the pan. They deflate as they cool and lose their signature bounce. That said, the batter can be prepped up to the point before whipping the aquafaba and stored for about 30 minutes.
Can I use all-purpose flour instead of pastry flour?
Yes! Measure 1 cup of all-purpose flour, remove 1 tablespoon, and add 1 tablespoon of cornstarch in its place. This brings the protein level down closer to pastry flour.
Can I substitute arrowroot for potato starch?
Yes, arrowroot starch works. Do not use tapioca starch or cornstarch – they don’t produce the same tender texture.
My aquafaba won’t form peaks. What’s wrong?
A few things can prevent aquafaba from whipping: grease or moisture in your bowl, aquafaba that’s too warm, or just needing more time. Make sure your bowl and beaters are completely clean and dry, and that your aquafaba is at room temperature or slightly chilled.
Can I make these gluten-free?
A 1:1 gluten-free pastry flour blend may work, but results can vary. The texture may be slightly different and may require some experimentation.
Do I have to use ring molds?
For the signature tall shape, yes. Without ring molds, the batter will spread flat like regular pancakes. You can DIY ring molds from stiff cardboard as described above.
How do I know when to flip?
The batter should have visibly risen, the sides should look set and cooked, and the top should no longer appear wet or shiny. If you’re unsure, give it another minute or two.
Can I double the recipe?
Yes! Just double all the ingredients. Keep in mind you may need to cook in batches unless you have a very large pan and enough ring molds.
A Closing Thought
Nourishing your body doesn’t have to mean joyless, complicated food.
Sometimes it looks like cloud-soft Japanese pancakes on a quiet morning.
Sometimes it’s just giving yourself permission to enjoy breakfast without rushing.
These fluffy vegan Japanese pancakes are more than a recipe – they’re an invitation to show up for yourself.
We hope they bring a little peace, a little joy, and a whole lot of deliciousness to your table.
Enjoy every single bite. You deserve it.
Explore more nourishing recipes and faith-inspired self-care routines on our blog.
A Short Prayer for Your Morning
Lord, thank You for the gift of a new morning – and for the simple pleasures that make it beautiful. As I nourish my body today, may I do so with gratitude, with presence, and with joy. Remind me that taking care of myself is an act of stewardship, not selfishness. May this meal be a small moment of peace in whatever the day holds. Amen.
Fluffy Vegan Japanese Pancakes (Hottokēki)
Ingredients
Version 1 – With Aquafaba (Recommended)
- 3/4 cup (180ml) lite canned coconut milk
- 1 tbsp apple cider vinegar
- 1 tbsp vanilla extract
- 1/4 cup (60ml) aquafaba (liquid from a can of no-sodium chickpeas)
- 1/4 tsp cream of tartar
- 1 cup (120g) pastry flour
- 2 tbsp (20g) potato starch
- 3 tbsp (36g) organic cane sugar
- 1.5 tbsp (21g) baking powder
- 1/2 tsp nutritional yeast (optional)
- Small pinch of black salt / kala namak (optional)
Version 2 – Without Aquafaba
- 3/4 cup (180ml) lite canned coconut milk
- 1 tbsp apple cider vinegar
- 1 tbsp vanilla extract
- 1 tbsp (15g) coconut yogurt
- 1 cup (120g) pastry flour
- 2 tbsp (20g) potato starch
- 3 tbsp (36g) sugar
- 2 tsp baking powder
- 1/2 tsp baking soda
- 1/2 tsp nutritional yeast (optional)
- Small pinch of black salt (optional)
Instructions
- Make the vegan buttermilk. Combine coconut milk and apple cider vinegar in a bowl or measuring cup. Stir and set aside for 2–3 minutes until slightly curdled. (If making Version 2, stir in the coconut yogurt as well.)
- Mix the dry ingredients. Sift pastry flour, potato starch, baking powder, nutritional yeast, and black salt into a large mixing bowl. Add sugar and whisk to combine.
- Combine wet and dry. Make a well in the dry ingredients. Pour in the buttermilk mixture and vanilla. Using a spatula, fold together until just combined. Do not overmix – the batter should still be lumpy. Begin heating your pan over medium heat.
- Whip the aquafaba (Version 1 only). In a clean bowl, whip aquafaba with an electric hand mixer. Add cream of tartar and continue whipping until semi-stiff peaks form.
- Fold in the aquafaba. Gently fold the whipped aquafaba into the batter using a spatula in 2–3 additions. Keep folding motions slow and deliberate to preserve the air.
- Prepare the pan. Reduce heat to low. Spray the pan with oil or lay parchment paper on the surface. Place ring molds on the pan.
- Fill the molds. Spoon batter into ring molds, filling about 70–80% full. Cover the pan with a lid.
- Cook the first side.The pancakes are ready to flip when the batter has risen, the sides look set, and the top is no longer wet.3cm ring molds: cook 9–12 minutes5cm ring molds: cook 14–17 minutes
- Flip and cook the second side. Carefully flip using a wide spatula. Replace the lid and cook again:3cm ring molds: 5–8 minutes5cm ring molds: 10–15 minutes
- Test for doneness. Insert a toothpick into the center of a pancake. It should come out clean or with just a few cooked crumbs.
- Serve immediately. Remove ring molds (run a thin knife around the edge if needed). Transfer to plates and top with your favorites.